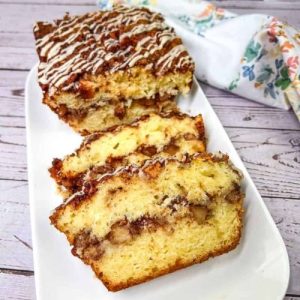
This Apple Fritter Bread is a cozy, bakery-style treat that captures the comforting flavors of warm cinnamon apples baked into a moist, tender loaf.
It’s fiber-rich and naturally balanced with healthy fats from butter, offering slow-releasing energy and a satisfying texture.
With less saturated fat than fried pastries and a simple, one-bowl batter method, it’s a fuss-free, family-friendly recipe perfect for weekday baking or brunch gatherings.
Apple Fritter Bread
Equipment
- 1 Loaf pan (9×5 inch)
- 2 Mixing bowls (medium and large)
- 1 hand mixer or stand mixer
- 1 whisk
- 1 spatula (or offset spatula)
- 1 small saucepan (optional for butter melting)
- 1 Wire Cooling Rack
- 1 measuring cup set and measuring spoons
Ingredients
For the Cinnamon Apples:
- 2 medium apples peeled and finely diced (about 2 heaping cups)
- 1 tablespoon dark brown sugar packed
- 1 ½ teaspoons ground cinnamon
- 1 teaspoon unsalted butter melted
For the Cinnamon Sugar Layer:
- ½ cup dark brown sugar lightly packed
- 2 teaspoons ground cinnamon
For the Batter:
- ½ cup 1 stick salted butter, softened
- ½ cup granulated sugar
- 2 large eggs
- 1 teaspoon vanilla extract
- 1 ½ cups all-purpose flour
- 2 ½ teaspoons baking powder
- ⅓ cup milk
- ⅓ cup sour cream
For the Glaze:
- ½ cup powdered sugar
- 1 tablespoon milk
- ¼ teaspoon vanilla extract
- Pinch of salt
Instructions
- Prepare the Baking Pan and Oven: Begin by preheating your oven to 350°F (175°C) so it reaches the perfect baking temperature by the time your batter is ready. Lightly grease a 9×5-inch loaf pan with nonstick spray or a thin layer of butter to prevent sticking, then line it with parchment paper if you prefer easy lifting later. Set the pan aside on a baking sheet or wire rack while you prepare the rest of the ingredients.
- Make the Cinnamon Apple Filling: In a medium-sized mixing bowl, combine the diced apples, 1 tablespoon dark brown sugar, and 1½ teaspoons of ground cinnamon. Drizzle 1 teaspoon of melted butter over the apples, stirring gently until every piece is coated with the sweet, spiced mixture. The goal is to let the cinnamon and sugar begin drawing out a bit of the apple’s natural juices, creating a syrupy coating that infuses rich flavor into the bread as it bakes. Set this mixture aside to allow the apples to absorb the spices while you make the batter.
- Prepare the Cinnamon Sugar Layer: In a small bowl, mix together ½ cup dark brown sugar and 2 teaspoons ground cinnamon. Stir until the cinnamon is evenly distributed through the sugar and the mixture looks uniform in color. This blend will be used to create a sweet, crunchy swirl in the bread and to sprinkle on top for a caramelized finish once baked. Keep it nearby for layering later.
- Cream the Butter and Sugar: In a large mixing bowl or the bowl of a stand mixer fitted with the paddle attachment, add the softened butter and granulated sugar. Beat the mixture on medium-high speed for about 2 to 3 minutes, or until it becomes pale, fluffy, and slightly creamy in texture. This process incorporates air, which helps the bread rise and stay tender. Be sure to scrape down the sides of the bowl once or twice to ensure all butter is evenly mixed.
- Add the Eggs and Vanilla: Reduce the mixer speed to medium, then add one egg at a time, beating well after each addition until fully incorporated. This step helps emulsify the mixture, giving your bread a smooth, stable batter. Once both eggs are in, pour in the vanilla extract and beat again for about 30 seconds, until the mixture looks glossy and well blended. Scrape the sides and bottom of the bowl as needed to make sure no unmixed butter remains.
- Mix the Dry Ingredients: In a separate large bowl, whisk together the all-purpose flour, baking powder, and a pinch of salt until combined. This ensures the baking powder is evenly distributed throughout the flour, preventing uneven rising later. Set this bowl aside for now—it will be added gradually to the wet ingredients in the next step.
- Combine Milk and Sour Cream: In a small bowl or liquid measuring cup, whisk together the milk and sour cream until smooth and fully blended. The sour cream adds moisture and a subtle tang that balances the sweetness of the bread while keeping the crumb soft and rich.
- Build the Batter: With the mixer on low speed, slowly add the dry ingredients to the creamed butter mixture in two batches, alternating with the milk-sour cream mixture. Begin and end with the dry ingredients. Mix gently until each addition is just incorporated before adding the next. Avoid overmixing—stir only until no visible streaks of flour remain. The batter should be thick but smooth, with a consistency that can easily spread without pouring.
- Assemble the Loaf Layers: Spoon half of the prepared batter into your greased loaf pan and spread it evenly with a spatula or offset spatula. Sprinkle half of the cinnamon sugar mixture evenly over this first layer, then scatter half of the apple mixture on top. Repeat the process with the remaining batter, spreading it carefully over the apples. Finish with the rest of the diced apples and a final dusting of the cinnamon sugar mixture on top. This layering technique ensures every bite has a perfect blend of moist cake, juicy apples, and sweet cinnamon crunch.
- Bake the Bread: Place the loaf pan on the center rack of your preheated oven and bake for 50 to 55 minutes, or until the top is golden brown and a knife or skewer inserted into the center comes out mostly clean with just a few moist crumbs attached. Avoid overbaking, as that can dry out the loaf. If the top starts to brown too quickly, lightly cover it with a piece of foil for the last 10 minutes of baking.
- Cool the Bread Properly: Once baked, remove the pan from the oven and place it on a wire rack to cool for about 10–15 minutes. Then carefully run a knife around the edges and gently lift or invert the bread from the pan. Let it cool completely on the rack before glazing—this step is crucial, as glazing while warm can cause the icing to melt and lose its decorative touch.
- Prepare the Sweet Glaze: In a small bowl, whisk together ½ cup powdered sugar, 1 tablespoon milk, ¼ teaspoon vanilla extract, and a pinch of salt until smooth and lump-free. Adjust the consistency by adding a few extra drops of milk if it’s too thick, or a bit more powdered sugar if too thin. The glaze should be slightly runny but thick enough to hold gentle ribbons when drizzled.
- Glaze and Serve: Once the bread is completely cooled, drizzle the glaze generously over the top using a spoon, fork, or piping bag for a zigzag pattern. Let it set for a few minutes until slightly firm to the touch. Slice into thick, even pieces and serve as a sweet breakfast, afternoon snack, or dessert. Each bite delivers a warm cinnamon swirl and tender apple bursts wrapped in a rich, cake-like texture.
Notes
- Any apple variety works beautifully — use sweet apples like Fuji, Honeycrisp, or Gala for a naturally sugary flavor, or Granny Smith for a tart contrast.
- Make sure to dice apples finely so they blend into the batter and bake evenly without sinking to the bottom.
- For smooth layering, an offset spatula helps spread the thick batter neatly.
- To prevent overbrowning, tent the loaf with foil during the last 10 minutes if the top darkens too fast.
- Always let the bread cool completely before glazing — this ensures the glaze sets perfectly and doesn’t melt into the loaf.
- For an extra decorative touch, use a piping bag or a small zip-top bag with the corner snipped to drizzle the glaze evenly.
Chef’s Secrets for Perfect Apple Bread
Creating the best Apple Fritter Bread comes down to a few smart techniques and a little patience.
Start with room-temperature butter and eggs, as they blend more smoothly and help the batter trap tiny air pockets for a soft, tender crumb.
When mixing, avoid overbeating once the flour is added—too much agitation can make the loaf dense instead of fluffy.
Using sour cream is key to keeping the bread incredibly moist while adding a subtle tang that balances the sweetness.
Another secret lies in how you layer the batter and apples.
By dividing the mixture in two layers with cinnamon sugar and apples between, you ensure every slice has pockets of juicy fruit and caramel-like flavor throughout.
Also, resist the urge to cut into the bread immediately after baking.
Allowing it to rest and cool fully lets the crumb set, making slicing easier and the flavor more developed.
Finally, take your time with the glaze—its consistency should be thick but pourable, so it coats beautifully without running off completely.
Serving Suggestions for Every Occasion
This Apple Fritter Bread shines at any time of day, whether warm from the oven or served at room temperature.
For breakfast, enjoy a thick slice with a pat of butter and a cup of coffee or chai latte for a cozy start.
It also makes an elegant afternoon treat when paired with a dollop of whipped cream or vanilla yogurt.
If you’re serving it as dessert, a drizzle of warm caramel sauce or a scoop of vanilla ice cream transforms it into a decadent finale.
For gatherings, slice the loaf into mini squares or cubes and present it on a platter as bite-sized treats for brunch or holiday tables.
You can even toast leftover slices lightly in the oven the next day to revive the flavor and add a delicate crispness.
Storage Tips for Long-Lasting Freshness
Apple Fritter Bread stores wonderfully when handled properly.
Once completely cooled, wrap the loaf tightly in plastic wrap or aluminum foil, then place it in an airtight container.
It can be kept at room temperature for up to 3 days, maintaining its moisture and softness.
For longer storage, refrigerate it for up to 5 days, allowing it to come to room temperature or warm briefly before serving.
To freeze, wrap the unglazed loaf securely in two layers of plastic wrap followed by a freezer-safe bag or foil.
It can be frozen for up to 2 months without losing quality.
Thaw it overnight in the refrigerator, then bring it to room temperature before adding the glaze.
You can also freeze individual slices for quick grab-and-go snacks—simply reheat them in a microwave or toaster oven for a fresh-from-the-oven taste.
Frequently Asked Questions
1. What are the best apples to use for this recipe?
The best apples are firm and slightly tart varieties such as Granny Smith, Honeycrisp, or Braeburn.
These hold their shape during baking and balance the sweetness of the batter. You can also mix two varieties for a more complex flavor.
2. Can I make this bread ahead of time?
Absolutely. This bread actually tastes even better the next day, once the flavors have had time to develop.
You can bake it one day in advance, store it at room temperature, and glaze it just before serving for a fresh, glossy look.
3. How do I know when the bread is fully baked?
Insert a knife or skewer into the center—if it comes out mostly clean with just a few moist crumbs, the bread is done.
Avoid waiting until it’s completely dry, as carryover heat will continue to bake it slightly after removal from the oven.
4. Can I make this recipe dairy-free?
Yes, you can substitute the butter with a plant-based margarine or coconut oil, the milk with almond or oat milk, and the sour cream with dairy-free yogurt.
These swaps maintain a moist texture and flavor while making it suitable for a dairy-free diet.
5. Why did my bread sink in the middle?
A sunken center usually means the bread was underbaked or the batter was overmixed. Make sure your oven is fully preheated before baking, and always test for doneness with a toothpick or skewer.
Also, avoid opening the oven door frequently during baking, as sudden temperature changes can cause collapse.