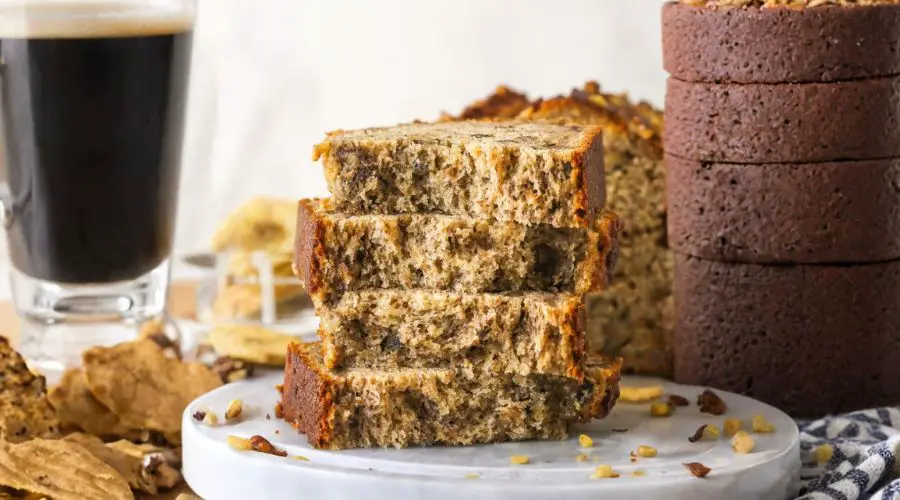
This Banana Nut Bread is a classic comfort baked good elevated with rich banana flavor and crunchy nuts.
What makes it stand out is its moist, tender crumb paired with a subtle hint of cinnamon, creating a perfect balance of sweetness and spice.
It’s naturally high in fiber from bananas and walnuts, and provides heart-healthy fats from the nuts and moderate amounts of protein from eggs, making it a more satisfying and nourishing treat than typical sweet breads.
The recipe is quick and straightforward, ideal for beginner bakers or for busy mornings when you want a wholesome, grab-and-go breakfast.
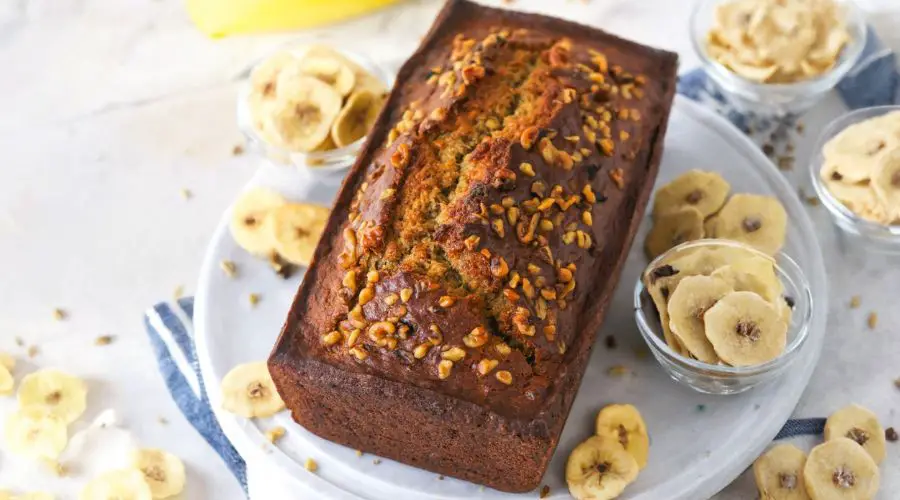
Its versatility also makes it a perfect candidate for meal prep, snack time, or even a thoughtful homemade gift, offering both flavor and nutrition in every slice.
Must-Have Tools for Perfect Results
9×5-Inch Loaf Pan
Essential for shaping and baking the bread evenly, ensuring a golden crust and soft interior. Great for cakes, quick breads, and meatloaf.
Mixing Bowls
Used to combine dry and wet ingredients separately before mixing together. A sturdy set is indispensable for baking, salads, and general cooking prep.
Whisk
Ideal for blending wet ingredients like eggs, banana, and butter for a smooth, uniform batter. Also perfect for sauces, dressings, and batters.
Measuring Cups & Spoons
Ensures precise ratios of flour, sugar, and spices, which guarantees consistent texture and flavor. Useful in all baking and cooking tasks.
Spatula
Helps fold in nuts gently and scrape the batter cleanly into the loaf pan, preventing waste. Also heat-resistant for stirring and folding in other recipes.

Flavorful Banana Nut Bread
Equipment
- 9×5-inch loaf pan
- 2 large mixing bowls
- 1 Whisk
- 1 Measuring Cups and Spoons
- 1 spatula
Ingredients
Dry Ingredients:
- 2 cups 260g all-purpose flour
- 1 teaspoon baking powder
- ½ teaspoon baking soda
- ¼ teaspoon salt
- ½ teaspoon ground cinnamon
- Wet Ingredients:
- ¼ cup 112g unsalted butter, melted
- ¼ cup vegetable oil
- ¾ cup 168g packed light brown sugar
- 2 large eggs
- 2 cups 450g mashed bananas (about 4 large ripe bananas)
- 1 teaspoon vanilla extract
Add-Ins:
- 1 cup 120g chopped walnuts or pecans
Instructions
- Preheat Oven and Prepare Pan: Begin by preheating your oven to 350°F (175°C) to ensure even baking. Lightly spray a 9×5-inch loaf pan with nonstick cooking spray or line it with parchment paper, making sure all sides are covered to prevent sticking. Proper preheating and preparation are essential for a loaf with a golden crust and soft, tender center.
- Mix Dry Ingredients: In a large mixing bowl, combine the all-purpose flour, baking powder, baking soda, salt, and ground cinnamon. Whisk the ingredients together thoroughly to ensure the leavening agents and spices are evenly distributed, which helps create a consistent texture and balanced flavor throughout the bread.
- Combine Wet Ingredients: In a separate bowl, whisk together the melted butter, vegetable oil, and light brown sugar until smooth. Add the eggs, mashed bananas, and vanilla extract, continuing to whisk until fully incorporated. This creates a creamy, cohesive batter that ensures moisture and richness in every slice.
- Incorporate Dry Ingredients: Gradually add the dry flour mixture into the wet banana mixture, gently folding with a spatula until just combined. Avoid over-mixing, as this can lead to a dense, tough texture; the batter should be thick but slightly lumpy.
- Fold in Nuts: Gently stir in the chopped walnuts or pecans, distributing them evenly throughout the batter. This step adds crunch and nutty flavor, giving the bread a pleasant texture contrast without deflating the batter.
- Transfer Batter to Pan: Pour the batter into the prepared loaf pan, using a spatula to smooth the top evenly. Ensure the batter reaches all corners of the pan for uniform baking and an even rise.
- Bake the Bread: Place the pan in the preheated oven and bake for 60–65 minutes, or until a toothpick inserted into the center comes out clean. Check the bread at the 55-minute mark to prevent over-baking, which could dry out the loaf.
- Cool the Loaf: Remove the bread from the oven and allow it to cool in the pan for 20–30 minutes. Then, carefully transfer the loaf to a cooling rack to finish cooling completely, which helps it set and makes slicing easier without crumbling.
- Slice and Serve: Once cooled slightly, slice the bread into 8–10 even pieces. Serve warm or at room temperature, optionally with butter, nut butter, or a drizzle of honey for extra indulgence. Store leftovers in an airtight container at room temperature for 3–5 days, or refrigerate for up to a week.
Notes
- Use very ripe bananas for maximum sweetness and moist texture; the browner the bananas, the better the flavor.
- Avoid over-mixing the batter after adding flour to ensure a tender, fluffy crumb rather than a dense loaf.
- Nuts can be toasted lightly beforehand to enhance their flavor and crunch.
- A 9×5-inch loaf pan works best for even baking; using a smaller or larger pan may alter cooking time.
- Let the bread cool in the pan briefly before transferring to a rack; this helps prevent sticking and crumbling.
- Slice and serve at room temperature for optimal flavor; optional toppings include butter, nut butter, or a light drizzle of honey.
Chef’s Secrets for Moist Bread
Achieving perfectly moist banana bread depends on both ingredient selection and mixing technique.
Always use overripe bananas—they provide natural sweetness and moisture while reducing the need for excessive sugar.
Gently fold dry ingredients into wet ones to prevent overworking the batter, which can make the bread tough.
Toasting the walnuts before adding them enhances their nutty aroma and adds a subtle crunch that complements the soft loaf.
Finally, allowing the bread to cool slightly in the pan ensures it maintains structure while still being soft and tender.
These small but important steps elevate a simple banana bread into a bakery-quality treat.
Serving Suggestions for Delicious Results
Banana nut bread is a versatile snack or breakfast option.
Serve slices warm with a pat of butter or a smear of nut butter for a cozy morning treat.
It pairs beautifully with coffee, tea, or a glass of milk.
For added indulgence, top with sliced bananas, a drizzle of honey, or a sprinkling of cinnamon sugar.
Leftover slices can be toasted lightly for breakfast or crumbled over yogurt or oatmeal to add texture and flavor.
Storage Tips to Maintain Freshness
Store your banana nut bread in an airtight container at room temperature for 3–5 days to preserve moisture.
For longer storage, refrigerate the bread for up to a week.
To freeze, wrap the cooled loaf tightly in plastic wrap or aluminum foil and place it in a freezer-safe container for up to 2 months.
Thaw overnight at room temperature or reheat slices in a 350°F oven for 5–10 minutes.
Keeping the bread slightly underbaked ensures it remains soft and moist when reheated.
Frequently Asked Questions About Recipe
1. Can I make this bread gluten-free?
Yes! Substitute the all-purpose flour with a gluten-free flour blend in a 1:1 ratio. Ensure your blend contains xanthan gum for structure, or add 1/2 teaspoon for stability.
2. Can I use a different type of nut?
Absolutely! Walnuts, pecans, or even almonds work well. Toasting them beforehand will enhance their flavor and add crunch.
3. Can I make this recipe vegan?
Yes, replace the eggs with flax eggs (2 tablespoons flaxseed meal + 6 tablespoons water) and use plant-based butter or oil. The texture will remain moist and delicious.
4. Can I add chocolate or other mix-ins?
Definitely! Chocolate chips, shredded coconut, or dried fruits like cranberries and raisins can be folded in with the nuts for extra flavor.
5. How do I prevent the bread from drying out?
Do not over-bake; check the bread at 60 minutes with a toothpick. Using very ripe bananas and proper pan size helps maintain moisture. Wrapping and storing properly also keeps it soft.
This recipe is inspired by lifeloveandsugar and has been carefully refined to enhance clarity, streamline preparation steps, and ensure accurate results. We’ve also included health benefits, nutritional highlights, and Must-Have Tools to help you get the best results every time you cook.