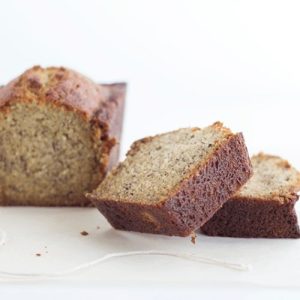
This Banana Rum Bread is a moist, flavorful twist on classic banana bread, enriched with the warmth of dark rum.
Packed with natural fiber from ripe bananas and a touch of healthy fats from butter, it’s a satisfying treat that’s quick to prepare.
Perfect for breakfast, snack, or dessert, it’s simple, comforting, and ideal for everyday baking.
Banana Rum Bread
Equipment
- 2 mini loaf pans (5.75 x 3.25 x 2.25 inches) or 1 8-inch loaf pan
- Parchment paper (enough to line pans)
- Nonstick cooking spray
- Large Mixing Bowl
- Fork or potato masher
- Microwave-safe bowl
- Electric mixer or whisk
- Cooling rack
- Toothpick (for doneness check)
Ingredients
- ¾ cup salted butter melted
- 1 cup mashed ripe bananas about 2 medium bananas
- ¾ cup granulated sugar
- ¼ cup packed brown sugar
- 2 large eggs
- 1 tablespoon dark rum
- 1 teaspoon vanilla extract
- 1 ½ cups all-purpose flour
- 1 teaspoon baking soda
Instructions
- Preheat and Prepare the Pans: Start by preheating your oven to 350°F (175°C). While the oven warms, prepare your baking pans. If using two mini loaf pans (5.75 x 3.25 x 2.25 inches) or a single 8-inch loaf pan, spray them generously with nonstick cooking spray. For extra assurance against sticking, line the bottom of each pan with parchment paper and spray the parchment lightly as well. This ensures the loaves will release perfectly after baking.
- Melt the Butter: Place ¾ cup of salted butter in a microwave-safe bowl. Heat it in the microwave in 20–30 second intervals until fully melted. Be careful not to overheat; the butter should be just melted, not browned. Set it aside to slightly cool while you prepare the bananas. The melted butter will add richness and moisture to the loaf.
- Mash the Bananas: Peel 2 medium ripe bananas and place them in a large mixing bowl. Using a fork or a potato masher, mash the bananas thoroughly until they are mostly smooth with only small lumps remaining. Well-mashed bananas release natural sweetness and moisture, which keeps the bread soft and tender.
- Combine Wet Ingredients: Add the melted butter to the mashed bananas. Next, add ¾ cup granulated sugar, ¼ cup packed brown sugar, 2 large eggs, 1 tablespoon dark rum, and 1 teaspoon vanilla extract. Using an electric mixer on medium speed (or a whisk if mixing by hand), blend everything together until fully combined. The batter should be smooth, glossy, and slightly thick. This step ensures that all the flavors—sweetness, rum, and vanilla—are evenly distributed throughout the loaf.
- Incorporate the Dry Ingredients: In a separate small bowl, combine 1 ½ cups all-purpose flour and 1 teaspoon baking soda. Gradually add the dry ingredients to the wet banana mixture. Start mixing on low speed to prevent flour from puffing into the air, then increase to medium once most of the flour is incorporated. The batter should be thick, cohesive, and slightly elastic. Avoid overmixing, as this can make the bread dense instead of soft and tender.
- Transfer Batter to Pans: Divide the batter evenly between the two mini loaf pans, or pour all of it into a single 8-inch loaf pan if using one. Use a spatula to smooth the top of the batter and ensure it is evenly distributed. This helps the bread bake evenly and form a uniform crust.
- Bake the Bread: Place the pans in the preheated oven. Mini loaves will bake for approximately 40–45 minutes, while a full 8-inch loaf may take 60–70 minutes. To test for doneness, insert a toothpick into the center of the loaf. If it comes out clean or with just a few moist crumbs, the bread is ready. If batter sticks to the toothpick, continue baking for a few more minutes and check again. This careful testing ensures perfectly baked, moist bread without overbaking.
- Cool in Pans: Once baked, remove the pans from the oven and let the bread cool in the pans for 10 minutes. This short cooling period allows the bread to firm up slightly, making it easier to remove from the pans without breaking.
- Remove and Transfer to Rack: Carefully run a butter knife along the edges of the loaf to loosen it. Gently turn the bread out onto a cooling rack. Peel away the parchment paper if used. Cooling the bread completely on a wire rack prevents condensation from forming on the bottom, which could make the loaf soggy.
- Serve or Store: Slice the Banana Rum Bread once cooled, and serve plain or with a light spread of butter or cream cheese. If not serving immediately, wrap the loaf tightly in plastic wrap or store in an airtight container. The bread can also be frozen for up to three months, making it convenient for meal prep or future snacking.
Notes
- Use ripe bananas for maximum natural sweetness and moisture—overripe bananas with brown spots work best.
- Always measure flour properly: spoon it into a measuring cup and level off with a knife to prevent dense bread.
- For a more pronounced rum flavor, increase the dark rum slightly, but avoid adding too much or it may affect the texture.
- If using mini loaf pans, baking time is shorter—check around 35–40 minutes to prevent overbaking.
- Allow the bread to cool completely before slicing to ensure clean slices and prevent crumbling.
Chef’s Secrets for Perfect Loaf
To achieve a perfectly moist Banana Rum Bread, blend the wet ingredients thoroughly before adding the flour.
This helps create a smooth, uniform batter that bakes evenly.
For extra flavor depth, lightly toast the bananas in the melted butter before mixing—it enhances the natural sweetness and adds a subtle caramelized note.
When baking, avoid opening the oven frequently, as temperature fluctuations can cause the loaf to sink.
Finally, using a toothpick test instead of relying solely on baking time ensures precise doneness every time.
Serving Suggestions for Maximum Enjoyment
This Banana Rum Bread is versatile and can be served in multiple ways.
Enjoy a warm slice with a pat of butter for breakfast, or pair it with cream cheese or mascarpone for an indulgent snack.
It also pairs beautifully with a cup of coffee, tea, or warm milk, enhancing the subtle sweetness and rum flavor.
For a dessert twist, drizzle lightly with honey or a rum glaze, or top with chopped nuts or chocolate chips for added texture and richness.
Storage Tips for Freshness
To keep your Banana Rum Bread soft and moist, store at room temperature in an airtight container or tightly wrapped in plastic wrap for up to 3 days.
For longer storage, freeze the loaf wrap tightly in plastic wrap and then in aluminum foil to prevent freezer burn, and it can last up to 3 months.
Thaw overnight in the refrigerator or at room temperature before slicing.
Avoid storing in the refrigerator without wrapping, as this can dry out the bread.
Frequently Asked Questions
1. Can I use overripe bananas?
Yes! Overripe bananas are ideal because they are sweeter and softer, which helps the bread stay moist. Slightly brown spots are perfect, but avoid bananas that are overly mushy or fermented.
2. Can I substitute the rum?
Absolutely. If you prefer a non-alcoholic version, replace the dark rum with an equal amount of apple juice, orange juice, or milk. The flavor will be slightly different but still delicious.
3. Why is my bread dense or dry?
Common causes include overmixing the flour, not using ripe bananas, or baking at too high a temperature. Measure flour accurately and mix just until combined to prevent a dense texture.
4. Can I add nuts or chocolate chips?
Yes! Fold in ½ to ¾ cup of chopped walnuts, pecans, or chocolate chips after mixing the batter. This adds texture and flavor, but be careful not to overmix after adding them.
5. How do I know when the loaf is done?
Use the toothpick test: insert a toothpick into the center of the loaf. It should come out clean or with a few moist crumbs. Avoid testing too early, as it may give a false indication of doneness.