Carrot ice cream is a delightful twist on classic frozen desserts, blending natural sweetness with creamy richness.
Roasting the carrots enhances their flavor and creates a beautiful orange hue without artificial coloring.
Packed with fiber, vitamins, and antioxidants, this recipe balances indulgence with nourishment.
With a touch of honey and aromatic cardamom, it’s both refreshing and satisfying—perfect for everyday enjoyment, whether as a wholesome treat or a make-ahead dessert.
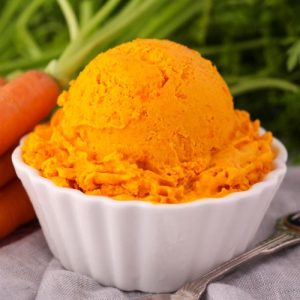
Carrot Ice Cream
Equipment
- 1 stick/immersion blender
- 1 ice cream churner
- 1 large baking tray
- 1 small saucepan
- 1 mixing bowl (small)
- 1 large heatproof jug
- 1 freezer-safe storage container
Ingredients
- 800 g 1.8 lbs fresh carrots (about 7 medium)
- 1 drizzle olive oil for roasting
- 2 teaspoons tapioca starch
- 500 g 2 cups heavy/thickened cream
- 110 g ½ cup granulated sugar
- 1 tablespoon honey
- ½ teaspoon ground cardamom
Instructions
- Prepare and Preheat: Begin by setting your oven to 320°F (160°C, fan-forced) so it has time to heat evenly. This moderate temperature ensures the carrots roast slowly, developing sweetness without burning. While the oven preheats, wash and peel your carrots, then pat them dry with a clean towel to remove any excess moisture.
- Cut and Arrange Carrots: Slice the carrots lengthwise into halves, then again into quarters, creating long, thick batons. This shape helps the carrots roast evenly while allowing the edges to caramelize slightly. Place them on a large baking tray, leaving a little space between each piece so hot air can circulate and roast them evenly. Drizzle lightly with olive oil, tossing to coat, but avoid over-oiling, as too much can make them greasy instead of sweet.
- Roast to Sweet Perfection: Transfer the tray of carrots into the preheated oven and roast for 1 hour and 10 minutes, turning the pieces halfway through to ensure even cooking. The carrots are ready when they feel tender when pierced with a sharp knife and show a light golden color along the edges. Once done, remove the tray and let the carrots cool slightly—this prevents steam from interfering with the blending process later.
- Make the Cream Base: In a small bowl, whisk together 2 tablespoons of cream with the tapioca starch until smooth, creating a slurry. This prevents lumps from forming when added to the heated cream. In a small saucepan, combine the remaining cream, sugar, and honey. Warm the mixture gently over medium heat, stirring until the sugar and honey dissolve completely. Once smooth, stir in the slurry and continue mixing until the base slightly thickens. Remove from heat and let it cool to room temperature.
- Blend the Carrot Purée: Place the roasted carrots into a large heatproof jug or blender-safe container. Using a stick or immersion blender, begin pureeing the carrots until smooth. You should end up with about 1 ⅓ cups of carrot purée. To achieve a silkier texture, add ½ cup of the cooled cream mixture and blend again until completely smooth and lump-free. This step ensures the carrot flavor integrates seamlessly with the creamy base.
- Combine Purée with Cream Base: Pour the rest of the cream mixture into the carrot purée and continue blending until well incorporated. Sprinkle in the ground cardamom and blend again, making sure the spice is evenly distributed throughout the mixture. Taste the base—if you’d like a slightly sweeter result, you can add a touch more honey at this stage. Cover the container and refrigerate for at least 4 hours, or ideally overnight. This chilling step is crucial for developing flavor and ensuring the mixture churns into smooth, scoopable ice cream.
- Prepare Churner and Container: Before you begin churning, place your freezer-safe storage container in the freezer to chill—this helps prevent the ice cream from melting too quickly when transferred. If you’re using a self-refrigerating ice cream machine, turn it on about 10 minutes before use so it’s properly cold. If you’re using a freezer-bowl churner, remove the bowl from the freezer only when you’re ready to churn to keep it at its coldest.
- Churn the Ice Cream: Pour the chilled carrot mixture into your ice cream churner and let it process according to the manufacturer’s instructions. This typically takes 20–30 minutes, depending on your machine. The ice cream should reach a soft-serve consistency, smooth and airy, with no icy crystals. Churning incorporates air while freezing, giving the final dessert its light and creamy texture.
- Freeze Until Firm: Once churning is complete, transfer the soft ice cream into the chilled storage container. Use a spatula to spread it evenly and press gently to remove air pockets. Cover with a lid or plastic wrap, making sure it touches the surface to prevent freezer burn. Place in the freezer for at least 4 hours, or until the ice cream is firm enough to scoop.
- Scoop and Serve: When ready to serve, remove the container from the freezer and let it sit at room temperature for 3–5 minutes to soften slightly. Scoop into bowls or cones and enjoy the creamy, naturally sweet flavor of roasted carrot ice cream. Garnish with a light dusting of extra cardamom, a drizzle of honey, or even some crushed pistachios for added texture.
Notes
- Roasting carrots slowly enhances natural sweetness and gives the ice cream its deep flavor and vibrant color.
- Tapioca starch helps stabilize the ice cream, creating a creamier texture without ice crystals.
- A touch of cardamom balances the sweetness with warmth and subtle spice.
- Honey not only sweetens but also adds a smooth, glossy finish to the ice cream.
- Chilling the mixture before churning is key to achieving a velvety, scoopable consistency.
Chef’s Secrets for Best Results
The key to outstanding carrot ice cream lies in roasting.
Cooking the carrots at a gentle heat for a long time intensifies their natural sugars while preventing bitterness.
To achieve the smoothest base, blend the carrots thoroughly with a portion of the cream mixture before adding the rest—this ensures a silky texture without fibrous bits.
Another pro tip is patience allowing the custard base to chill overnight helps the flavors meld and results in a better churn.
Finally, always freeze your storage container beforehand—this small step keeps the ice cream from melting too quickly when transferred.
Serving Suggestions That Elevate Flavor
Carrot ice cream shines on its own, but it pairs beautifully with complementary toppings and desserts.
A drizzle of honey, a sprinkle of toasted nuts such as pistachios or almonds, or even a dusting of extra cardamom can elevate its flavor.
For a fun twist, serve it alongside a slice of spiced carrot cake or warm ginger cookies—the contrast of hot and cold is delightful.
If you want something lighter, pair it with fresh fruit such as orange segments or berries, which add brightness and balance the creamy sweetness.
Storage Tips for Lasting Freshness
Homemade ice cream is best enjoyed within two weeks for peak flavor and texture.
Store it in a freezer-safe container with an airtight lid, pressing plastic wrap or parchment directly onto the surface before sealing to prevent ice crystals from forming.
Always keep it at the coldest part of your freezer rather than the door, where temperature fluctuations are more common.
When serving, allow the ice cream to soften at room temperature for a few minutes—forcing a hard scoop can lead to icy texture and broken scoops.
Frequently Asked Questions
1. Can I make this without an ice cream maker?
Yes! Simply freeze the mixture in a shallow dish, stirring vigorously with a fork every 30–45 minutes until smooth and creamy. While the texture won’t be quite as airy, it will still taste delicious.
2. What can I use instead of tapioca starch?
Cornstarch works well as a substitute, though tapioca gives a slightly silkier texture. If you use cornstarch, mix it into a slurry just as you would with tapioca.
3. Can I make this recipe dairy-free?
Absolutely. Replace the cream with full-fat coconut milk or a rich dairy-free cream alternative. Keep in mind that coconut milk will add a subtle coconut flavor, which actually pairs nicely with carrot and cardamom.
4. How can I adjust the sweetness?
If you prefer a less sweet dessert, reduce the sugar slightly and keep the honey for its smooth finish. For more sweetness, add an extra teaspoon of honey or a splash of maple syrup.
5. Why is my ice cream icy instead of creamy?
This usually happens if the base wasn’t chilled long enough or if the mixture wasn’t churned properly.
To fix this next time, ensure the custard base is very cold before churning, and don’t skip the stabilizer (tapioca starch), which helps prevent icy crystals.