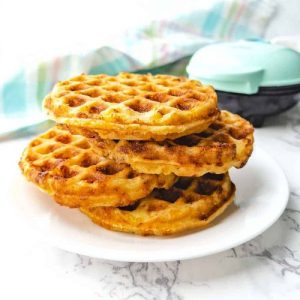
These Cheesy Mini Cornbread Waffles are bite-sized comfort food with a wholesome twist.
Made with cornmeal, buttermilk, and sharp cheddar, they deliver a satisfying crunch on the outside and a soft, cheesy center.
Packed with protein from eggs and cheese, plus fiber from cornmeal, they make a nourishing yet indulgent treat.
Quick to prepare and freezer-friendly, they’re a fantastic option for everyday meals, snacks, or meal prep.
Cheesy Mini Cornbread Waffles
Equipment
- 1 Mini Waffle Maker (such as Dash)
- 1 mixing bowl (medium)
- 1 whisk
- 1 Measuring cup set
- 1 Measuring Spoon Set
- 1 Kitchen spray bottle (vegetable oil spray)
Ingredients
- ¾ cup 3.75 oz / 90 g all-purpose flour
- ½ cup 2.75 oz / 78 g yellow cornmeal
- 1 teaspoon granulated sugar
- 1 teaspoon baking powder
- ½ teaspoon baking soda
- ½ teaspoon kosher salt
- 1 cup 8 oz / 240 ml buttermilk (see note for substitute)
- 1 large egg
- 3 tablespoons 1.5 oz / 43 g unsalted butter, melted
- 1 cup 4 oz / 113 g sharp cheddar cheese, shredded
- Vegetable oil spray for waffle maker
Instructions
- Mix the Dry Ingredients: In a medium-sized mixing bowl, combine the flour, cornmeal, sugar, baking powder, baking soda, and salt. Whisk these ingredients together until the mixture looks uniform and lump-free. This step ensures that the leavening agents and seasoning are evenly distributed, which helps the waffles rise properly and taste consistent in every bite.
- Prepare the Wet Ingredients: In a separate small bowl or large measuring cup, whisk together the buttermilk and the egg until smooth and fully combined. The buttermilk provides a gentle tang and moisture, while the egg binds the batter and contributes to the waffle’s fluffy interior.
- Combine Dry and Wet Mixtures: Pour the buttermilk-egg mixture into the bowl of dry ingredients. Using a spatula or wooden spoon, stir gently until everything just comes together. It’s important not to overmix here — a few small lumps are completely fine. Over-stirring can make the waffles tough instead of light and tender.
- Add Butter and Cheese: Drizzle the melted butter into the batter, followed by the shredded cheddar cheese. Fold both into the mixture with a gentle hand, again being careful not to overmix. The butter adds richness, while the cheese brings a sharp, savory flavor and gooey texture that makes these mini waffles so irresistible.
- Preheat and Prepare the Waffle Maker: Plug in your mini waffle maker and allow it to preheat fully, usually a few minutes until the indicator light shows it’s ready. Once hot, lightly coat both the top and bottom plates with vegetable oil spray. This prevents sticking and ensures the waffles release easily with golden, crispy edges.
- Portion and Spread the Batter: Scoop out about ¼ cup of the cornbread batter and carefully spoon it onto the center of the waffle maker. Use the back of the spoon to gently spread the batter so it covers the cooking surface evenly. Spreading the batter ensures a consistent thickness and helps avoid undercooked spots.
- Cook Until Golden and Crisp: Close the waffle maker lid and cook the batter for about 4 minutes, or until the waffle turns golden brown with a lightly crisped exterior. Cooking times can vary slightly depending on your waffle maker, so check for a uniform golden color and a firm texture before removing.
- Remove and Repeat: Using tongs or a fork, carefully lift the waffle out of the machine and transfer it to a plate or a wire rack to keep its texture crisp. Repeat the process with the remaining batter, making sure to re-spray the waffle maker plates lightly between batches if needed.
- Keep Warm (Optional): If serving immediately, you can enjoy the waffles as they come out of the waffle maker. To keep them warm for later, place the finished waffles on a baking sheet in a 200°F (93°C) oven while the rest cook. This keeps them hot without drying them out.
- Serve and Enjoy: Once all the waffles are ready, serve them warm. They’re delicious on their own, but you can also pair them with butter, honey, or maple syrup for a touch of sweetness, or serve them alongside chili topped with sour cream and extra cheese for a hearty, savory option.
Notes
- No buttermilk on hand? Make your own by adding 1 tablespoon of vinegar or lemon juice to a measuring cup, then filling with milk to equal 1 cup. Let sit for 5 minutes before using.
- Sharp cheddar gives the boldest cheesy flavor, but you can swap with Monterey Jack, pepper jack, or gouda for variety.
- For extra flavor and texture, stir in mix-ins like crumbled bacon, diced jalapeños, green onions, or fresh herbs.
- Waffles may develop uneven or ragged edges while cooking — simply trim with kitchen scissors for a neat finish.
- Keep waffles warm in a 200°F (93°C) oven while cooking the rest of the batch to serve everything hot at once.
- Make-ahead friendly: store cooled waffles in an airtight container for up to 3 days in the fridge or 1 month in the freezer.
- Reheat in a 350°F (175°C) oven for 5–6 minutes, or use a toaster oven to restore crispiness.
- These waffles pair well with sweet toppings like honey or syrup, or savory options like chili, sour cream, and salsa.
Chef’s Secrets for Perfect Results
The key to light, fluffy waffles is not overmixing the batter.
Stir just until the dry ingredients are moistened; a few lumps are absolutely fine and will bake out during cooking.
Preheating the waffle maker completely is another small but essential step — this ensures even cooking, golden edges, and prevents sticking.
For maximum flavor, use sharp cheddar cheese, which creates a bold cheesy bite, but feel free to experiment with Monterey Jack or pepper jack if you prefer a different flavor profile.
Finally, don’t skip the vegetable spray between batches, especially if your waffle maker isn’t nonstick, as it guarantees easy release and crisp edges every time.
Serving Suggestions to Try
These mini waffles are delicious on their own but shine even brighter when paired with other dishes.
For a comforting savory option, serve them alongside a steaming bowl of chili topped with sour cream, onions, and extra cheese.
If you prefer a sweeter presentation, drizzle them with honey or warm maple syrup, and add a pat of butter for a classic touch.
They also work beautifully as a brunch bite — arrange them on a platter with fried chicken strips for a fun take on chicken and waffles.
For entertaining, consider cutting them into wedges and serving with dips like queso, salsa, or guacamole for a playful appetizer.
Storage Tips and Make-Ahead Advice
These waffles are just as practical as they are tasty.
If you’d like to make them ahead, simply cool them completely, then store in an airtight container in the refrigerator for up to three days.
For longer storage, freeze them in a single layer on a baking sheet until solid, then transfer to a freezer-safe bag or container for up to one month.
When ready to serve, reheat in a 350°F (175°C) oven for 5–6 minutes, or pop them into a toaster oven until warmed through and crisp again.
This way, you can always have cheesy cornbread waffles ready to enjoy at a moment’s notice.
Frequently Asked Questions
1. Can I make these without buttermilk?
Yes! If you don’t have buttermilk, you can make a quick substitute by adding 1 tablespoon of lemon juice or white vinegar to a measuring cup, then filling with whole milk until it reaches 1 cup.
Let it sit for 5 minutes before using.
2. What other cheeses can I use?
Sharp cheddar is classic, but Monterey Jack, pepper jack, or even gouda work beautifully. Each cheese will bring its own flavor and melt differently, so feel free to experiment based on your preference.
3. Can I make these waffles gluten-free?
Absolutely. Swap the all-purpose flour for a gluten-free all-purpose blend designed for baking. Just be sure it includes a binding agent like xanthan gum for best results.
4. How do I keep the edges neat?
Sometimes the batter may spill slightly and create uneven edges. Once cooled, simply trim the edges with kitchen shears for a clean presentation — though many people love the rustic look!
5. What are good mix-ins for variety?
You can customize these waffles by folding in crumbled bacon, diced jalapeños, chopped green onions, or even fresh herbs.
These add-ins give extra flavor and make the waffles more unique, perfect for serving at gatherings.