Chia Seed Pudding is a simple, nourishing recipe that transforms just a few pantry staples into a creamy, fiber-rich delight.
Packed with plant-based protein, healthy omega-3 fats, and naturally low in saturated fat, this pudding is both satisfying and wholesome.
It’s a quick, make-ahead option that works beautifully for breakfast, a midday snack, or even a guilt-free dessert—perfect for busy days and meal prep.
10-Minute Healthy Chia Seed Pudding
Equipment
- 1 large mixing bowl or measuring cup
- 1 whisk
- 1 large jar or airtight container (about 4 cups capacity)
- 4 small jars or bowls for serving
Ingredients
- ½ cup chia seeds black or white
- 2 cups milk of choice almond, oat, dairy, soy, or light coconut
- 2 tablespoons maple syrup honey, or preferred sweetener (adjust to taste)
Instructions
- Prepare the Base Mixture: Begin by choosing a large mixing bowl, a deep measuring cup, or even a wide-mouth mason jar to make stirring easier. Pour in your milk of choice—almond milk for a nutty flavor, oat milk for creaminess, light coconut milk for a tropical note, or dairy milk for a classic version. Next, drizzle in your sweetener of choice, whether that’s maple syrup, honey, or another liquid sweetener you enjoy. Using a whisk or spoon, stir thoroughly to make sure the sweetener is fully dissolved and evenly distributed throughout the milk. This ensures the pudding will have balanced sweetness in every spoonful.
- Incorporate the Chia Seeds: Slowly sprinkle the chia seeds into the sweetened milk mixture while whisking continuously. Adding the seeds gradually helps prevent clumps from forming. Once all the seeds are in, whisk for about 30–60 seconds until you see them floating evenly throughout the liquid. This step is crucial because chia seeds tend to sink or stick together if left untouched, so whisking thoroughly guarantees a smoother, creamier texture later.
- Rest and Re-Whisk to Prevent Clumps: Allow the mixture to sit at room temperature for about 10–15 minutes. During this time, the chia seeds will start absorbing the liquid and forming a light gel-like coating. After the resting period, whisk the mixture again vigorously. This second whisk breaks up any small clumps that may have formed and ensures that the seeds remain evenly suspended instead of sinking to the bottom. Think of this as the step that guarantees your pudding will be silky rather than lumpy.
- Refrigerate for Overnight Setting: Once the mixture looks even and the seeds are floating freely, transfer it into an airtight jar or cover the bowl tightly with a lid or plastic wrap. Place it in the refrigerator for at least 4 hours, though overnight chilling is highly recommended. The cold environment allows the chia seeds to fully expand and absorb the liquid, creating a thick, pudding-like consistency. If you prefer a looser texture, you can stir in an extra splash of milk before serving to thin it out.
- Check Consistency and Adjust: After the chilling period, remove the pudding from the fridge and give it a gentle stir. The mixture should be thick, creamy, and spoonable—similar to tapioca pudding. If it feels too thick for your liking, add an additional 2–3 tablespoons of milk, stirring until you reach your preferred consistency. If you like a firmer texture, simply keep it as it is. This flexibility makes it easy to customize to your personal preference.
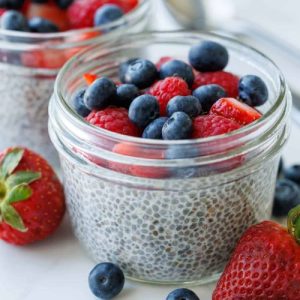
- Portion and Serve with Toppings: Divide the pudding into small jars, cups, or bowls—about ¾ cup per serving. This makes it convenient for meal prep or grab-and-go breakfasts. Now comes the fun part toppings! Fresh fruit like berries, mango cubes, or banana slices add natural sweetness and freshness. For crunch, sprinkle on granola, chopped nuts, or seeds. If you want indulgence, add a swirl of peanut butter, a spoonful of jam, or even a dusting of cocoa powder or cinnamon. The toppings not only enhance flavor but also add variety, making each serving unique.
- Store for Later Enjoyment: If you’re not eating it right away, cover the jars or bowls tightly and return them to the refrigerator. Chia pudding keeps well for up to 5 days, making it ideal for weekly meal prep. For longer storage, you can freeze it in individual portions for up to 1 month—just thaw overnight in the fridge before enjoying. Remember, toppings like fresh fruit or granola should be added just before serving to maintain their freshness and texture.
Notes
- Only three main ingredients needed: chia seeds, milk of choice, and a sweetener.
- Resting and re-whisking is essential to prevent clumps.
- Best texture is achieved after chilling overnight.
- Sweetness and consistency can be easily adjusted.
- Perfect for meal prep—stores up to 5 days in the fridge.
- Highly customizable with mix-ins like cocoa, matcha, or fruit.
- Naturally gluten-free, dairy-free (when using plant milk), and rich in protein and fiber.
Chef’s Secrets for Best Results
The secret to perfect chia pudding lies in whisking thoroughly and at the right times.
Adding the chia seeds gradually while whisking ensures they don’t clump together.
After the first 10–15 minutes, whisking again is crucial—it evenly distributes the seeds before they start to gel.
Using a wide-mouth jar or bowl also makes stirring easier.
For a creamier pudding, swap part of the milk with yogurt or coconut milk.
If you want extra flavor without added sugar, try mixing in vanilla extract, cinnamon, or unsweetened cocoa powder before chilling.
These little touches make the pudding taste indulgent while keeping it wholesome.
Serving Suggestions and Pairing Ideas
Chia pudding is incredibly versatile, which makes serving it fun and creative.
For breakfast, pair it with fresh berries, sliced bananas, or diced mango for natural sweetness.
A sprinkle of granola, nuts, or seeds adds crunch and makes it more filling.
For a dessert-style twist, drizzle on chocolate sauce, swirl in peanut butter, or top with coconut flakes.
Chia pudding also works beautifully in parfaits—layer it with fruit and yogurt for a café-style treat.
If you’re serving it as a light snack, keep it simple with a dusting of cinnamon or a few spoonfuls of fruit compote.
Storage Tips and Best Practices
Chia pudding is an excellent recipe for meal prep because it stays fresh for several days.
Store it in airtight containers or small jars in the refrigerator for up to 5 days.
If you plan to freeze it, portion it into single-serving containers and freeze for up to 1 month.
Thaw overnight in the fridge before serving.
To keep the texture smooth, stir well before enjoying, as some liquid separation may occur.
Always add fresh toppings like fruit or granola just before eating to maintain their freshness and crunch.
Frequently Asked Questions
1. Can I use any type of milk?
Yes! Chia pudding works with dairy and plant-based milks. Almond, oat, soy, or light coconut milk all create great results.
For a creamier pudding, use whole milk or canned coconut milk. For a lighter option, stick with almond or oat milk.
2. Why is my chia pudding runny?
Runny pudding usually happens if the seed-to-liquid ratio is off or if the mixture wasn’t whisked well enough.
Stick to the standard ratio of ½ cup chia seeds to 2 cups milk and make sure to whisk twice—once immediately and again after 10–15 minutes.
3. Can I make it without sweetener?
Absolutely. You can leave out the sweetener for a naturally mild base and then add sweetness later with fresh fruit, jam, or a drizzle of honey or maple syrup before serving. This is a great option if you prefer low-sugar breakfasts.
4. How can I boost the protein content?
For extra protein, replace part of the milk with Greek yogurt or add a scoop of protein powder before chilling.
Both options make the pudding creamier and more filling, which is especially helpful if you’re using it as a breakfast meal prep.
5. Do chia seeds need to be ground first?
No, whole chia seeds work best for pudding because they naturally absorb liquid and create a gel-like texture.
Ground chia seeds will thicken too much and create a paste rather than a pudding. Stick with whole seeds for the classic result.