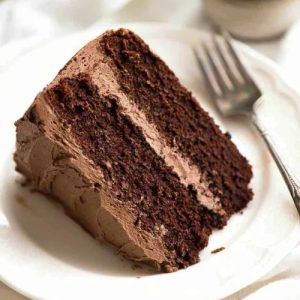
This everyday chocolate cake is delightfully moist, tender, and bursting with rich cocoa flavor, yet simple enough for any home baker.
Made in just one bowl, it’s an effortless treat that balances indulgence with practicality.
Naturally high in fiber from cocoa and wholesome flour, it delivers a satisfying dessert with moderate sugar and healthy fats, perfect for quick baking or meal prep.
Homemade Chocolate Cake
Equipment
- 2 x 9-inch (22 cm) round cake pans
- Large mixing bowl (1)
- Whisk (1)
- Measuring Cups and Spoons
- Cooling rack (1)
- Wooden skewer (1)
Ingredients
For the Chocolate Cake:
- 1 ¾ cups all-purpose flour
- ¾ cup unsweetened cocoa powder
- 1 ½ tsp baking powder
- 1 ½ tsp baking soda
- 2 cups white sugar
- 1 tsp salt
- 2 large eggs ~55–65 g each
- 1 cup milk low or full fat
- ½ cup vegetable oil
- 2 tsp vanilla extract
- 1 cup boiling water
For the Chocolate Buttercream Frosting:
- 1 ½ batches of chocolate buttercream frosting adjust to taste
Instructions
- Prepare Oven and Pans: Preheat your oven to 350°F (180°C) or 160°C if using a fan-assisted oven. Position your oven shelf in the center to ensure even heat circulation. Grease two 9-inch (22 cm) round cake pans thoroughly with butter, making sure every edge is coated. Line the bottom of each pan with parchment paper. This prevents sticking and helps the cakes come out smoothly, giving them a professional finish.
- Sift Dry Ingredients: In a large mixing bowl, sift together 1 3/4 cups all-purpose flour, 3/4 cup unsweetened cocoa powder, 1 1/2 tsp baking powder, and 1 1/2 tsp baking soda. Sifting removes lumps and introduces air, producing a lighter, fluffier cake. Add 2 cups sugar and 1 tsp salt, then whisk briefly to ensure all ingredients are combined evenly.
- Combine Wet Ingredients: Add 2 large eggs, 1 cup milk, 1/2 cup vegetable oil, and 2 tsp vanilla extract to the dry mixture. Using a whisk, blend the ingredients until smooth and lump-free. This process should take about 30 seconds. Make sure to scrape the sides and bottom of the bowl to incorporate any remaining flour for an even batter.
- Add Boiling Water: Carefully pour in 1 cup of boiling water. Whisk thoroughly to incorporate it into the batter. The batter will appear thin, which is intentional. The hot water helps to bloom the cocoa, intensifying the chocolate flavor and ensuring a moist, tender crumb.
- Divide Batter into Pans: Pour the prepared batter evenly into the two cake pans. If desired, use a kitchen scale to ensure equal distribution for uniform baking. Gently tap the pans on the counter to remove any large air bubbles, then smooth the surface with a spatula.
- Bake the Cake: Place the pans in the preheated oven. Bake for approximately 35 minutes, or until a wooden skewer inserted into the center comes out clean. If using multiple oven racks and both pans cannot fit on the middle shelf, place one 1/3 from the top and the other directly below it. Remove the top cake first at 35 minutes, then move the bottom cake to the middle shelf for an additional 5 minutes to ensure even baking.
- Cool the Cake: Remove the cakes from the oven and allow them to cool in the pans for 10 minutes. Run a knife along the edges to loosen the cakes. Place a cooling rack on top of each cake, invert them carefully, and remove the pans. This way, the flat base becomes the top, providing a smooth surface for frosting and making slicing easier.
- Prepare Frosting: While the cakes cool, prepare 1 1/2 batches of chocolate buttercream frosting, scaling the recipe as needed. Ensure the frosting is smooth and spreadable to complement the tender, chocolatey cake perfectly.
- Assemble the Cake: Once fully cooled, place one cake layer on a serving plate or cake stand. Spread a generous, even layer of frosting over the surface. Carefully place the second layer on top. Apply a thin crumb coat around the sides to lock in crumbs, then chill for 15–20 minutes. Finish by spreading a thicker, smooth layer of frosting on the top and sides with a spatula for a polished look.
- Serve and Store: Cut the cake into 8–10 slices and serve. Store in an airtight container for up to 5 days at room temperature, or refrigerate in hot climates to protect the frosting. Avoid freezing, as the cake’s moist crumb may become overly dense. Bring refrigerated slices to room temperature before serving for maximum flavor and texture enjoyment.
Notes
- Sugar Choice: You can use caster (superfine) sugar for a smoother texture, but regular granulated sugar works equally well. Both yield a tender crumb.
- Cocoa Powder: Unsweetened cocoa provides balanced chocolate flavor. For a deeper, more intense chocolate taste, use Dutch-processed cocoa.
- Pan Options: Standard 9-inch round pans are ideal. For other shapes, adjust baking times: bundt pan – 50 minutes, single 9-inch pan – 40–45 minutes, 8-inch pans – 38 minutes, 13×9-inch rectangle – 35–40 minutes.
- Thin Batter Handling: This recipe’s batter is intentionally thin. Greasing pans well and using parchment ensures it won’t stick. Place a tray under springform pans to catch any drips.
- Cooling Tip: Turn the cakes upside down so the flat base becomes the top—perfect for a smooth, professional-looking finish.
Chef’s Secrets: Expert Chocolate Baking Insights
For an exceptionally tender cake, sift your dry ingredients to introduce air and remove lumps.
Adding boiling water at the final step not only thins the batter for even baking but also “blooms” the cocoa, intensifying the chocolate flavor.
Always use room-temperature eggs and milk to maintain a uniform batter.
When frosting, apply a thin crumb coat first to trap loose crumbs, ensuring a smooth, polished final layer.
Small touches, like leveling cakes with a serrated knife, make a visually professional cake that tastes as good as it looks.
Serving Suggestions: Delicious Ways To Enjoy
This chocolate cake pairs beautifully with fresh berries, a dollop of lightly whipped cream, or a scoop of vanilla ice cream for contrast.
For adults, a drizzle of coffee liqueur or chocolate ganache can elevate flavor complexity.
Slice generously and serve on dessert plates with a sprinkle of cocoa powder or powdered sugar for a simple but elegant presentation.
Perfect for birthdays, afternoon tea, or casual family desserts, it’s a versatile treat that suits any occasion.
Storage Tips: Keep Cake Moist Longer
Store your cake in an airtight container at room temperature for up to 5 days.
If the kitchen is hot, refrigerate it to prevent the frosting from softening too much.
Avoid freezing the cake, as its moist texture can become overly dense, almost pudding-like.
For short-term storage, wrap individual slices in plastic wrap to maintain freshness.
Always bring refrigerated cake to room temperature before serving to enjoy its full flavor and soft, tender crumb.
Frequently Asked Questions
1. Can I make this cake gluten-free?
Yes! Substitute all-purpose flour with a gluten-free blend, but ensure it contains xanthan gum or similar binding agents. Baking time may vary slightly, so check doneness with a skewer.
2. Can I replace the eggs in this recipe?
Eggs can be substituted with flax eggs (1 tbsp flaxseed + 3 tbsp water per egg) or commercial egg replacers. The texture will remain moist, though slightly denser.
3. Why is my cake batter so thin?
This cake’s batter is intentionally thin due to boiling water, which blooms the cocoa and ensures a moist crumb. It’s normal and yields a tender cake.
4. Can I use other oils instead of vegetable oil?
Yes. Canola, sunflower, or light olive oil works well. Avoid strong-flavored oils like coconut or sesame, which will alter the cake’s chocolate taste.
5. How can I make the cake extra chocolatey?
Use Dutch-processed cocoa, or add a handful of finely chopped dark chocolate to the batter. For frosting, a ganache topping instead of buttercream intensifies chocolate flavor.