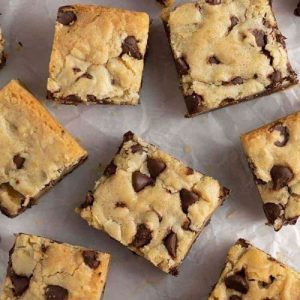
These Chocolate Chip Cookie Bars deliver a perfect balance of soft, chewy texture with rich, chocolatey flavor in every bite.
Packed with fiber from wholesome flour and moderate protein from eggs, they’re a satisfying treat without being overly indulgent.
Quick to prepare and simple to bake, these bars are perfect for everyday snacking, lunchboxes, or an easy dessert for any occasion.
Chocolate Chip Cookie Bars
Equipment
- 8×8 inch baking pan
- Parchment Paper
- Medium mixing bowl
- Large Mixing Bowl
- Whisk
- spatula
- Toothpick or skewer
Ingredients
- 2 ¼ cups 270 g all-purpose flour
- 1 tsp baking soda
- 1 tbsp cornstarch
- 1 tsp salt
- ¾ cup 170 g unsalted butter, melted and slightly cooled
- 1 cup 200 g packed light brown sugar
- ⅔ cup 133 g granulated sugar
- 2 large eggs at room temperature
- 1 tbsp 15 mL vanilla extract
- 2 cups 200 g semi-sweet chocolate chips
Instructions
- Preheat and Prepare Your Pan: Begin by preheating your oven to 350°F (175°C) to ensure it reaches the ideal temperature while you prepare the dough. Line an 8×8-inch baking pan with parchment paper, letting the paper hang slightly over the edges for easy lifting later. If parchment paper isn’t available, you can carefully use aluminum foil. Avoid skipping this step—proper lining prevents sticking and ensures smooth removal of the bars.
- Melt and Cool the Butter: Measure 3/4 cup (170 g) of unsalted butter and gently melt it in a microwave-safe bowl or on the stovetop. Allow it to cool slightly, so it isn’t too hot to combine with the sugars and eggs. The melted butter will give the cookie bars a dense, chewy texture while adding rich flavor.
- Mix Dry Ingredients Together: In a medium mixing bowl, combine 2 1/4 cups (270 g) all-purpose flour, 1 tsp baking soda, 1 tbsp cornstarch, and 1 tsp salt. Whisk them together thoroughly until evenly combined. This ensures proper distribution of leavening agents and prevents any clumps, resulting in bars that rise evenly while remaining soft.
- Combine Sugars and Butter: In a large mixing bowl, pour the slightly cooled melted butter. Add 1 cup (200 g) packed light brown sugar and 2/3 cup (133 g) granulated sugar. Use a whisk or spatula to blend them into a smooth, thick slurry. The sugars will dissolve slightly in the butter, creating a rich, sweet base that helps give the bars their chewy texture.
- Add Eggs and Vanilla Extract: Crack 2 large eggs into the sugar-butter mixture, ensuring they are at room temperature to prevent curdling. Pour in 1 tbsp (15 mL) of vanilla extract. Stir thoroughly until the mixture is smooth, glossy, and slightly thickened. The eggs provide structure, moisture, and protein, while vanilla adds aromatic depth to the bars.
- Incorporate the Dry Ingredients: Gradually add the whisked dry ingredients into the wet mixture. Mix gently using a spatula or wooden spoon until the dough is almost fully combined. Be careful not to overmix, as this can make the bars tough. The dough should be slightly thick but spreadable, with a uniform consistency.
- Fold in Chocolate Chips: Reserve a small handful of chocolate chips to sprinkle on top later.Stir the remaining 2 cups (200 g) into the dough evenly, ensuring chocolate is well-distributed. The chocolate chips melt slightly during baking, giving pockets of gooey chocolate throughout each bar.
- Transfer Dough to Pan: Scrape the dough into your prepared 8×8-inch baking pan. Use a spatula to gently press and spread the dough toward the edges, creating a roughly smooth, even layer. Smooth the top just enough to level it, but don’t overwork it—the rough surface helps give the bars a rustic, homemade look. Sprinkle the reserved chocolate chips evenly over the top for extra chocolatey appeal.
- Bake to Perfection: Place the pan in your preheated oven and bake at 350°F (175°C) for approximately 35 minutes. The cookie bars are done when the edges are golden brown, and a toothpick inserted into the center comes out mostly clean with just a few moist crumbs. Avoid overbaking; the center should remain soft and chewy.
- Cool Completely Before Cutting: Remove the pan from the oven and allow the bars to cool in the pan for about an hour. Cooling lets the bars set properly, preventing them from crumbling when cut. Use the parchment overhang to lift the bars from the pan, then transfer them to a cutting board. Cut into 24 squares using a sharp knife for clean edges.
- Optional Finishing Touches: For added flavor, sprinkle a pinch of flaked sea salt over the warm bars immediately after baking. If you want added texture, fold in 1 cup of chopped walnuts or pecans during step 7. For a gooier, fudge-like texture, remove the bars from the oven 3–5 minutes early.
Notes
- Always line your baking pan with parchment paper or foil for easy removal and minimal sticking.
- Use room temperature eggs to help the dough mix evenly and create a soft, chewy texture.
- Slightly underbaking the bars gives them a fudgier, more indulgent center—perfect if you love gooey chocolate.
- You can customize the chocolate chips by using milk chocolate, dark chocolate, or even chunks for variety.
- Adding nuts like walnuts or pecans adds crunch and contrast to the soft, chewy bars.
- A pinch of flaked sea salt on top after baking enhances the sweetness and intensifies the chocolate flavor.
Chef’s Secrets for Perfect Bars
The secret to these cookie bars’ perfect texture lies in a balance between melted butter and sugars.
Melting the butter creates a dense, chewy base, while using both brown and granulated sugar adds moisture, sweetness, and that subtle caramel flavor.
Avoid overmixing the dough once the flour is added to prevent toughness.
For maximum chocolate pockets, fold the chips gently into the dough, reserving some for topping.
Finally, allow the bars to cool completely in the pan—this ensures clean slices and bars that hold their shape beautifully.
Serving Suggestions for Maximum Enjoyment
These chocolate chip cookie bars are incredibly versatile and perfect for many occasions.
Serve them warm with a scoop of vanilla ice cream for an indulgent dessert.
For a quick snack, pair with a glass of milk, coffee, or hot chocolate.
They’re also excellent for lunchboxes, picnics, or parties.
Cut into small squares for bite-sized treats or slightly larger portions if you want a more indulgent snack.
Adding fresh berries or a drizzle of chocolate sauce can elevate them for a special gathering.
Storage Tips to Keep Bars Fresh
Store the bars in an airtight container at room temperature for up to five days to maintain their soft, chewy texture.
If you want to store them longer, refrigerate for up to two weeks or freeze for up to three months.
When freezing, wrap individual bars in plastic wrap or foil, then place them in a freezer-safe bag to prevent freezer burn.
Thaw at room temperature or warm slightly in the microwave for that freshly-baked feel.
Frequently Asked Questions
1. Can I use a different type of flour?
Yes! While all-purpose flour gives the classic texture, you can use whole wheat or a gluten-free blend. Keep in mind that denser flours may slightly alter the chewiness, so check doneness carefully.
2. Can I make the bars ahead of time?
Absolutely! You can prepare the dough a day ahead and refrigerate it until ready to bake. This can enhance the flavor as the ingredients meld together.
3. How do I make them extra gooey?
Bake the bars for a few minutes less than the recommended 35 minutes. They should look slightly underbaked in the center but will firm up as they cool, giving a fudgy texture.
4. Can I add nuts or other mix-ins?
Yes! Chopped walnuts, pecans, or even shredded coconut can be folded into the dough. Just be careful not to add too many extras, as it may alter the overall texture.
5. How should I cut the bars neatly?
For clean edges, allow the bars to cool completely in the pan. Use a sharp knife, wiping it clean between cuts.
Using the parchment paper overhang to lift the bars out before cutting can also help achieve perfectly square slices.