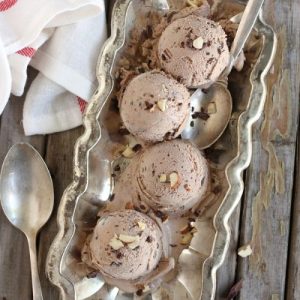
Indulge in the rich, nutty charm of homemade Chocolate Hazelnut Ice Cream—a creamy delight that blends velvety milk chocolate with toasted hazelnuts for an unforgettable flavor.
Beyond its decadent taste, this recipe provides plant-based protein, heart-healthy fats, and a boost of fiber from hazelnuts.
With a balance of sweetness and wholesome nutrients, it’s a satisfying treat that’s perfect for everyday enjoyment, special occasions, or make-ahead desserts.
Chocolate Hazelnut Ice Cream
Equipment
- 1 Baking sheet (for roasting hazelnuts)
- 1 Kitchen towel (for skin removal)
- 1 Food processor (for chopping nuts)
- 2 Medium saucepans (for custard and cream)
- 2 Mixing bowls (for whisking and chocolate mixture)
- 1 Whisk (for eggs and custard)
- 1 Fine mesh strainer (for steeped milk and custard)
- 1 Ice cream maker (for churning)
- 1 Rubber spatula (for stirring and mixing)
Ingredients
- 1 ½ cups hazelnuts 185 g
- 1 cup whole milk 237 ml / 8 fl oz
- 2 cups heavy cream 375 ml / 16 fl oz, divided
- ¾ cup granulated sugar 150 g
- ¼ teaspoon coarse salt
- 8 ounces milk chocolate finely chopped (230 g), divided
- 5 large egg yolks
- ⅛ teaspoon vanilla extract
Instructions
- Roast the Hazelnuts for Flavor: Preheat your oven to 350°F (175°C). Place the hazelnuts in a single, even layer on an ungreased baking sheet. Roast them in the oven for about 10–12 minutes, stirring once or twice to ensure they toast evenly on all sides. The nuts should turn lightly golden and release a fragrant, nutty aroma. Once done, set them aside to cool completely. After cooling, place the hazelnuts inside a clean kitchen towel and gently rub them together to remove most of the skins. Don’t worry if some skins remain—they add a bit of rustic character. Finally, transfer the peeled nuts to a food processor and pulse until finely chopped, almost like coarse crumbs.
- Create the Hazelnut-Infused Milk: In a medium saucepan, combine the whole milk, 1 cup of heavy cream, granulated sugar, and coarse salt. Stir constantly over medium heat until the sugar fully dissolves and the liquid begins to steam. Do not let it boil. Remove the pan from the heat and stir in the finely chopped hazelnuts. Cover the pan with a lid and allow the mixture to steep for 1 hour at room temperature. This resting time lets the milk absorb the rich, nutty essence of the hazelnuts.
- Prepare the Chocolate Mixture: Meanwhile, place 4 ounces (half) of the chopped milk chocolate in a large mixing bowl. In a separate small saucepan, heat the remaining 1 cup of heavy cream just until it begins to bubble around the edges—avoid boiling. Immediately pour the hot cream over the chocolate pieces. Let the mixture sit undisturbed for 4–5 minutes to soften the chocolate completely. After resting, whisk until smooth and glossy. This becomes the chocolate base that will later blend with the custard.
- Strain and Warm the Hazelnut Milk: After the hazelnut milk has steeped, pour it through a fine mesh strainer into a clean bowl, pressing firmly on the nuts with the back of a spoon or spatula to extract as much liquid and flavor as possible. Discard the solids. Return the flavored milk mixture back to the saucepan and place it over medium-low heat, warming it gently until it’s hot but not boiling.
- Temper the Egg Yolks: In a separate bowl, whisk the egg yolks until smooth and slightly thickened. To prevent scrambling, carefully temper the yolks by slowly ladling a small amount of the warm hazelnut milk into the eggs while whisking constantly. Gradually continue adding more hot milk until about half of the liquid has been incorporated. Once the yolks are warm and blended, pour the entire egg mixture back into the saucepan with the remaining milk.
- Cook the Custard Base: Place the saucepan over medium heat and cook the mixture slowly, stirring constantly with a wooden spoon or heatproof spatula. The custard is ready when it thickens enough to coat the back of the spoon and holds a clear line when you run your finger across it. Avoid boiling, as this could cause the custard to curdle. This step usually takes 5–7 minutes.
- Combine Custard with Chocolate Mixture: Once the custard reaches the right thickness, immediately pour it through a strainer into the bowl containing the melted chocolate mixture. This second straining step ensures an extra-smooth texture. Add the vanilla extract and stir gently until the custard and chocolate blend into a velvety, uniform base.
- Chill the Ice Cream Base: Cover the bowl with plastic wrap, pressing it directly against the surface of the custard to prevent a skin from forming. Place the bowl in the refrigerator and chill thoroughly for at least 4 hours or preferably overnight. The colder the base, the creamier the final ice cream will be.
- Churn the Ice Cream: Once fully chilled, pour the mixture into your ice cream maker and churn according to the manufacturer’s instructions. During the last 5 minutes of churning, add the remaining 4 ounces of chopped chocolate so that small chunks are distributed throughout the ice cream. This adds texture and extra bursts of chocolate flavor.
- Freeze to Firm and Serve: Transfer the churned ice cream into a freezer-safe container with a tight-fitting lid. Smooth the top with a spatula, cover, and freeze for at least 2–3 hours to firm up. When ready to enjoy, let the ice cream sit at room temperature for 5 minutes before scooping to achieve the perfect creamy texture.
Notes
- Toasting hazelnuts before steeping enhances their nutty flavor and aroma.
- Removing most of the skins prevents bitterness and gives a smoother taste.
- Steeping hazelnuts in warm milk infuses a deep, natural flavor throughout the custard.
- Straining the milk twice ensures a creamy, velvety texture without nutty grit.
- Cooking the custard slowly over medium heat prevents curdling and keeps it silky.
- Chilling the base thoroughly (at least 4 hours or overnight) is key to smooth ice cream.
- Adding chocolate chunks in the final minutes of churning provides delicious texture.
- Using an airtight container with parchment or plastic wrap on top prevents ice crystals.
- Ice cream tastes best within 1–2 weeks of freezing for peak flavor and texture.
- Allowing the ice cream to soften slightly before scooping gives the perfect creamy bite.
Chef’s Secrets for Perfect Ice Cream
For the richest flavor, always roast the hazelnuts before blending them into the milk.
Skipping this step leaves the nuts tasting flat instead of warm and aromatic.
When cooking the custard, keep the heat low and stir constantly to avoid scrambling the yolks.
A good trick is to use a spoon test once the mixture coats the back of a spoon and leaves a clear line when you swipe your finger, it’s ready.
Finally, never rush the chilling process.
A well-chilled base churns more efficiently and results in smoother ice cream.
Serving Suggestions to Enjoy Fully
This ice cream is delightful on its own, but it shines when paired with complementary flavors.
Serve scoops alongside warm brownies or chocolate lava cake for a decadent dessert.
For a lighter option, top with fresh berries, especially raspberries or strawberries, which balance the richness with a refreshing tartness.
A drizzle of espresso or strong coffee poured over a scoop makes a heavenly affogato-style treat.
If you’re entertaining, consider garnishing with crushed hazelnuts, shaved chocolate, or a swirl of Nutella for an elegant finish.
Storage Tips for Lasting Freshness
Homemade ice cream is best enjoyed within the first two weeks of freezing for optimal texture and flavor.
Store it in an airtight, freezer-safe container with a tight-fitting lid.
To prevent ice crystals, press a piece of parchment paper or plastic wrap directly on the surface of the ice cream before sealing the container.
When serving, allow the ice cream to soften at room temperature for 5–10 minutes rather than microwaving, which can compromise texture.
Frequently Asked Questions
1. Can I use dark chocolate instead of milk chocolate?
Yes, dark chocolate can be substituted if you prefer a richer, more intense flavor. Keep in mind it will make the ice cream slightly less sweet, so you may wish to adjust the sugar to taste.
2. Do I need an ice cream maker?
An ice cream maker ensures the creamiest results, but you can make this recipe without one. Pour the chilled base into a shallow dish, freeze it, and stir every 30 minutes for 3–4 hours to break up ice crystals.
3. Can I make this recipe dairy-free?
Yes, you can replace the milk and cream with full-fat coconut milk or a similar plant-based alternative. Use dairy-free chocolate and reduce the sugar slightly since coconut milk is naturally sweeter.
4. How do I keep my ice cream from becoming icy?
The key is a well-cooked custard base and thorough chilling before churning. Storing it properly with parchment or plastic wrap pressed against the surface also helps prevent unwanted ice crystals.
5. Can I prepare the custard ahead of time?
Absolutely. The custard base can be made 1–2 days in advance and kept in the refrigerator. In fact, an overnight chill enhances the texture and makes the churning process more effective.