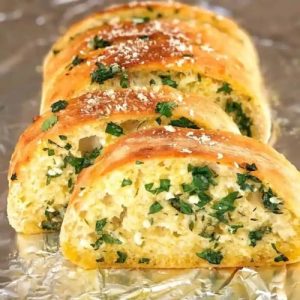
This homemade ciabatta garlic bread is bursting with rich, buttery flavor, fresh herbs, and a hint of parmesan, creating the perfect balance of savory and aromatic.
Packed with heart-healthy fats from butter and fiber from ciabatta, it’s a satisfying snack or side dish.
Quick, easy, and crowd-pleasing, it’s perfect for everyday meals, weeknight dinners, or meal prep.
Ciabatta Garlic Bread
Equipment
- 1 small mixing bowl
- 1 spoon or spatula
- 1 sharp knife
- 1-Baking tray
- Aluminium foil
Ingredients
- 350 g ciabatta bread loaf
- 60 g softened butter
- 2 cloves garlic crushed
- ½ cup fresh flat-leaf parsley roughly chopped
- 1 tablespoon fresh thyme leaves
- 1½ tablespoons finely grated parmesan cheese
- Fine salt to taste
Instructions
- Preheat Oven Properly: Begin by preheating your oven to 180°C (350°F). Ensuring the oven reaches the correct temperature before baking allows the ciabatta to cook evenly and helps the butter and herbs infuse perfectly into each slice. Place the oven rack in the center to promote balanced heat circulation.
- Prepare Herb-Butter Mixture: In a small mixing bowl, combine 60 g of softened butter with 2 crushed garlic cloves. Add ½ cup of roughly chopped flat-leaf parsley, 1 tablespoon of fresh thyme leaves, and 1½ tablespoons of finely grated parmesan cheese. Season lightly with fine salt. Mix thoroughly using a spoon or spatula until the ingredients form a smooth, evenly blended herb-butter paste. This mixture is the flavor base, so take your time to fully combine.
- Slice the Ciabatta Loaf Carefully: Place your 350 g ciabatta bread loaf on a cutting board. Using a sharp knife, slice the loaf into 2 cm (¾-inch) thick sections, cutting almost through the base but not all the way. Keeping the bottom intact ensures the loaf remains in one piece for easy serving and prevents the slices from falling apart during baking.
- Insert Herb-Butter Between Slices: Gently spread or spoon the prepared herb-butter mixture between each cut in the loaf. Make sure every slice gets an even amount, working the mixture down slightly into the cuts. This allows each piece to absorb the rich flavors of garlic, herbs, and parmesan while baking, creating an aromatic and flavorful bite in every slice.
- Wrap Loaf in Aluminium Foil: Carefully wrap the prepared loaf in a sheet of aluminium foil. To secure it, crimp the sides over the top and fold in the ends. This wrapping method keeps the butter from spilling out while allowing the bread to steam slightly during baking, ensuring it stays soft and tender on the inside.
- Bake Loaf for Initial Softening: Place the foil-wrapped loaf on a baking tray and put it in the preheated oven. Bake for 20 minutes. During this time, the heat gently melts the butter, infuses the garlic and herbs, and warms the bread thoroughly. This step creates a soft, flavorful interior while keeping the crust protected from direct heat.
- Unwrap Loaf for Crisping: After 20 minutes, carefully remove the loaf from the oven. Open the foil on top to expose the slices. This step allows the exposed edges and top to crisp up, giving the bread a golden, slightly crunchy texture. Return the loaf to the oven and bake for an additional 10 minutes. Keep an eye on it to prevent over-browning.
- Cool and Serve: Once the bread is golden and fragrant, remove it from the oven and allow it to rest for a few minutes. This helps the flavors settle and makes it easier to separate the slices if desired. Serve warm for the best experience, whether as a side for pasta, soup, or as a standalone snack.
Notes
- Not slicing through the base of the ciabatta loaf ensures the bread stays intact during baking, making it easier to serve.
- Wrapping the loaf in foil helps retain moisture while the herb-butter melts, creating a soft interior.
- For a crispier top, always open the foil for the final 10 minutes of baking. If skipped, the bread will remain soft but still flavorful.
- Use freshly grated parmesan and fresh herbs whenever possible for the best aroma and taste.
- The amount of salt can be adjusted to preference; remember parmesan adds a slight salty flavor.
- This recipe is perfect for meal prep, easy weeknight dinners, or as a quick side for pasta, soups, or salads.
Chef’s Secrets: Insider Baking And Flavor Tips
The secret to perfect ciabatta garlic bread lies in the herb-butter blend.
Softened butter allows the flavors to infuse evenly into the bread, while crushing garlic just before mixing ensures maximum aroma.
Lightly pressing the butter mixture into the slices helps it seep through the bread’s layers for consistent flavor.
Wrapping in foil prevents the exterior from over-browning while allowing gentle steaming, and a final crisping step gives the top a golden, irresistible crunch.
Using fresh herbs rather than dried ensures vibrant color and a fresh, herbaceous taste.
For added indulgence, try sprinkling extra parmesan on top before the final bake—it melts and forms a light, cheesy crust.
Serving Suggestions: How To Enjoy Perfectly
Serve this ciabatta garlic bread warm as a flavorful side to Italian dishes like pasta, lasagna, or minestrone soup.
It also pairs beautifully with roasted vegetables, grilled meats, or a fresh salad for a light, balanced meal.
For entertaining, cut the loaf into individual slices and serve on a platter with dipping sauces like marinara, pesto, or olive oil with balsamic.
Leftovers can be reheated briefly in the oven to restore crispness, making it a versatile option for breakfast, lunch, or even a late-night snack.
Storage Tips: Keep Bread Fresh Longer
To store, wrap the cooled bread tightly in aluminium foil or place in an airtight container.
It can be kept at room temperature for up to 2 days.
For longer storage, freeze the loaf unbaked or after baking; if frozen unbaked, bake directly from frozen adding a few extra minutes.
If freezing a baked loaf, thaw at room temperature and reheat in the oven for 5–10 minutes to restore the crisp texture.
Avoid storing in plastic at room temperature for long periods, as this can make the crust soggy.
Frequently Asked Questions
1. Can I use other bread types?
Yes, sourdough or French baguette can work, but ciabatta’s airy texture allows the butter and herbs to penetrate perfectly. Denser breads may not absorb the flavors as well.
2. How can I make the bread extra crispy?
After baking for 20 minutes in foil, open the foil completely and bake for an additional 10–12 minutes. Broiling for 1–2 minutes at the end can also enhance the crispiness.
3. Can I make this garlic bread ahead of time?
Absolutely. Prepare the loaf with the butter mixture and wrap it in foil. Refrigerate for up to 24 hours before baking. This makes it great for meal prep or parties.
4. Can I add extra cheese or herbs?
Yes, adding more parmesan, mozzarella, or a sprinkle of cheddar before the final bake creates a cheesy variation. Additional fresh herbs like rosemary or oregano can also enhance flavor.
5. Is this recipe suitable for kids or picky eaters?
Definitely. The garlic flavor is mild but aromatic, and the buttery, cheesy texture appeals to most children. You can adjust garlic quantity if a subtler taste is preferred.