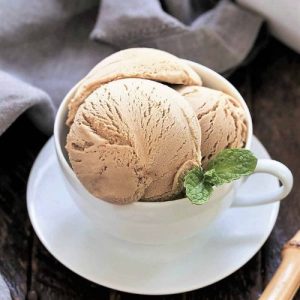
This homemade coffee ice cream is a creamy indulgence that blends bold espresso flavor with a smooth, velvety base.
Made with simple ingredients, it’s rich in protein from egg yolks and contains healthy fats from cream, while remaining lower in carbs compared to store-bought versions.
Perfect for everyday enjoyment, it’s quick to prepare, naturally satisfying, and a fantastic make-ahead treat for coffee lovers who crave a balance of flavor and nutrition.
Homemade Coffee Ice Cream
Equipment
- 1 Large heatproof mixing bowl
- 1 medium saucepan
- 1 whisk
- 1 fine-mesh strainer
- 1 Ice cream machine
- 1 instant-read thermometer
Ingredients
- 6 large egg yolks
- 1 ¾ cups heavy cream
- 2 cups whole milk
- ¾ cup granulated sugar
- 2 tablespoons granulated sugar extra
- ¼ teaspoon salt
- 3 tablespoons instant espresso powder
- 1 tablespoon Kahlua
Instructions
- Prepare the Egg Yolks: Separate six large egg yolks from the whites and place them in a large heatproof mixing bowl. Whisk gently until smooth and uniform in texture. This step helps prevent the eggs from curdling later and ensures a rich, silky custard base for the ice cream. Set aside while preparing the coffee cream mixture.
- Combine Cream and Milk: In a medium saucepan, pour in 1¾ cups of heavy cream and 2 cups of whole milk. Stir gently to combine. This mixture creates the rich foundation for the ice cream while balancing flavor and texture for a creamy, smooth result.
- Sweeten and Flavor the Base: Add ¾ cup granulated sugar, 2 extra tablespoons of sugar, and ¼ teaspoon salt to the cream and milk mixture. Stir thoroughly to dissolve the sugar completely. Then add 3 tablespoons of instant espresso powder and whisk to combine. This ensures an even distribution of coffee flavor without lumps.
- Heat to Simmer: Place the saucepan over medium heat. Stir gently but consistently to prevent scorching. Heat until the mixture reaches a slow, gentle simmer, just shy of a boil. Small bubbles should appear around the edges, and the mixture should emit a rich coffee aroma, which usually takes about 7–9 minutes.
- Temper the Egg Yolks: Slowly pour half of the hot coffee cream mixture into the bowl with egg yolks while whisking continuously. This process — called tempering — warms the yolks gradually, preventing them from scrambling. Continue whisking until the yolk mixture becomes smooth and slightly thickened.
- Combine Mixtures: Pour the tempered yolk mixture back into the saucepan containing the remaining coffee cream mixture. Stir gently and continuously over medium-low heat to ensure even cooking and prevent curdling.
- Cook Until Thickened: Continue stirring until the custard thickens enough to coat the back of a spoon. You should be able to draw a line through it without it filling in. Use an instant-read thermometer to confirm the mixture reaches about 175°F (79°C).
- Strain the Custard: Remove the saucepan from heat. Place a fine-mesh strainer over a clean bowl and pour the custard through it. This step removes any small egg lumps or espresso granules, ensuring a silky-smooth base for your ice cream.
- Add Flavor Enhancer: While the custard is still warm, stir in 1 tablespoon of Kahlua. This adds a subtle depth of flavor, enhancing the coffee without overpowering it.
- Chill the Custard Base: Press a piece of plastic wrap directly onto the surface of the custard to prevent a skin from forming. Refrigerate for at least four hours, or overnight for best results. The custard must be completely cold before churning to achieve the smoothest texture.
- Churn the Ice Cream: Pour the chilled custard into your ice cream machine and churn according to the manufacturer’s instructions, typically for about 20–25 minutes, until it reaches a soft, creamy consistency.
- Freeze to Set: Transfer the churned ice cream to an airtight container. Place parchment or plastic wrap directly over the surface to prevent ice crystals. Freeze for at least 4 hours before serving so the texture becomes firm yet creamy.
- Serve and Enjoy: Scoop the coffee ice cream into bowls or cones. Optionally garnish with shaved dark chocolate, cocoa powder, or a drizzle of coffee syrup.Enjoy your rich, indulgent coffee creation anytime as a decadent dessert or refreshing treat.
Notes
- Always use fresh egg yolks for a rich, creamy texture.
- Instant espresso powder blends evenly and delivers a deep coffee flavor without bitterness.
- Stir gently and constantly when heating the custard to prevent curdling.
- Chilling the custard thoroughly before churning is essential for a smooth, scoopable ice cream.
- Adding Kahlua is optional — you can substitute with coffee liqueur, vanilla extract, or omit for a non-alcoholic version.
Chef’s Secrets: Perfect Creamy Coffee Base
Creating truly luxurious coffee ice cream comes down to the custard base. Using both cream and milk ensures a balanced texture — rich but not overly heavy.
Tempering the egg yolks slowly with hot cream is a crucial step to prevent scrambling and keep the base silky smooth.
Use an instant-read thermometer to monitor the custard’s temperature precisely.
Additionally, chilling the custard overnight intensifies flavor and ensures the ideal texture when churned.
For an extra layer of complexity, experiment with adding a pinch of cinnamon, nutmeg, or a touch of dark cocoa powder to the custard before churning.
Serving Suggestions: Delicious Ways To Enjoy
Serve your homemade coffee ice cream as a standalone treat, garnished with shaved dark chocolate or a dusting of cocoa powder for elegance.
Pair it with warm desserts such as apple pie, brownies, or chocolate lava cake for a contrast in temperature and texture.
It also works beautifully as an affogato — pour a shot of hot espresso over a scoop for a luxurious coffee dessert.
For a refreshing summer twist, serve it in waffle cones or alongside biscotti for an indulgent café-style experience at home.
Storage Tips: Keep Ice Cream Fresh Longer
To maintain perfect texture, store coffee ice cream in an airtight container to prevent ice crystals from forming.
Press a piece of parchment or plastic wrap directly on the surface before sealing.
Store in the coldest part of your freezer — ideally at 0°F (-18°C) or lower.
Homemade ice cream is best enjoyed within two weeks for optimum freshness, flavor, and texture.
If ice crystals develop over time, let the ice cream soften slightly at room temperature before scooping to restore its creaminess.
Frequently Asked Questions
1. Can I make this ice cream without an ice cream machine?
Yes. You can use the no-churn method by pouring the custard into a freezer-safe container and stirring every 30–45 minutes until frozen.
This process helps break up ice crystals and keeps the texture creamy, though it won’t be as smooth as churned ice cream.
2. What can I substitute for Kahlua?
If you prefer a non-alcoholic version, vanilla extract or coffee extract works well. You can also use a splash of brewed espresso or coffee syrup to retain depth of flavor without alcohol.
3. How can I make this recipe vegan or dairy-free?
For a plant-based version, replace heavy cream with full-fat coconut milk and whole milk with almond milk or oat milk.
Use a plant-based egg substitute or cornstarch slurry to thicken the custard. Keep in mind that flavors and texture will vary slightly.
4. Can I adjust the coffee flavor intensity?
Yes. Adjust the amount of instant espresso powder to your taste. Increase slightly for a stronger, bolder coffee taste or reduce for a subtler coffee note. Always mix well to avoid clumping.
5. How long should I churn the ice cream?
Churning time varies depending on your ice cream machine, usually between 20–30 minutes.
Look for a soft, thick texture before transferring to the freezer for final setting. Avoid over-churning, as it can make the texture grainy.