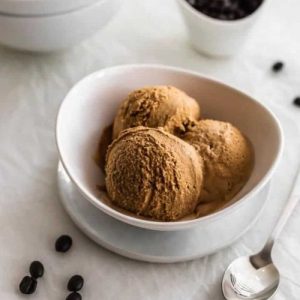
Indulge in this creamy no-churn Espresso Ice Cream that captures the bold, aromatic flavors of Vietnamese coffee in every spoonful.
Quick and effortless to make, it requires no ice cream machine yet delivers rich texture and satisfying taste.
Packed with good fats from whipping cream and a moderate protein boost, this dessert is a smart, everyday treat that feels indulgent without excessive prep time.
Espresso Ice Cream
Equipment
- 1 medium mixing bowl (for whipping cream)
- 1 metal whisk
- 1 spatula
- 1 separate small bowl (for mixing condensed milk)
- 1 freezer-safe jar or container (to store ice cream)
Ingredients
- 185 ml heavy whipping cream cold, at least 36% milkfat
- 100 ml sweetened condensed milk
- 5 g instant espresso powder about 2 sachets
- 2 teaspoons pure vanilla extract
Instructions
- Prepare Your Workspace: Before beginning, gather all ingredients and equipment. Chill a medium mixing bowl in the refrigerator for at least 10–15 minutes to help the cream whip faster and hold its structure. Have a metal whisk, spatula, small mixing bowl, and a clean, freezer-safe jar or container ready. Pre-measuring ingredients will make the process smooth and prevent errors.
- Measure and Chill Heavy Cream: Measure 185 ml of heavy whipping cream, ensuring it has at least 36% milkfat for a rich, creamy texture. Keep the cream cold, as chilled cream whips better and produces a light, airy consistency. Place it into the chilled mixing bowl when ready to whip.
- Whip Cream to Soft Peaks: Using a metal whisk, begin whipping the cream in a gentle circular motion. Gradually increase speed to medium. Watch closely as the cream thickens. Stop whipping when soft peaks form—this is when the cream holds a slight peak but curls back into itself when the whisk is lifted. Avoid overwhipping at this stage, as it can become grainy and separate.
- Combine Condensed Milk, Espresso, and Vanilla: In a separate small bowl, pour 100 ml of sweetened condensed milk. Add 5 g of instant espresso powder (about 2 sachets) and 2 teaspoons of pure vanilla extract. Stir thoroughly until the espresso is fully dissolved and the mixture is smooth and aromatic. This ensures the coffee flavor is evenly distributed.
- Lighten the Espresso Mixture: Take about one-third of the whipped cream and fold it gently into the condensed milk mixture using a spatula. Use a soft lifting motion from the bottom up to avoid deflating the cream. This step lightens the mixture, making it easier to fold into the remaining whipped cream and ensuring a smooth, airy final texture.
- Incorporate Whipped Cream Fully: Pour the lightened condensed milk and espresso mixture back into the remaining whipped cream. Using the spatula, fold carefully and thoroughly, scraping along the sides and bottom of the bowl. Continue folding until the mixture is uniform in color and texture, with no streaks remaining.
- Transfer to Freezer-Safe Container: Once fully combined, transfer the ice cream mixture into a clean, freezer-safe jar or container. Smooth the surface with a spatula for even freezing. Cover the container with a lid or plastic wrap to prevent ice crystals from forming.
- Freeze Until Firm: Place the container in the freezer and allow it to set for at least 6 hours or overnight. This ensures the ice cream develops a firm, scoopable texture while remaining creamy. Avoid stirring during freezing to maintain a smooth consistency.
- Serve and Enjoy: Remove the ice cream from the freezer about 5 minutes before serving to allow it to soften slightly for easier scooping. Use an ice cream scoop or spoon to serve portions into bowls or dessert glasses. Optionally, garnish with chocolate shavings, cocoa powder, or a drizzle of caramel for an extra indulgent touch.
- Storage and Reuse: Store any leftover ice cream in the same freezer-safe container, tightly covered. It can be kept in the freezer for up to 2 weeks without losing flavor or texture. Let it sit at room temperature for a few minutes before scooping each time to achieve the perfect creamy consistency.
Notes
- Always use cold, high-fat heavy cream (at least 36% milkfat) to achieve a creamy and smooth texture. Warm cream will not whip properly.
- Instant espresso powder dissolves quickly and provides a concentrated coffee flavor; do not substitute with brewed coffee, as it may alter the ice cream’s texture.
- Folding the whipped cream gently is essential—overmixing can deflate the airiness, resulting in denser ice cream.
- Freeze the ice cream covered to avoid ice crystal formation and maintain its velvety consistency.
- For a richer flavor, you can toast the espresso powder lightly in a dry pan before mixing to enhance its aroma.
Chef’s Secrets: Mastering No-Churn Ice Cream
The secret to ultra-creamy no-churn ice cream lies in the balance between whipped cream and condensed milk.
Whipped cream incorporates air, giving the ice cream its light texture, while condensed milk adds sweetness and smoothness.
To get that authentic Vietnamese coffee flavor, ensure your espresso powder is fresh and fully dissolved in the condensed milk.
When folding the whipped cream, use slow, deliberate motions to maintain the mixture’s airiness.
Also, chilling the mixing bowl before whipping the cream can make a noticeable difference in consistency.
Finally, don’t rush the freezing process—patience ensures a silky, scoopable result every time.
Serving Suggestions: Delicious Pairing Ideas
Espresso ice cream is a versatile dessert that pairs beautifully with a variety of accompaniments.
Serve it in classic bowls or elegant dessert glasses, topped with a sprinkle of cocoa powder, chocolate shavings, or a drizzle of caramel sauce.
For a more indulgent twist, pair it with warm chocolate brownies, coffee-flavored cookies, or almond biscotti for texture contrast.
It also works well alongside fresh berries or sliced bananas, balancing the ice cream’s richness with fruity brightness.
For an adult-friendly option, a splash of coffee liqueur or espresso over the top elevates the flavor into a café-style dessert.
Storage Tips: Keeping Ice Cream Fresh
Proper storage is key to maintaining smooth, creamy texture.
Always cover the ice cream tightly with a lid or plastic wrap to prevent freezer burn and ice crystal formation.
Store it at the back of the freezer, where the temperature is most stable, and avoid frequent opening, which can soften the ice cream unevenly.
For best quality, consume within 2 weeks.
If the ice cream becomes slightly firm, let it sit at room temperature for 5–10 minutes before scooping—this makes it easier to serve while retaining its creamy consistency.
Frequently Asked Questions
1. Can I use brewed coffee instead of instant espresso powder?
While brewed coffee can technically work, it adds extra liquid and may result in a less creamy, icier texture.
Instant espresso powder is recommended for a concentrated flavor without compromising the ice cream’s smoothness.
2. How can I make this ice cream vegan or dairy-free?
Substitute coconut cream for heavy cream and use a dairy-free sweetened condensed milk. Whip the coconut cream until light and follow the same folding method to achieve a similar creamy texture.
3. Can I adjust the coffee flavor intensity?
Yes! Increase the espresso powder slightly for a bolder, more robust coffee taste, or reduce it for a milder flavor. Always dissolve it fully in the condensed milk to avoid gritty texture.
4. How long can I store the ice cream in the freezer?
For optimal texture and flavor, consume within 2 weeks. While it can be frozen longer, the ice cream may develop ice crystals and lose creaminess.
5. Can I make this recipe ahead of time for parties?
Absolutely! This no-churn ice cream is perfect for make-ahead dessert prep. Simply prepare the mixture, freeze overnight, and scoop directly before serving. It’s also convenient for batch-making and entertaining.