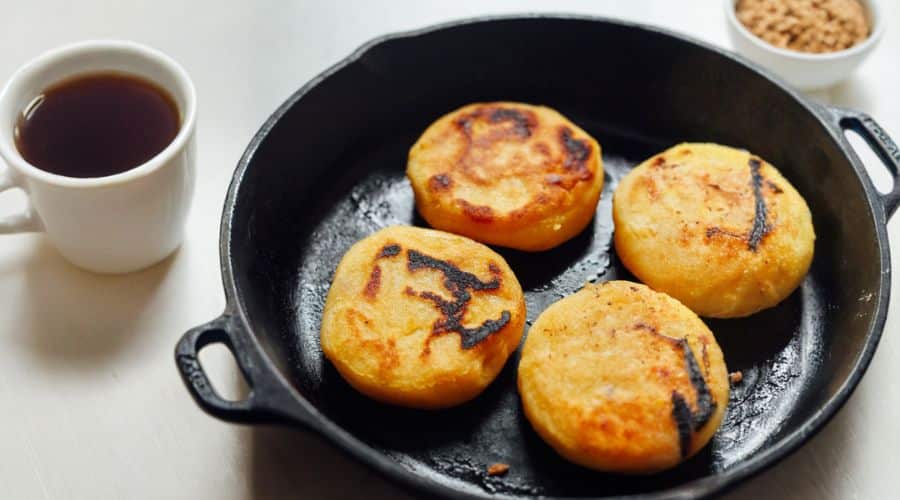
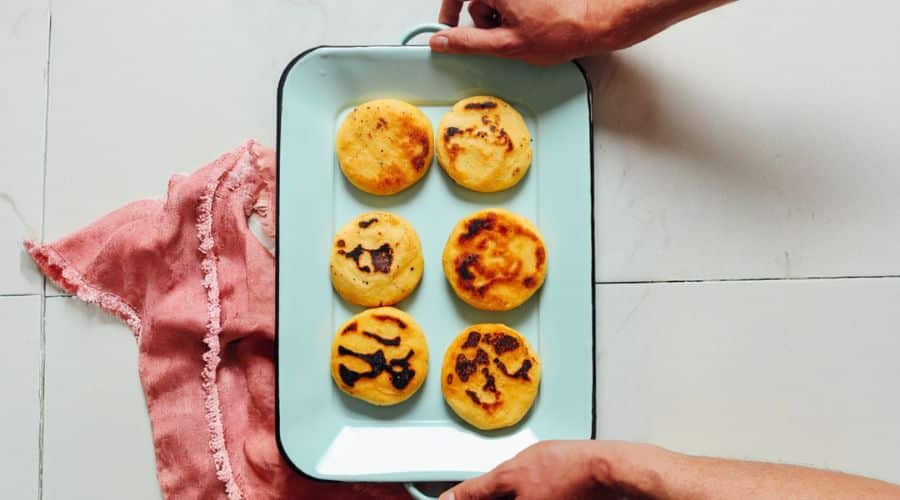
This vibrant arepa recipe shines as a gluten-free, vegan delight that’s both nourishing and simple to prepare.
Crafted from areparina, a special pre-cooked corn flour blend, these arepas deliver a satisfying texture with a naturally mild flavor that pairs beautifully with countless fillings.
Rich in complex carbohydrates and plant-based protein, they provide steady energy without the heaviness of refined flours.
Using heart-healthy fats like avocado or coconut oil keeps the recipe low in saturated fat while boosting its nutrient profile.
The straightforward technique makes this dish ideal for busy weeknights or meal prep, while the option to bake and pan-fry yields a perfect crust with a tender interior.

Whether stuffed or served plain, these arepas offer a wholesome, versatile base that’s great for Latin-inspired meals or casual snacks.
Must-Have Tools for Perfect Results:
Cast Iron Skillet
Essential for creating a beautifully crisp, golden crust on each arepa. Its superior heat retention ensures even cooking and versatile use beyond this recipe, from searing meats to baking.
Mixing Bowl
A large, durable bowl is needed to combine water, salt, and areparina efficiently. It doubles as a prep station for countless baking and cooking tasks.
Measuring Cups and Spoons
Accurate measurement guarantees the right dough consistency for moldable, crack-free arepas. These tools are indispensable for any kitchen recipe precision.
Parchment Paper
Lining the baking sheet with parchment prevents sticking and promotes easy cleanup, making baking hassle-free. It’s a versatile kitchen staple for roasting and baking alike.
Whisk or Hands
For mixing and kneading the dough, a sturdy whisk helps incorporate ingredients smoothly, but hands give the best tactile feedback, ensuring perfect dough texture every time.

30 Minutes Homemade Arepas
Equipment
- 1 Large Mixing Bowl
- 1 Cast Iron Skillet or Non-Stick Pan
- Measuring Cups and Spoons
- Baking Sheet
- Parchment Paper
Ingredients
- 2 cups warm water
- 1 heaped teaspoon sea salt
- 2 cups areparina masarepa – blend of white and yellow preferred
- 1 tablespoon avocado coconut, or vegan butter (optional, for cooking)
Instructions
- Prepare Your Workspace and Ingredients: Preheat your oven to 350°F (176°C) and line a baking sheet with parchment paper to prevent sticking during baking. Measure out all your ingredients carefully, especially the areparina flour and salt, so you have everything ready. Pour the warm water into a large mixing bowl, then add the sea salt and stir gently until it completely dissolves, creating a lightly salted base for your dough.
- Mix and Knead the Dough: Gradually add the areparina flour into the salted water a little at a time, using either a whisk or your hands to combine thoroughly. Continue incorporating the flour until you reach a soft, moldable dough that doesn’t stick excessively to your fingers but still holds moisture well—aim for a consistency that allows you to roll it into a ball.Cover the dough with a clean kitchen towel and let it rest for 5 minutes; this step helps the flour fully hydrate, resulting in a tender final texture.
- Shape the Arepas: Uncover the rested dough and pinch off a generous handful, rolling it firmly between your palms to form a smooth ball. Place the ball on a clean surface and gently press it down to shape a disc roughly 1/2 inch thick—if you prefer thinner, crispier arepas, press to about 1/4 inch instead. If the edges crack during shaping, lightly moisten your fingers with water and smooth over the cracks to seal them, ensuring even cooking and an attractive appearance.
- Pan-Fry for Golden Crust: Heat a cast-iron skillet or non-stick pan over medium-high heat and add a small amount of avocado, coconut oil, or vegan butter to coat the surface lightly. Once the fat is shimmering but not smoking, place the shaped arepas in the pan with some space between each to prevent sticking. Cook each side for 2 to 3 minutes until a deep golden-brown crust forms, flipping carefully with a spatula to avoid breaking the delicate discs.
- Bake for Perfect Finish: Transfer the browned arepas to your parchment-lined baking sheet and place them in the preheated oven. Bake for 15 to 18 minutes, allowing the arepas to puff slightly and develop a richer golden color, which ensures they’re cooked through and have a fluffy interior. Once baked, remove from the oven and let them cool for 5 to 10 minutes before slicing or stuffing to avoid a doughy center and to enhance flavor.
- Serve and Enjoy Creatively: Slice each arepa halfway through, leaving a hinge on one side to create a pocket perfect for stuffing with your favorite fillings like black beans, guacamole, or vegan barbacoa. Alternatively, enjoy them plain with a smear of vegan butter and a drizzle of maple syrup for a simple, satisfying treat. Store any leftovers wrapped tightly in the refrigerator for up to 3 days or freeze for up to a month, reheating gently in the oven to retain their crisp texture.
Notes
- Use areparina (masarepa) specifically, as it is a pre-cooked corn flour essential for authentic arepas; regular cornmeal or masa harina will change the texture.
- Adjust water gradually when mixing dough; too much will make it sticky, too little causes cracks.
- Resting the dough for 5 minutes improves hydration and makes shaping easier.
- Pan-frying before baking helps develop a crisp crust and locks moisture inside.
- Arepas can be made smaller or larger depending on your serving needs.
- Optional vegan butter or oil adds richness but can be omitted for oil-free cooking.
- Store cooked or uncooked arepas in the freezer for up to one month.
- For gluten-free flour substitutes in place of areparina, see recipe notes for flour blend recommendations.
Chef’s Secrets for Flawless Arepas
Achieving perfect arepas lies in the dough’s moisture balance and cooking technique.
Always add areparina slowly to warm salted water and mix by hand, feeling for a pliable but not sticky dough.
Resting the dough is critical—it allows the corn flour to fully absorb moisture, creating a tender interior.
When shaping, don’t stress over small cracks; simply seal them gently with damp fingers to avoid breakage.
Use a cast iron or heavy non-stick skillet heated properly to develop a golden, crispy crust on both sides before baking.
This dual cooking method locks in moisture and provides the ideal texture contrast between crispy outside and soft inside.
For extra flavor, experiment by blending white and yellow areparina or adding a pinch of baking powder for a slightly puffier arepa.
Serving Suggestions to Elevate Flavor
Arepas are wonderfully versatile, pairing well with savory or sweet fillings.
Classic options include black beans, avocado, sautéed vegetables, or vegan barbacoa for hearty meals.
For a quick snack, spread vegan butter and drizzle maple syrup inside warm arepas for a comforting treat. You can slice them open and fill them like pita pockets or simply serve as a side to soups and salads.
For festive occasions, try stuffing with seasoned tofu scramble or plant-based cheeses.
Garnish with fresh herbs, hot sauce, or pickled vegetables to add brightness and texture.
The mild corn flavor acts as a neutral canvas, so feel free to customize your fillings based on seasonal produce or personal preference.
Storage Tips for Freshness and Convenience
Cooked arepas keep well in the refrigerator for 3 to 4 days when stored in an airtight container or wrapped tightly in plastic wrap.
To enjoy later, reheat in a 350°F (176°C) oven until warmed through and crisp on the outside.
You can also freeze uncooked or cooked arepas for up to one month; if frozen raw, thaw them completely before cooking to ensure even texture.
Avoid microwaving reheated arepas, as this tends to make them rubbery.
For meal prep, consider cooking a batch ahead of time, slicing, and freezing them with parchment paper between layers for easy portioning.
This recipe’s simple ingredients and prep make it ideal for batch cooking and storing for quick meals.
Frequently Asked Questions About Arepas
- What is areparina and can I substitute it?
Areparina is a pre-cooked corn flour specifically used for making arepas, different from regular cornmeal or masa harina. If unavailable, you can substitute with a mix of masa harina, coconut flour, and gluten-free flour or arrowroot starch as described in the notes, but results may vary slightly in texture. - Can I make these arepas oil-free?
Yes! The vegan butter or oil is optional and primarily helps with browning and flavor. Use a high-quality non-stick or well-seasoned cast iron pan and cook over medium heat to prevent sticking. - How do I know if the dough has the right consistency?
The dough should be moist enough to form a smooth ball without sticking excessively to your hands. If it cracks a lot when shaping, add 1-2 tablespoons of water gradually until pliable but not sticky. - Can I freeze arepas?
Absolutely! Arepas freeze well either cooked or uncooked for up to one month. Thaw uncooked arepas before cooking for best results, and reheat cooked ones in the oven to retain their crispy exterior. - What fillings work best with arepas?
Arepas pair beautifully with savory fillings like black beans, grilled veggies, guacamole, or plant-based proteins like vegan barbacoa. They also work with sweet spreads such as vegan butter and maple syrup for a comforting snack.
This recipe is inspired by minimalistbaker and has been carefully refined to enhance clarity, streamline preparation steps, and ensure accurate results. We’ve also included health benefits, nutritional highlights, and Must-Have Tools to help you get the best results every time you cook.


