These mini muffins are the ultimate bite-sized treat—soft, fluffy, and ready in just over 20 minutes.
Packed with wholesome ingredients, they deliver a balance of energy-boosting carbs, a touch of protein, and satisfying fats for a well-rounded snack.
With less saturated fat than traditional bakery muffins, they’re a lighter option that’s perfect for everyday cooking—whether you’re meal-prepping for the week, packing school lunches, or enjoying a quick breakfast on the go.
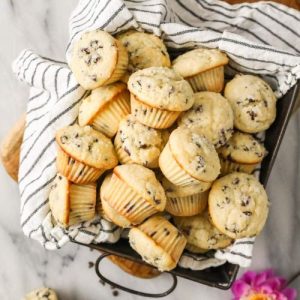
Fluffy Mini Muffins
Equipment
- 1 Mini muffin tin (24-count)
- 15 Paper liners (per batch)
- 1 large mixing bowl
- 1 Medium mixing bowl (or large measuring cup)
- 1 ½ tablespoon cookie scoop
- 1 whisk
- 1 spatula
Ingredients
- 1 ¾ cups 220 g all-purpose flour
- ¾ cup 150 g granulated sugar
- 2 teaspoons baking powder
- ¼ teaspoon baking soda
- ½ teaspoon salt
- 1 cup 240 g sour cream
- ½ cup 113 g unsalted butter, melted
- 1 large egg
- 1 teaspoon vanilla extract
- 1 cup 170 g mini chocolate chips
- Coarse sugar for sprinkling, optional
Instructions
- Prepare the oven and muffin pan: Begin by preheating your oven to 375°F (190°C). This ensures the oven is fully heated by the time your batter is ready, which is key for achieving tall, fluffy muffins. While the oven is heating, line a 24-cup mini muffin tin with 15 paper liners, leaving empty spaces between them in an alternating pattern. This spacing encourages better airflow around each muffin, helping them rise higher and bake evenly. Set the tin aside.
- Combine the dry ingredients: In a large mixing bowl, whisk together the all-purpose flour, granulated sugar, baking powder, baking soda, and salt. Whisking not only mixes the ingredients evenly but also helps aerate the flour slightly, which gives the muffins a lighter texture. Be sure there are no clumps of flour or sugar remaining before moving to the next step.
- Blend the wet ingredients: In a separate medium bowl or a large liquid measuring cup, whisk the sour cream, melted butter, egg, and vanilla extract until fully combined. The mixture may look slightly separated due to the butter, but this is completely normal. Keep whisking until everything looks as smooth as possible—this step ensures moisture and flavor are evenly distributed throughout the batter.
- Bring wet and dry mixtures together: Pour the wet mixture into the bowl of dry ingredients. Using a spatula, gently fold the two together. The batter will look thick and somewhat dry at first—don’t worry, this is exactly how it should be. Stir slowly and carefully to avoid overmixing, which can make muffins dense instead of soft.
- Add the chocolate chips: Once the batter is about halfway mixed (you should still see some streaks of flour), add in the mini chocolate chips. Continue folding gently until everything is combined and no dry patches of flour remain. At this stage, the batter should be thick but scoopable. The chocolate chips should be evenly distributed, so each muffin gets a perfect pop of chocolate.
- Portion the batter into the pan: Using a 1 ½ tablespoon cookie scoop, portion the batter into the prepared muffin liners. The liners should be filled nearly to the top, which helps create a rounded, bakery-style muffin top. If you like a bit of extra crunch and sweetness, sprinkle a small pinch of coarse sugar on top of each filled muffin cup before baking.
- Bake the muffins: Place the muffin tin on the center rack of your preheated oven. Bake for 12–13 minutes, or until the muffin tops are lightly golden and a toothpick inserted into the center comes out clean or with just a few moist crumbs. Avoid overbaking, as it can dry out the muffins—pull them from the oven as soon as they’re set and fluffy.
- Cool and prepare the next batch: Allow the muffins to rest in the pan for about 5 minutes. This brief cooling period makes them easier to remove without breaking. Carefully transfer them to a wire cooling rack to finish cooling. If you still have batter left, let the muffin pan cool before re-lining it with paper liners for the second batch. Don’t worry if the batter sits covered at room temperature while you wait—it actually helps the second round bake with taller, more domed tops.
Notes
- This recipe makes 30 mini muffins, so you’ll need to bake them in two batches. Leaving empty spaces in the muffin tin by alternating the liners helps the muffins rise taller and bake more evenly.
- The batter may look quite thick compared to standard muffin recipes—this is normal! The result is a soft, fluffy muffin with a beautifully domed top.
- Coarse sugar is optional but highly recommended for a bakery-style look and subtle crunch. If you don’t have coarse sugar, a light sprinkle of regular sugar works fine, or you can skip it altogether.
- Muffins are best enjoyed warm from the oven but also freeze wonderfully, making them perfect for meal-prep or quick lunchbox treats.
Chef’s Secrets for Perfect Muffins
The secret to fluffy, tender mini muffins lies in not overmixing the batter.
Muffin batter is meant to be thick, and stirring just until the flour disappears keeps the texture soft and airy.
For best results, fold the chocolate chips in when the batter is only halfway combined—this prevents streaks of flour while ensuring even distribution of chips.
Another tip is to alternate muffin liners in the pan, leaving gaps so the heat circulates evenly and encourages a taller rise.
If you want bakery-style results, don’t be shy about filling the muffin cups nearly full—this is how you get that signature domed top.
Serving Suggestions for Every Occasion
These mini muffins are versatile enough for any time of day.
Serve them fresh out of the oven for a cozy breakfast alongside a cup of coffee or tea.
They also make excellent lunchbox additions or quick after-school snacks that kids love.
For a brunch spread, arrange them on a platter with fresh fruit and yogurt for a balanced meal.
If you want to elevate them further, drizzle with a light glaze, dip the tops in melted chocolate, or serve warm with a pat of butter for extra indulgence.
They’re equally at home as a simple weekday snack or a sweet bite on special occasions.
Storage Tips for Freshness and Flavor
To keep your mini muffins tasting their best, store them in an airtight container at room temperature for up to three days.
If you’d like to extend their life, refrigerating them works as well, though it may slightly change their texture.
For long-term storage, these muffins freeze beautifully simply wrap each muffin tightly in plastic wrap, then place them in a freezer-safe bag or container.
They’ll keep well for up to 2–3 months.
To enjoy, thaw at room temperature or give them a quick warm-up in the microwave or oven to bring back that fresh-from-the-oven softness.
Frequently Asked Questions
1. Why is the batter so thick?
This recipe uses sour cream and melted butter, which naturally create a thicker batter. Don’t worry—the muffins bake up soft, moist, and fluffy despite the dense-looking mixture.
2. Can I use regular-sized muffin tins?
Yes, you can! Simply divide the batter into a standard muffin pan and increase the baking time to about 16–18 minutes. Keep an eye on them and use the toothpick test to check for doneness.
3. What if I don’t have sour cream?
Plain Greek yogurt is a great substitute for sour cream and provides the same creamy texture and tangy flavor. Regular yogurt works too, but Greek yogurt offers better structure and moisture.
4. How can I make these healthier?
For a lighter version, try using half whole wheat flour for added fiber, swap some sugar with honey or maple syrup, or use dark chocolate chips instead of milk chocolate.
Each option adds nutrition while keeping them delicious.
5. Can I add mix-ins besides chocolate chips?
Absolutely! Mini muffins are very adaptable. Try blueberries, raspberries, chopped nuts, or even a swirl of peanut butter or Nutella for a fun variation.
Just keep the total add-ins to about one cup so the muffins stay balanced.