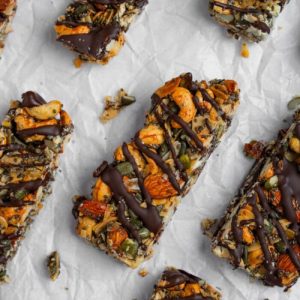
These homemade nut and seed energy bars are a wholesome, protein-packed snack perfect for busy days.
Rich in plant-based protein, fiber, and heart-healthy fats, they provide sustained energy without refined sugars.
Easy to prepare and fully customizable, they make a satisfying breakfast, post-workout treat, or grab-and-go snack, ideal for everyday cooking and meal prep.
Nut and Seed Energy Bars
Equipment
- 1 Baking sheet
- Baking parchment
- 1 large mixing bowl
- 1 spatula
- 1 cutting board
- 1 sharp knife
Ingredients
- 1 cup slivered almonds
- 1½ cups cashews
- 1 cup pumpkin seeds
- 1 cup whole almonds
- ½ cup chia seeds
- ½ cup large flake dried coconut
- 1 tsp vanilla extract
- ½ cup maple syrup
- 1 tbsp olive oil
- ½ tsp sea salt
Optional Toppings:
- ½ cup dark chocolate melted
- 1 tbsp coconut oil
Instructions
- Preheat and Prepare Pan: Begin by preheating your oven to 325°F (160°C) to ensure even baking. While the oven warms, line a standard baking sheet with parchment paper. The parchment not only prevents sticking but also makes cleanup easier. Set the prepared baking sheet aside within reach so you can transfer the mixture smoothly after combining the ingredients.
- Combine Nuts and Seeds: In a large mixing bowl, add the slivered almonds, whole almonds, cashews, pumpkin seeds, chia seeds, and coconut flakes. Gently toss them together with a spatula or your hands until all the ingredients are evenly mixed. This step ensures that every bite will have a consistent crunch and flavor. Take a moment to appreciate the aroma of the fresh nuts and coconut—they set the stage for a delicious treat.
- Mix Wet Ingredients: In a small measuring cup or separate bowl, combine the maple syrup, olive oil, and vanilla extract. Add the sea salt to enhance the natural flavors of the nuts and seeds. Pour this liquid mixture over the nut and seed blend. Using a spatula, stir thoroughly until the mixture is fully coated. Allow it to sit for 5 minutes; during this time, the chia seeds will absorb moisture and slightly thicken, helping the bars hold together better after baking.
- Transfer and Shape Mixture: Lightly grease a baking pan or line it with parchment. Carefully transfer the nut and seed mixture into the pan. Using the back of a spoon, spatula, or even your hands (gently pressing down), spread the mixture evenly across the pan. Press it firmly and compactly; this step is crucial to ensure the bars hold their shape when sliced. Smooth the surface as much as possible to create uniform bars after baking.
- Bake Until Golden: Place the pan in the preheated oven and bake for 25 to 30 minutes. Keep an eye on the color; the mixture should turn golden brown, and the edges may darken slightly. The aroma of toasted nuts will fill your kitchen, signaling that the bars are nearing readiness. Avoid overbaking to prevent dryness, as you want the bars to remain chewy yet firm.
- Cool Completely: Remove the pan from the oven and allow it to cool at room temperature for at least one hour. Cooling is essential for the bars to set properly; cutting them too soon may cause crumbling. Patience here rewards you with perfectly formed, cohesive bars. If you are in a hurry, you can place the pan in the fridge to speed up the cooling process slightly.
- Slice Into Bars: Once the mixture is fully cooled, carefully transfer the slab to a cutting board. Using a sharp knife, slice the block into 16 even bars. Take your time with this step to ensure clean edges and uniform portions. If desired, you can cut the bars into smaller or larger sizes based on your preference.
- Prepare Optional Chocolate Topping: For an indulgent finishing touch, melt the dark chocolate with the coconut oil in a microwave-safe bowl. Heat in 20-second intervals, stirring between each, until smooth and glossy. Drizzle the chocolate over the cooled bars using a spoon or piping bag. Allow the chocolate to set completely before storing or serving. This step is optional but adds a rich flavor contrast and visual appeal.
- Store Properly: Place the finished bars in an airtight container. Store them in the refrigerator for up to four days. Proper storage keeps them fresh, maintains their crunch, and prevents the chocolate drizzle from melting or becoming sticky. These bars are perfect for meal prep, quick snacks, or a portable, protein-packed energy boost.
Notes
- Feel free to swap out nuts or seeds based on your preferences or pantry availability. For larger nuts like pecans, chopping them slightly helps the bars hold together better.
- If you prefer a stickier texture, replace maple syrup with brown rice syrup or honey.
- Add mix-ins like dried cranberries, raisins, or cacao nibs for extra flavor and texture, making sure the mixture still holds together well.
- To save time or simplify the recipe, fold in chocolate chips directly into the mixture instead of melting and drizzling.
- Ensure bars are completely cooled before slicing to avoid crumbling and achieve clean, uniform pieces.
Chef’s Secrets: Expert Techniques For Success
Achieving perfectly textured energy bars relies on attention to detail.
Toasting nuts lightly before combining them enhances their natural flavor and adds a subtle crunch.
When mixing wet and dry ingredients, ensure every nut and seed is evenly coated, which helps the bars stick together.
Press the mixture firmly into the pan; compacting it well prevents crumbling after baking.
Allowing chia seeds to absorb moisture before baking improves binding, creating bars that hold their shape while staying chewy inside.
If using chocolate, melt it slowly in short bursts and stir frequently to prevent burning and achieve a smooth, glossy finish.
Serving Suggestions: Delicious Ways To Enjoy
These bars are versatile and can be enjoyed at any time of the day.
Serve them as a quick breakfast with a dollop of nut butter or alongside a cup of coffee for a satisfying mid-morning snack.
They’re perfect post-workout, providing a combination of protein, fiber, and healthy fats to refuel energy levels.
For a more indulgent treat, drizzle extra melted chocolate or sprinkle with shredded coconut before serving.
You can also cut them into smaller bite-sized pieces for on-the-go snacks or pack them in lunchboxes for a convenient, nutrient-dense option.
Storage Tips: Keep Bars Fresh Longer
To maintain the freshness and texture of your energy bars, store them in an airtight container in the refrigerator for up to four days.
If you’d like to extend shelf life, freeze the bars individually wrapped in parchment paper for up to a month.
When ready to eat, simply thaw at room temperature or briefly microwave for a few seconds.
Avoid leaving bars at room temperature for prolonged periods, as the natural oils in nuts may become soft or rancid.
Always slice only after the mixture has completely cooled to prevent crumbling.
Frequently Asked Questions
1. Can I use other nuts or seeds?
Absolutely! Almonds, pecans, walnuts, sunflower seeds, or a mix of your favorite nuts and seeds work well. Chop larger nuts for easier slicing and binding.
2. How can I make bars stickier?
Use brown rice syrup or honey instead of maple syrup. Press the mixture firmly into the pan and allow chia seeds to thicken to improve cohesion.
3. Are these bars suitable for vegans?
Yes! The recipe is fully plant-based. Ensure the chocolate topping is dairy-free if you’re keeping it vegan-friendly.
4. Can I make these bars ahead of time?
Definitely. They store well in the fridge for up to four days and can be frozen for longer storage. Pre-slice or wrap individually for convenience.
5. How can I avoid the bars crumbling?
Cool the baked mixture completely before slicing. Firmly pressing the mixture into the pan before baking and letting chia seeds thicken during prep helps the bars hold together perfectly.