These oatmeal chocolate chip bars are a wholesome twist on a classic sweet treat—soft, chewy, and packed with flavor in every bite.
With fiber from oats, plant-based protein, and a balance of good fats, they’re a satisfying dessert or snack you can feel good about.
Quick to prepare, freezer-friendly, and perfect for everyday baking, these bars make an easy go-to recipe for families, gatherings, or weekly meal prep.
Oatmeal Chocolate Chip Bars
Equipment
- 1 × 9×13-inch baking pan
- 1 × electric hand mixer or stand mixer
- 2 × large mixing bowls
- 1 × spatula
- 1 × measuring cups set
- 1 × measuring spoons set
- 1 × parchment paper (optional, for lining pan)
Ingredients
- 1 cup 226 g salted butter, softened
- 2 ⅓ cups 465 g light brown sugar, packed
- 2 large eggs
- 1 teaspoon vanilla extract
- 2 ½ cups 315 g all-purpose flour
- 1 teaspoon salt
- 1 teaspoon baking soda
- 1 teaspoon baking powder
- 1 ½ cups 135 g quick oats
- 2 cups 340 g mini chocolate chips
- ¼ cup 45 g semi-sweet chocolate chips, for topping
Instructions
- Prepare the Baking Pan: Begin by preheating your oven to 350°F (175°C) so it’s fully ready when the batter is mixed. Lightly coat a 9×13-inch baking pan with nonstick cooking spray to prevent sticking. For easier removal and cleaner slices, you may also line the pan with parchment paper, allowing a slight overhang on the edges to lift the bars out once baked.
- Cream the Butter and Sugar: In a large mixing bowl, place 1 cup softened salted butter and 2 ⅓ cups packed light brown sugar. Using an electric mixer on medium speed, beat the mixture for 2–3 minutes until it turns creamy, smooth, and slightly lighter in color. This step is crucial because properly creaming the butter and sugar incorporates air, which gives the bars a tender and chewy texture instead of being too dense.
- Incorporate the Eggs and Vanilla: Crack two large eggs into the bowl, one at a time, mixing well after each addition. Then add 1 teaspoon vanilla extract. Continue to beat for another 1–2 minutes until the mixture is glossy and uniform. The eggs act as a binder while the vanilla enhances the overall flavor, balancing the sweetness of the sugar and richness of the butter.
- Mix the Dry Ingredients Separately: In a second large bowl, whisk together the 2 ½ cups all-purpose flour, 1 teaspoon salt, 1 teaspoon baking soda, and 1 teaspoon baking powder. This ensures the leavening agents and salt are evenly distributed throughout the flour, preventing clumps. Properly mixing dry ingredients beforehand helps the batter come together more smoothly later, avoiding overmixing, which can lead to tough bars.
- Combine Wet and Dry Mixtures: Gradually add the dry ingredient mixture into the wet mixture, mixing on low speed or by hand with a sturdy spatula. The batter will begin to look very thick and heavy—that’s exactly how it should be. Continue mixing just until no streaks of flour remain. Avoid overmixing at this stage, as doing so may cause the bars to become dense or tough after baking.
- Add the Oats and Chocolate Chips: Fold in 1 ½ cups quick-cook oats using a spatula or wooden spoon until evenly distributed throughout the dough. The oats give the bars their chewy, hearty bite and add a boost of fiber. Next, gently stir in 2 cups mini chocolate chips, making sure the chips are spread consistently so every bar is studded with rich chocolate in each bite.
- Spread Batter into the Pan: Transfer the thick cookie dough into your prepared baking pan. Because the batter is heavy, it may not spread on its own—use a spatula to press and smooth it evenly into all corners of the pan. For a bakery-style finish, sprinkle ¼ cup semi-sweet chocolate chips evenly over the surface and gently press them into the dough. This creates an appealing presentation and ensures extra chocolate flavor on top.
- Bake to Golden Perfection: Place the pan in the preheated oven and bake for 30 minutes. The bars are done when the edges are lightly golden brown and the center looks slightly puffed. The surface should no longer look wet, though the inside will still feel very soft. Keep in mind that the bars continue to cook as they cool, so avoid overbaking to maintain their soft, chewy texture.
- Cool Before Slicing: Remove the pan from the oven and allow the bars to cool in the pan for at least 20–30 minutes. This resting period is important—cutting too soon may cause the bars to crumble since they are very soft when hot. Once cooled, use a sharp knife to slice into 18 even squares or rectangles, depending on your serving preference.
- Serve, Store, and Enjoy: Enjoy the oatmeal chocolate chip bars slightly warm for a gooey treat, or let them cool completely for cleaner slices. Store leftovers in an airtight container at room temperature for up to 4 days. For longer storage, wrap bars individually in plastic wrap and freeze in a resealable bag for up to 8 weeks—perfect for meal prep or lunchbox treats.
Notes
- Butter Temperature Matters: Softened butter blends better with sugar, creating a creamier, more cohesive batter. Avoid melted butter—it may make the bars too dense.
- Sugar Swap Options: Light brown sugar adds sweetness and moisture. Dark brown sugar can be used for a richer, deeper flavor.
- Oat Options: Quick-cook oats make the bars soft and chewy. Rolled oats can be used if processed briefly in a food processor.
- Chocolate Chips: Mini chocolate chips distribute evenly for perfect chocolate bursts. You can mix in nuts, butterscotch chips, or dried fruit for variety.
- Mixing Caution: Avoid overmixing once dry ingredients are added; it can toughen the bars. Fold gently until fully combined.
Chef’s Secrets for Perfect Bars
To achieve bars that are both soft and chewy, the secret lies in layering flavors and textures.
Properly creaming butter and sugar introduces air, giving a lighter, tender bite.
Adding chocolate chips last ensures even distribution without breaking the batter’s structure.
Pressing extra chocolate on top before baking creates a professional, glossy finish.
Finally, allowing bars to cool fully in the pan ensures clean, firm slices and prevents crumbling.
Serving Suggestions to Impress Guests
These bars are versatile and can be enjoyed warm or room temperature.
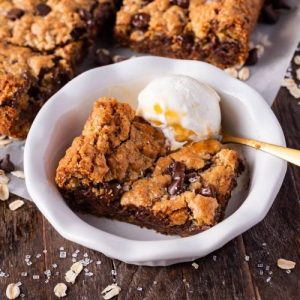
Serve slightly warm with a glass of milk, a scoop of vanilla ice cream, or a drizzle of melted chocolate for an indulgent dessert.
For a lighter snack, pair a bar with fresh fruit or Greek yogurt.
They also make a convenient grab-and-go treat for lunchboxes, afternoon coffee breaks, or casual gatherings with friends.
Storage Tips for Freshness and Flavor
Store the bars in an airtight container at room temperature for up to 4 days.
For longer storage, individually wrap bars in plastic wrap or parchment and freeze in a resealable freezer bag for up to 8 weeks.
To enjoy frozen bars, let them thaw at room temperature for 30–60 minutes or briefly microwave for 10–15 seconds to regain a soft, chewy texture.
Frequently Asked Questions
1. Can I use rolled oats instead of quick oats?
Yes! Rolled oats can replace quick oats, but for a softer texture, process them briefly in a food processor to reduce size slightly. This prevents the bars from being too chewy or heavy.
2. Can I make this recipe gluten-free?
Absolutely! Substitute the all-purpose flour with a gluten-free flour blend (like King Arthur or Bob’s Red Mill). Ensure your oats are certified gluten-free to maintain the recipe’s texture and flavor.
3. Can I add nuts or other mix-ins?
Yes. Chopped walnuts, pecans, or dried fruits can be folded into the batter for extra flavor and texture. Aim for about 1 cup of additional mix-ins to avoid overcrowding the pan.
4. How do I prevent bars from sticking to the pan?
Line the pan with parchment paper and lightly grease it. This creates a nonstick surface and allows you to lift the bars out easily once cooled.
5. How can I keep the bars chewy instead of dry?
Do not overbake. Remove the bars when the edges are golden and the center is slightly puffed. Allow them to cool in the pan to firm up. Overbaking is the main cause of dryness.