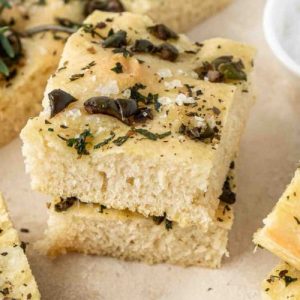
This Olive and Herb Focaccia is a soft, chewy bread with a golden, crispy top, bursting with savory olives and aromatic herbs.
Naturally rich in plant-based protein and fiber, it contains heart-healthy fats from olive oil and low saturated fat.
Quick and easy to prepare, it’s perfect for everyday meals, sandwiches, or as a wholesome side dish.
Olive and Herb Focaccia
Equipment
- 1 Stand Mixer with Dough Hook Attachment
- 1 large mixing bowl
- 1 Kitchen Towel or Plastic Wrap
- 1 9×13 inch (20cm x 30cm) baking tray
- 1 Measuring cups and spoons
- 1 wooden spoon or spatula
- 1 pastry brush
Ingredients
For the Dough:
- 1 cup warm water
- 1 teaspoon dry yeast
- 1 teaspoon honey
- 2 ½ cups plain flour or all-purpose flour
- 2 tablespoons olive oil plus extra for greasing
- 1 teaspoon salt
For the Topping:
- 1 tablespoon olive oil
- 1 teaspoon flakey sea salt
- 2 teaspoons dried herbs or 2 tablespoons fresh herbs, chopped
- ¼ cup olives sliced or chopped
Instructions
- Activate the Yeast: In a medium bowl, pour 1 cup of warm water (not hot—just comfortably warm to the touch). Sprinkle in 1 teaspoon of dry yeast and 1 teaspoon of honey, which serves as a gentle fuel for the yeast. Stir lightly to combine. Cover the bowl with a clean kitchen towel and let it rest for about 10 minutes, or until the mixture becomes frothy and bubbly. This signals that the yeast is alive and ready to work.
- Combine Dough Ingredients: In the bowl of a stand mixer fitted with a dough hook, add 2 ½ cups of plain flour, 2 tablespoons of olive oil, and 1 teaspoon of salt. Slowly pour in the foamy yeast mixture. Start mixing on low speed until the ingredients begin to come together, forming a shaggy dough. Once the flour is mostly incorporated, increase the speed to medium and continue mixing until the dough forms a cohesive ball.
- Knead the Dough: Continue kneading the dough on low speed for 5 minutes in the mixer. Then, transfer it to a lightly floured surface and knead by hand for another 5 minutes. Push, fold, and stretch the dough until it feels smooth, elastic, and slightly tacky to the touch. Proper kneading ensures the bread develops a chewy, airy texture.
- First Rise: Lightly coat the inside of a clean mixing bowl with olive oil. Place the dough ball into the greased bowl, turning it so all sides are lightly coated in oil. Cover the bowl with plastic wrap or a damp kitchen towel. Let the dough rise in a warm, draft-free area for about 1 hour, or until it doubles in size. This first rise allows the dough to develop flavor and texture.
- Deflate and Prepare for Second Rise: Once the dough has doubled, gently punch it down to release trapped air. Transfer it back to a lightly floured surface and knead briefly for 1 minute, just to make it manageable. This step ensures an even crumb in the finished focaccia.
- Shape the Dough: Grease a 9×13 inch (20cm x 30cm) baking tray generously with olive oil. Lightly roll the dough into a rough rectangle slightly smaller than the pan. Place it in the tray and press it gently to fit the pan. Use your fingertips to create dimples across the dough’s surface—these small indentations help the focaccia hold its toppings and develop a textured, golden crust.
- Second Rise: Cover the tray with a kitchen towel and allow the dough to rise again for 45–60 minutes, or until it reaches the edges of the pan. The dough should feel soft and pillowy, ready to absorb the toppings and bake to perfection.
- Preheat Oven and Add Toppings: Preheat your oven to 180°C (356°F) so it’s fully hot when the dough is ready. Brush the risen dough generously with 1 tablespoon of olive oil. Sprinkle 1 teaspoon of flakey sea salt evenly across the top. Add your choice of ¼ cup sliced or chopped olives and 2 teaspoons of dried herbs (or 2 tablespoons of fresh chopped herbs) for flavor and visual appeal. Make sure the toppings are evenly distributed for consistent taste in every bite.
- Bake the Focaccia: Place the tray in the preheated oven and bake for approximately 20 minutes. Keep an eye on the focaccia as it bakes—the top should turn a beautiful golden brown and feel slightly firm when gently pressed. The aroma of herbs and olive oil should fill your kitchen, signaling it’s ready.
- Cool and Serve: Once baked, remove the focaccia from the oven and allow it to cool in the pan for 5–10 minutes. Carefully transfer it to a cutting board or serve directly from the pan. Slice into squares or rectangles while still slightly warm. Enjoy it as a side, snack, or for sandwiches. Leftovers can be reheated or toasted to restore the crisp top.
Notes
- Flour Choice: All-purpose flour works perfectly, but using bread flour will give your focaccia a slightly chewier texture. Both options yield a soft, flavorful bread.
- Water Temperature: Warm water is crucial to activate the yeast without killing it. Aim for a temperature where you can comfortably hold your finger in the water for a few seconds.
- Olive Oil: Don’t skimp on olive oil. It enhances flavor, ensures a moist crumb, and helps create the golden crust that makes focaccia so irresistible.
- Herb Variations: Fresh herbs like rosemary, thyme, parsley, or oregano can be combined to suit your taste. Dried herbs also work well if fresh isn’t available.
- Toppings Flexibility: Besides olives, consider sun-dried tomatoes, caramelized onions, or a light drizzle of pesto for creative variations.
Chef’s Secrets: Expert Baking Insights
For the best focaccia, timing and handling of the dough are key.
Gentle kneading ensures a soft, airy crumb, while creating dimples in the dough before baking helps hold toppings and enhances texture.
Allowing a full second rise develops a richer flavor and a tender, pillowy interior.
Brushing generously with olive oil before baking gives the crust a golden sheen and a deliciously crisp finish.
For extra flair, lightly sprinkle coarse sea salt on top after baking to enhance flavor.
Serving Suggestions: Delicious Ways to Enjoy
This olive and herb focaccia is incredibly versatile.
Serve it warm alongside soups, salads, or roasted vegetables.
Slice it horizontally for gourmet sandwiches or tear pieces for a bread basket at dinner parties.
Pairing it with a simple drizzle of balsamic glaze, herb-infused olive oil, or a side of hummus can elevate the experience.
It also works beautifully as a breakfast option with avocado, cheese, or even a light spread of nut butter for a savory twist.
Storage Tips: Keep Focaccia Fresh
Focaccia is best enjoyed fresh, but it can be stored for convenience.
Keep it in an airtight container at room temperature for up to 2 days.
For longer storage, wrap tightly in plastic wrap and freeze for up to a month.
Reheat frozen or leftover focaccia in a 180°C (356°F) oven for 5–10 minutes to restore its crisp top and soft interior.
Avoid refrigerating, as this can dry out the bread and affect texture.
Frequently Asked Questions
1. Can I use whole wheat flour instead?
Yes! Substitute up to half of the plain flour with whole wheat flour for a nuttier flavor and extra fiber. The texture may be slightly denser, so allow for a slightly longer rise.
2. How do I make this recipe vegan?
Simply replace honey with an equal amount of sugar or maple syrup. All other ingredients are naturally plant-based.
3. Can I make focaccia ahead of time?
Absolutely. You can prepare the dough and let it rise, then refrigerate for up to 12 hours before baking. This can deepen the flavor.
4. Why isn’t my focaccia rising properly?
This usually happens if the yeast is old or the water is too hot or cold. Always check the expiration of your yeast and use warm water around 40–45°C (104–113°F).
5. Can I add other toppings besides olives?
Yes! Focaccia is highly adaptable. Try sun-dried tomatoes, caramelized onions, roasted garlic, or even thinly sliced vegetables. Just adjust the toppings to your taste and press lightly into the dough before baking.