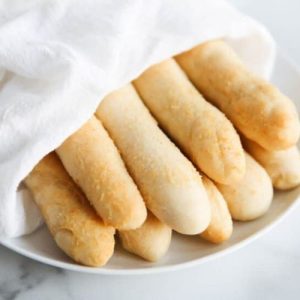
Soft, golden, and irresistibly buttery, these homemade breadsticks bring the cozy flavors of Olive Garden straight to your kitchen.
Made with simple pantry staples and a garlic-butter finish, they’re not only satisfying but also fiber-rich thanks to whole-grain flour options, with healthy fats from olive oil.
Quick to prepare and perfect for weeknight dinners, these breadsticks are a crowd-pleasing, wholesome addition to any meal.
Olive Garden Breadsticks
Equipment
- 1 Stand Mixer with Dough Hook Attachment
- 2 baking sheets
- Parchment paper or silicone baking mat
- Small mixing bowls (2)
- Measuring Cups and Spoons
- Rolling surface (counter or breadboard)
Ingredients
- 1 ½ cups warm water 105–110°F
- 1 tablespoon active dry yeast
- 1 tablespoon granulated sugar or honey
- 3 ¼ cups 422 g all-purpose flour, plus extra for rolling
- 2 teaspoons fine sea salt
- 1 tablespoon extra-virgin olive oil
- 4 tablespoons salted butter melted
- ¾ teaspoon garlic powder
- ¾ teaspoon garlic salt
Instructions
- Activate the Yeast: Pour 1 ½ cups of warm water (105–110°F) into a small bowl. Sprinkle 1 tablespoon of active dry yeast and 1 tablespoon of granulated sugar or honey over the water. Stir gently to combine. Let the mixture sit, uncovered, for about 5 minutes or until it begins to foam. This step ensures that the yeast is alive and ready to create a light, airy dough.
- Combine Dry Ingredients: Measure 3 ¼ cups of all-purpose flour and 2 teaspoons of fine sea salt. In the bowl of a stand mixer fitted with a dough hook, mix 1 cup of flour with the salt. This helps distribute the salt evenly and forms the base for your dough, ensuring consistent texture and flavor.
- Mix Dough Base: Once the yeast mixture is foamy, pour it into the flour and salt mixture. Add 1 tablespoon of extra-virgin olive oil. Mix on low speed until the liquids are fully incorporated, forming a soft, slightly sticky dough. Properly mixing the dough at this stage ensures even rising and a tender crumb.
- Add Remaining Flour Gradually: Add the remaining flour in ½-cup increments, mixing thoroughly after each addition. Continue until the dough is smooth, elastic, and pulls away slightly from the sides of the bowl. The dough should be soft but not overly sticky. Correct dough consistency is key to achieving chewy, well-risen breadsticks.
- First Dough Rise: Cover the mixing bowl with plastic wrap or a clean towel. Let the dough rise in a warm, draft-free area for 15 to 30 minutes, or until it roughly doubles in size. This first rise allows the dough to develop flavor and airy texture, making the breadsticks soft and fluffy.
- Prepare Garlic Butter Mixture: While the dough rises, melt 4 tablespoons of salted butter in a small bowl. Stir in ¾ teaspoon garlic powder and ¾ teaspoon garlic salt until well combined. Set aside. This butter mixture will be brushed on the breadsticks during and after baking to provide that signature rich, garlicky flavor.
- Preheat Oven And Prepare Baking Sheets: Preheat your oven to 400°F (205°C). Line two baking sheets with parchment paper or a silicone mat. Lightly flour a clean counter or breadboard for rolling the dough. Preparing your baking surface ahead of time ensures smooth shaping and even baking.
- Divide And Shape Dough: Once the dough has risen, gently punch it down to release excess air. Divide it into 16 equal portions, each weighing approximately 1.5 ounces. Roll each portion into a log about 8 to 10 inches long. Place the breadsticks on the prepared baking sheets, leaving 2 inches of space between each to allow for expansion during baking.
- Second Dough Rest: Allow the shaped breadsticks to rest for 10 minutes. This brief second rise helps them puff slightly and ensures a tender texture. Skipping this step can result in denser breadsticks.
- Initial Bake: Place the baking sheets in the preheated oven and bake for 10 minutes. The breadsticks will begin to rise and develop a light golden color, indicating they are nearly ready for the final touch.
- Brush With Garlic Butter: Remove the breadsticks from the oven and brush the tops generously with the prepared garlic butter mixture. This step adds flavor, moisture, and a glossy finish that makes the breadsticks irresistible.
- Finish Baking: Return the breadsticks to the oven and bake for an additional 3 to 5 minutes, or until the bottoms are lightly golden brown. For deeper color, place the sheets on the top rack during the last few minutes, ensuring they do not dry out.
- Final Butter Glaze And Cooling: Once baked, remove the breadsticks from the oven and brush any remaining garlic butter over the tops. Allow them to cool for a couple of minutes before serving. Serving them warm ensures they retain their soft, chewy texture and delicious garlic aroma.
- Serving And Storage Notes: Enjoy these breadsticks fresh for the best taste. Store leftovers in an airtight container for up to 3 days, reheating in the microwave for 15–20 seconds. For slightly crisp tops, reheat in a 350°F oven for 3–5 minutes. Breadsticks can also be frozen individually in foil for up to one month and warmed in the oven before serving.
Notes
- Yeast Activation: Always use water between 105–110°F to ensure the yeast activates properly. Too hot, and the yeast dies; too cold, and it won’t foam.
- Dough Texture: The dough should be soft and slightly tacky but not sticky. Add flour gradually to reach the ideal consistency.
- Shaping: Roll each portion evenly to create uniform breadsticks, which helps them bake consistently.
- Baking Tip: For extra golden tops, place the breadsticks on the top rack during the last few minutes of baking.
- Garlic Butter: Brush while hot for maximum absorption. Reserved butter can be applied after baking for enhanced flavor.
Chef’s Secrets: Insider Breadstick Techniques
For restaurant-quality breadsticks at home, start by letting your dough rise in a warm, draft-free environment.
This encourages an airy, tender crumb.
Using a stand mixer with a dough hook ensures the gluten develops evenly, producing chewy, structured breadsticks.
When rolling, keep the dough portions consistent to prevent uneven baking.
Don’t skip the second short rest after shaping; this slight rise ensures the perfect fluffiness.
Finally, brushing with garlic butter twice—once during baking and once after—creates the signature glossy, flavorful crust that keeps these breadsticks irresistible.
Serving Suggestions: Perfect Pairing Ideas
These breadsticks are wonderfully versatile.
Serve them alongside your favorite pasta dishes, such as spaghetti with marinara or creamy Alfredo, to soak up sauces.
They also pair beautifully with hearty soups like tomato basil, minestrone, or chicken noodle.
For a casual appetizer, arrange them on a platter with dips like garlic aioli, marinara, or even a soft cheese spread.
They’re ideal for weeknight dinners, entertaining guests, or simply enjoying warm from the oven as a satisfying snack.
Storage Tips: Keep Breadsticks Fresh Longer
Breadsticks are best eaten fresh, but they can be stored in an airtight container for up to three days.
To maintain softness, reheat briefly in the microwave for 15–20 seconds.
For slightly crisp tops, reheat in a 350°F oven for 3–5 minutes.
You can also freeze them wrap individually in foil and store in a freezer-safe bag for up to 1 month.
Thaw at room temperature, then warm in the oven before serving.
Frequently Asked Questions
1. Can I make these breadsticks ahead of time?
Yes! You can prepare the dough the night before and refrigerate it. Allow the dough to come to room temperature and complete the rising process before shaping and baking.
2. Can I use whole wheat or gluten-free flour?
Whole wheat flour can be used for a slightly denser, fiber-rich version. For gluten-free breadsticks, use a 1:1 gluten-free flour blend, but note the texture will differ slightly.
3. How can I make the breadsticks more golden brown?
Baking an extra 2–3 minutes or placing the tray on the top oven rack during the final minutes enhances browning without drying out the interior.
4. Can I make them vegan?
Yes! Substitute the butter with a plant-based margarine or vegan butter and ensure the dough is free of animal-based ingredients. Olive oil remains the same.
5. What is the best way to serve leftover breadsticks?
Reheat lightly in the microwave or oven. Serve warm with garlic butter, dips, or as a side to soups and salads. This restores their soft, fresh-baked texture and flavor.