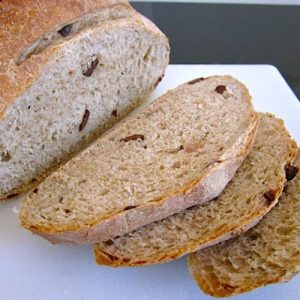
This homemade Olive Herb Bread brings bakery-quality flavor straight to your kitchen with minimal effort.
Packed with fiber from whole wheat and enriched with heart-healthy olives and aromatic thyme, it offers plant-based protein and good fats for a wholesome boost.
Soft, flavorful, and easy to prepare, it’s perfect for everyday meals, snacks, or sandwich-making.
Healthy Olive Herb Bread
Equipment
- 1 large mixing bowl or pot
- Measuring Cups and Spoons
- Sharp Knife
- Baking Sheet
- Parchment paper or foil
- Wire cooling rack
Ingredients
- 1 cup whole wheat flour
- 2 ¼ cups bread flour
- 1 ⅓ tsp salt
- ¾ Tbsp active dry or instant yeast
- ⅓ cup pitted kalamata olives
- 1 tsp dried thyme
- 1 ¼ cups warm water
- 2 Tbsp cornmeal
Instructions
- Prepare the Dry Ingredients: In a large mixing bowl or pot, combine the whole wheat flour, bread flour, salt, and dried thyme. Stir gently to ensure all ingredients are evenly mixed. Sprinkle in the yeast and mix lightly again. Thoroughly combining the dry ingredients at this stage helps create a uniform dough, ensuring consistent texture and flavor in every bite.
- Chop and Add the Olives: Slice or roughly chop the kalamata olives to release their rich, briny flavor evenly throughout the bread. Add the chopped olives to the dry ingredients and fold them in gently until distributed throughout the mixture. Properly incorporating the olives prevents large pockets and ensures each slice has the perfect balance of olive flavor.
- Combine Water and Form Dough: Warm 1 1/4 cups of water until it is pleasantly warm to the touch, not hot. Gradually pour the water over the dry ingredients and olives. Stir with a spoon or spatula until all the flour is moistened and a cohesive dough forms. If there are still dry patches at the bottom, add 2 tablespoons of water at a time until the mixture is uniform and slightly sticky.
- First Rise – Let Dough Rest: Loosely cover the bowl with a clean kitchen towel or plastic wrap. Allow the dough to sit at room temperature for approximately 2 hours. During this period, the yeast activates, causing the dough to expand and develop flavor. The dough should appear puffed and soft, with a springy texture when gently pressed.
- Shape the Dough Ball: After the first rise, lightly dust your hands and the dough with flour to prevent sticking. Gently fold and shape the dough into a smooth, round ball, tucking the edges underneath to create a neat, even shape. This step ensures an attractive dome and even baking throughout the loaf.
- Prepare the Baking Surface: Line a baking sheet with parchment paper or foil and sprinkle generously with cornmeal. This prevents sticking and adds a subtle crunch to the bottom crust. Place the shaped dough ball on the prepared sheet, making sure it is centered and evenly positioned.
- Second Rise – Let Dough Proof: Allow the dough to rise a second time on the baking sheet for 1 to 1.5 hours, or until it doubles in size. This second rise produces an airy, light crumb and a soft interior, essential for a tender and flavorful bread.
- Preheat Oven and Score Dough: Preheat the oven to 425°F (220°C). Using a very sharp knife or bread lame, make a few shallow diagonal slashes across the top of the dough. These cuts allow the loaf to expand evenly during baking and give a professional, artisan appearance.
- Bake the Bread: Lightly brush the top of the dough with water to enhance browning and create a slightly crisp crust. Place the baking sheet in the preheated oven and bake for 30 minutes. During baking, the bread develops a golden-brown exterior and a fragrant, savory aroma from the olives and thyme.
- Cool Before Slicing: Once baked, transfer the bread to a wire cooling rack and allow it to cool completely. Cooling ensures the interior sets properly, producing a soft, tender crumb while preventing a gummy texture. Once cooled, slice and serve fresh, or use for sandwiches, toast, or snacking.
Notes
- This bread is naturally soft and slightly chewy thanks to the combination of whole wheat and bread flour. For a lighter loaf, sift the whole wheat flour before measuring.
- Kalamata olives provide a rich, savory flavor, but you can substitute with green olives or a mix of your favorites. Be sure to pit them before adding.
- The dough is slightly sticky; resist the urge to over-flour it. A lightly floured surface for shaping is sufficient.
- Cornmeal on the baking sheet adds a rustic texture and prevents sticking—do not skip it.
- Allow the bread to cool completely before slicing to ensure a tender, fully set crumb.
Chef’s Secrets: Perfect Homemade Olive Bread
Achieving bakery-style bread at home is easier than you think.
The key is in the two-step rising process, which develops flavor and ensures a light, airy crumb.
When mixing the dough, focus on gently folding rather than aggressive kneading, as overworking can make the bread dense.
Using warm water (not hot) activates the yeast without killing it, giving a perfect rise.
For an aromatic touch, experiment with different herbs like rosemary or oregano, or add a light drizzle of olive oil before baking for a golden, glossy crust.
Serving Suggestions: Delicious Ways To Enjoy
Olive Herb Bread pairs beautifully with a wide range of dishes.
Slice it thick for hearty sandwiches with fresh vegetables, cheese, or roasted meats.
Serve it alongside soups, stews, or Mediterranean salads for a flavorful side.
Toasted slices with a smear of cream cheese, hummus, or avocado make a quick, satisfying breakfast or snack.
Its soft texture and savory aroma make it perfect for casual family meals or elegant dinner presentations alike.
Storage Tips: Keep Bread Fresh Longer
To maintain freshness, store the bread at room temperature in a paper bag or loosely wrapped in a clean kitchen towel.
Avoid airtight containers, which can trap moisture and make the crust soggy.
For longer storage, slice the bread and freeze it in a resealable freezer bag; simply toast or warm slices directly from the freezer when needed.
Homemade bread is best enjoyed within 2–3 days for optimal texture, but proper freezing extends its usability up to a month.
Frequently Asked Questions
1. Can I use all-purpose flour instead?
Yes, all-purpose flour can replace bread flour, but the bread may have a slightly softer texture and less chew. Mixing some whole wheat flour with all-purpose will retain flavor and fiber.
2. Can I add more olives or other ingredients?
Absolutely! You can increase olives, add sun-dried tomatoes, roasted garlic, or nuts. Just ensure the dough consistency remains slightly sticky and not overly dry.
3. How do I know when the bread is fully baked?
The crust should be golden brown and firm. Tap the bottom of the loaf—if it sounds hollow, it’s done. A thermometer inserted into the center should read about 200°F (93°C).
4. Can I make this bread in advance?
Yes, you can prepare the dough ahead and let it rise slowly in the refrigerator overnight. This slow fermentation enhances flavor and makes the bread even more aromatic.
5. What if I don’t have cornmeal for the baking sheet?
You can lightly flour the baking sheet or use parchment paper. Cornmeal adds a pleasant crunch, but flour will prevent sticking and still give excellent results.