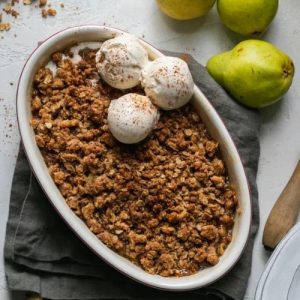
This Pear Ginger Crisp is a warm, comforting dessert that combines naturally sweet pears with a subtle zing of fresh ginger.
Made with fiber-rich whole wheat pastry flour, heart-healthy walnuts, and oats, it’s a nutritious twist on a classic crisp.
Quick, easy, and satisfying, it’s perfect for weeknight desserts or weekend gatherings, and pairs beautifully with vanilla ice cream.
Delicious Pear Ginger Crisp
Equipment
- 1 medium baking dish (8×8 or 9×9 inches)
- 2 medium mixing bowls
- 1 whisk
- 1 rubber spatula
- Measuring Cups and Spoons
- Grater for fresh ginger
Ingredients
Crisp Topping:
- ¾ cup whole wheat pastry flour
- ⅔ cup old-fashioned rolled oats
- ¾ cup light brown sugar loosely packed
- ½ cup walnuts chopped
- 1 ½ tsp ground cinnamon
- ½ tsp ground cardamom
- ½ tsp salt
- ½ cup unsalted butter melted and cooled
- 1 tsp vanilla extract
Pear Filling:
- 5 D’Anjou pears peeled, cored, and thinly sliced
- Juice of 1 large lemon
- ¼ cup sugar
- 2 tbsp pure maple syrup
- 1 tsp freshly grated ginger
- 1 tbsp cornstarch
- ¼ tsp salt
Optional for Serving:
- Vanilla bean ice cream
Instructions
- Preheat and Prepare Baking Dish: Begin by preheating your oven to 350℉ (175℃). While the oven warms, lightly butter a medium-sized baking dish, ideally 8×8 or 9×9 inches. This ensures that your crisp won’t stick and will come out beautifully golden. Set the dish aside while you prepare the topping and filling.
- Mix Crisp Dry Ingredients: In a medium mixing bowl, combine 3/4 cup whole wheat pastry flour, 2/3 cup old-fashioned rolled oats, 3/4 cup loosely packed light brown sugar, 1/2 cup chopped walnuts, 1 1/2 teaspoons ground cinnamon, 1/2 teaspoon ground cardamom, and 1/2 teaspoon salt. Whisk these ingredients together until evenly blended. This step ensures that the spices and dry components are evenly distributed, which creates a balanced, flavorful topping.
- Incorporate Wet Ingredients Into Topping: Pour 1/2 cup melted and cooled unsalted butter and 1 teaspoon vanilla extract into the dry mixture. Using a rubber spatula, gently fold the ingredients together until the mixture is moistened and crumbly. The texture should be slightly clumpy but still loose enough to sprinkle over the pears. Set half of this mixture aside if you plan to save extra topping for another crisp.
- Prepare the Pear Filling: In a separate medium mixing bowl, combine 5 peeled, cored, and thinly sliced D’Anjou pears with the juice of 1 large lemon. Add 1/4 cup sugar, 2 tablespoons pure maple syrup, 1 teaspoon freshly grated ginger, 1 tablespoon cornstarch, and 1/4 teaspoon salt. Gently stir until the pears are evenly coated and the ginger is distributed throughout. This ensures that each bite has a consistent balance of sweetness, spice, and thickening agent.
- Assemble the Crisp: Pour the prepared pear mixture evenly into the buttered baking dish. Sprinkle half of the crumble topping over the pears, spreading it carefully to cover the fruit. If desired, you can layer the remaining topping for a thicker, crunchier texture. This layering allows for a perfect balance of soft, juicy pears and crispy topping.
- Bake Until Golden: Place the assembled crisp in the preheated oven and bake for approximately 40 minutes, or until the topping is golden brown and the pears are bubbling at the edges. Keep an eye on the top during the last 10 minutes to avoid over-browning. The aroma of baked pears, ginger, and warm spices will fill your kitchen during this stage, signaling that the crisp is almost ready.
- Cool Before Serving: Remove the crisp from the oven and allow it to cool for about 10 minutes. This short cooling period helps the filling thicken slightly and makes it easier to serve. It also ensures the topping retains its crunch rather than becoming soggy.
- Serve and Enjoy: Spoon the pear ginger crisp into bowls or onto plates. For an indulgent touch, serve with a scoop of vanilla bean ice cream on top. The warm, spiced pears paired with the crunchy oat-walnut topping and creamy ice cream create a perfect dessert experience.
- Optional Storage Tip: If you have leftover crisp, cover the baking dish tightly with foil or transfer portions to an airtight container. Store in the refrigerator for up to one week. The topping can be briefly reheated in the oven to restore its crunch, making it ideal for make-ahead desserts or quick weekday treats.
Notes
- For best results, choose ripe but firm D’Anjou pears. Overripe pears can become too mushy during baking, while under-ripe ones may lack natural sweetness.
- The crumble topping makes enough for two batches, so if you double the pear filling, you can make a larger crisp for gatherings or holidays. Store extra topping in an airtight container in the fridge for up to one week.
- When measuring oats and flour, spoon them lightly into the cup and level off with a knife to avoid a dense topping.
- Freshly grated ginger adds vibrant warmth and spice, but if you prefer a milder flavor, you can reduce the amount slightly or substitute with ground ginger.
Chef’s Secrets: Elevating Your Crisp Flavor
A key tip for a perfectly balanced crisp is layering flavors.
Toss the pear slices with lemon juice before adding sugar and maple syrup—this not only prevents browning but also enhances the natural fruit flavor.
Toasting the walnuts lightly before incorporating them into the topping brings out a rich, nutty aroma that complements the pears and spices.
For an extra indulgent touch, mix a small pinch of sea salt into the crumble; it heightens sweetness and rounds out the flavors beautifully.
Serving Suggestions: Pairings and Presentation Ideas
Serve this crisp warm, straight from the oven, to enjoy the contrast of soft pears and crunchy topping.
A scoop of vanilla bean or cinnamon ice cream is a classic choice, but Greek yogurt or lightly whipped cream adds a lighter, tangy alternative.
Garnish with a sprinkle of chopped walnuts or a tiny dusting of cinnamon for visual appeal.
For a cozy fall dessert table, serve individual portions in ramekins or small baking dishes for a charming presentation.
Storage Tips: Keeping Crisp Fresh
Once cooled, store leftovers in an airtight container in the refrigerator for up to one week.
To retain the topping’s crunch, reheat portions in a 350℉ oven for 5–10 minutes rather than microwaving.
If storing the topping separately, keep it in a sealed container at room temperature or in the fridge for up to one week.
This makes it easy to whip up a quick pear crisp anytime without extra prep.
Frequently Asked Questions
1. Can I use other pear varieties?
Yes! Bosc, Bartlett, or Comice pears also work well. Choose pears that are ripe but firm to avoid a watery filling. Mixing varieties can add subtle differences in sweetness and texture.
2. Can I make this recipe vegan?
Absolutely! Replace butter with a plant-based margarine or coconut oil. Serve with non-dairy ice cream to keep the dish entirely vegan while still rich and flavorful.
3. Can I prepare this in advance?
You can assemble the crisp a few hours ahead and refrigerate it before baking. Bake just before serving, adding an extra 5–10 minutes to the baking time if chilled, to ensure the topping becomes golden and crisp.
4. How can I make the topping extra crunchy?
For a crunchier topping, mix in an additional 1–2 tablespoons of chopped nuts or lightly toast the oats and nuts in a dry skillet before combining with the butter and sugar. This enhances both flavor and texture.
5. Can I freeze the pear crisp?
Yes! Assemble and bake the crisp, then cool completely before freezing in an airtight container.
Reheat in the oven at 350℉ until warmed through and the topping regains its crispness. This is a great make-ahead option for holiday desserts.