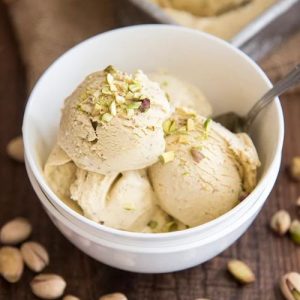
This Pistachio Ice Cream is luxuriously creamy with a rich, nutty flavor that feels indulgent yet wholesome.
Packed with pistachios, it offers plant-based protein and healthy fats, along with a satisfying natural sweetness.
Low in saturated fat compared to many desserts, this treat is perfect for those craving a gourmet dessert that’s both nourishing and rewarding.
Ideal for everyday enjoyment or special occasions.
Pistachio Ice Cream
Equipment
- Large mixing bowl × 1
- Food processor or high-powered blender × 1
- Large saucepan × 1
- Whisk × 1
- Wooden spoon × 1
- Ice cream maker × 1
- 9×5 loaf pan × 1
Ingredients
- ¾ cup salted shelled pistachios
- ¾ cup sugar divided
- 1 cup whole milk
- 2 cups heavy cream
- ⅛ teaspoon salt
- 4 egg yolks
- ½ teaspoon vanilla extract
- ½ teaspoon almond extract
Instructions
- Preparing the Pistachio Mixture: Start by placing ¾ cup of salted, shelled pistachios into a food processor or high-powered blender. Add ¼ cup of sugar to the pistachios. Pulse the mixture in short bursts until the nuts are finely ground. Be careful not to over-process, as this will turn the mixture into pistachio butter rather than a fine crumb. Once achieved, set aside this flavorful pistachio-sugar blend — it will be the foundation of the ice cream’s nutty essence.
- Heating the Cream Base: In a large saucepan, combine 2 cups of heavy cream, 1 cup of whole milk, the remaining ½ cup of sugar, and 1/8 teaspoon of salt. Place the saucepan over medium-high heat and stir occasionally to ensure the sugar dissolves completely. Heat the mixture until bubbles just begin to form around the edges — do not let it boil vigorously. This gentle heating process ensures a smooth base for the ice cream without curdling the dairy.
- Infusing Pistachio Flavor: Once the cream mixture is warm and slightly steaming, stir in the pistachio-sugar blend you prepared earlier. Mix thoroughly so that the pistachio flavor disperses evenly throughout the cream base. Reduce the heat slightly and allow the mixture to infuse for about 1–2 minutes, stirring gently to prevent sticking. This step is crucial for creating a rich, aromatic flavor throughout the ice cream.
- Preparing the Egg Yolk Custard: While the cream mixture infuses, take a large mixing bowl and add 4 egg yolks. Using a whisk, beat the yolks until they become smooth and slightly pale in color. This step aerates the yolks and prepares them to blend seamlessly with the cream mixture without cooking into scrambled eggs.
- Tempering the Egg Yolks: To prevent the egg yolks from curdling when added to the hot cream, you must temper them. Begin by slowly pouring ½ cup of the warm cream mixture into the beaten yolks while whisking vigorously. This gradual process gently raises the yolks’ temperature. Then, continue adding another ½ cup of cream mixture in two portions, whisking constantly. This ensures a smooth, safe integration of yolks and cream without scrambling.
- Cooking the Custard Base: Once tempered, pour the egg yolk mixture back into the saucepan with the remaining cream mixture. Place the pan over medium heat and cook gently, stirring continuously with a wooden spoon. This step thickens the base and creates the custard consistency essential for creamy ice cream. Continue cooking until the mixture slightly coats the back of the spoon — this usually takes about 5 minutes. Be attentive, as overheating can cause curdling.
- Adding Flavor Extracts: Remove the custard from heat. Stir in ½ teaspoon of vanilla extract and ½ teaspoon of almond extract. These extracts enhance the depth of flavor, creating a delicate aroma that complements the pistachio perfectly. Stir until the extracts are fully incorporated and evenly dispersed throughout the custard.
- Cooling in an Ice Bath: To quickly stop the cooking process and prevent over-thickening, place the saucepan in an ice bath. Stir gently for about 10 minutes until the custard cools slightly. This step also improves the texture of the ice cream and helps lock in flavor.
- Chilling the Custard: Transfer the custard into a covered mixing bowl and refrigerate for at least 2 hours, or overnight for optimal flavor development. Chilling allows the flavors to meld and ensures the custard is at the right temperature for churning.
- Churning the Ice Cream: Once chilled, pour the custard mixture into your ice cream maker according to the manufacturer’s instructions. Let it churn for approximately 30 minutes, until the mixture transforms into a soft, creamy consistency. The churning incorporates air for lightness and smoothness.
- Freezing to Set: Transfer the churned ice cream into a 9×5 loaf pan. Smooth the surface with a spatula, cover tightly, and place in the freezer. Allow it to freeze for at least 6 hours, or up to overnight for a firm texture that slices beautifully.
- Serving the Ice Cream: When ready to enjoy, remove the ice cream from the freezer about 5–10 minutes beforehand to soften slightly for easier scooping. Serve in bowls or cones, and consider garnishing with crushed pistachios or a drizzle of chocolate for an extra touch of indulgence.
Notes
- Always use fresh, salted, shelled pistachios for the richest flavor and texture. Unsalted pistachios will work but will require an extra pinch of salt.
- Grinding pistachios too long will release oils, turning them into pistachio butter rather than a fine crumb — a subtle but important texture difference.
- Be patient while tempering egg yolks; rushing this step can cause curdling and grainy custard.
- Chilling the custard base for several hours or overnight improves both flavor and texture.
- Adjust sweetness to your taste; you can slightly reduce sugar for a more nut-forward profile.
Chef’s Secrets: Unlocking Pistachio Perfection
The magic behind an exceptional pistachio ice cream lies in balancing texture, flavor, and temperature control.
Always grind the pistachios gently — a coarse grind gives a pleasant crunch while a finer grind creates smoother creaminess.
Tempering the egg yolks slowly is crucial to avoid curdling, giving the custard its silk-like texture.
Adding almond extract enhances the nutty essence without overpowering pistachios.
Finally, chilling the custard for hours allows flavors to meld deeply, resulting in a richer, creamier dessert.
Serving Suggestions: Elegant Pistachio Pairings
Pistachio ice cream is versatile and pairs beautifully with various accompaniments.
Serve scoops alongside fresh berries, drizzled with honey or dark chocolate sauce for a gourmet touch.
Crumbled biscotti or shortbread cookies add a delightful texture contrast, while a sprinkle of chopped pistachios adds visual appeal and extra crunch.
For a creative dessert platter, pair the ice cream with almond cake or poached pears, creating a luxurious flavor harmony.
Storage Tips: Maintaining Creamy Freshness
Store pistachio ice cream in an airtight container to prevent freezer burn and flavor loss.
For best texture, place a piece of parchment paper directly on the surface before sealing.
Keep in the coldest section of your freezer and consume within 1–2 weeks for optimal flavor.
If the ice cream hardens too much, allow it to sit at room temperature for 5–10 minutes before scooping.
This will soften it slightly without compromising its texture.
Frequently Asked Questions
1. Can I make pistachio ice cream without an ice cream maker?
Yes! You can make it without a machine by pouring the chilled custard into a shallow, freezer-safe dish. Freeze for 30 minutes, then stir vigorously every 30 minutes for about 2–3 hours.
This manual churning process incorporates air and prevents ice crystals, though texture may differ slightly from machine-churned ice cream.
2. Can I use unsalted pistachios?
Absolutely. If using unsalted pistachios, add a pinch of salt to the custard base to enhance flavor and balance sweetness. Salt brings out the nutty richness and prevents the ice cream from tasting bland.
3. How do I prevent ice crystals in homemade ice cream?
The key is thorough chilling of the custard before churning and storing the ice cream in an airtight container. Using full-fat cream and milk also helps create a smooth texture.
Finally, stirring periodically while freezing (for non-machine methods) keeps the texture creamy.
4. Can I prepare this recipe ahead of time?
Yes, this recipe is perfect for meal prep. You can make the custard base a day ahead and store it in the refrigerator. Churn when ready to serve, or churn ahead and store in the freezer for up to two weeks.
5. How can I enhance the pistachio flavor?
For a stronger pistachio flavor, toast the pistachios lightly before grinding.
You can also add a few drops of pistachio extract to intensify the nutty aroma. Just be careful, as pistachio extract can be very concentrated — a little goes a long way.