Indulge in the luxurious taste of homemade Red Wine Ice Cream, a decadent dessert that combines rich red wine with creamy vanilla custard.
This recipe delivers a protein-rich treat with good fats from cream and half & half, making it satisfying yet indulgent.
Easy to prepare and perfect for entertaining or a cozy night in, it’s a unique twist on classic ice cream that elevates any occasion.
Red Wine Ice Cream
Equipment
- 1 large saucepan
- 1 medium saucepan
- 1 wooden spoon
- 1 whisk
- 1 mixing bowl
- 1 fine-mesh strainer
- 1 ice cream maker (1 unit)
Ingredients
- 1 bottle red wine 750 ml, Merlot recommended
- ⅔ cup brown sugar
- 2 cups heavy whipping cream
- 1 cup half & half
- 4 large egg yolks
- 1 vanilla bean split and scraped
Instructions
- Wine Reduction Magic: Begin by pouring the entire bottle of red wine into a large, heavy-bottomed saucepan. Place it over medium-low heat and allow it to simmer gently. Stir occasionally, letting the wine slowly reduce into a thick, syrup-like consistency. This process concentrates the rich flavors and aromas, turning a simple wine into a luxurious base for your ice cream. Keep a close eye—it typically takes around 60 minutes to reduce to about 1 cup, but it may vary depending on your stove. Once reduced, remove from heat and set aside to cool slightly.
- Preparing the Cream Base: In a medium-sized saucepan, combine 2 cups of heavy whipping cream with 2/3 cup brown sugar. Split the vanilla bean lengthwise and carefully scrape out the seeds, adding them directly into the cream. Drop the remaining bean pod into the mixture as well. Place the saucepan over medium heat, stirring constantly with a wooden spoon or silicone spatula. Heat until the mixture begins to steam and small bubbles appear around the edges—do not allow it to boil. This step ensures the sugar dissolves completely and the vanilla infuses fully, creating a fragrant, velvety cream base.
- Egg Yolks Preparation: While the cream mixture is heating, place 4 large egg yolks in a separate mixing bowl. Using a fork or hand mixer, beat the yolks until they become pale and slightly fluffy. This aeration helps create a smooth, custard-like texture when combined with the hot cream.
- Tempering the Eggs: To prevent the yolks from curdling, slowly pour a small amount of the hot cream into the beaten eggs while whisking continuously. Repeat this process gradually, adding more cream in small increments until about half of the cream mixture is incorporated into the eggs. This delicate step tempers the yolks, ensuring a silky, smooth custard.
- Cooking the Custard: Once tempered, return the egg-cream mixture to the saucepan and place it over medium heat. Stir continuously with a wooden spoon, making slow, circular motions along the bottom and sides of the pan. The custard will gradually thicken; you’ll know it’s ready when it coats the back of the spoon and a clear line can be drawn through it with your finger. Remove the pan from heat immediately to prevent overcooking, which could cause a grainy texture.
- Straining and Combining: Remove the vanilla bean pod from the custard. Pour the mixture through a fine-mesh strainer into a large, clean mixing bowl. This step ensures any small cooked bits or remaining solids are removed, resulting in a perfectly smooth ice cream base. Gently stir in 1 cup of half & half and the cooled red wine reduction until fully combined.
- Chilling the Mixture: Cover the bowl with plastic wrap, pressing it lightly against the surface of the mixture to prevent a skin from forming. Refrigerate for 1–2 hours until thoroughly chilled. Chilling allows the flavors to meld and ensures that the mixture is at the optimal temperature for churning.
- Churning into Ice Cream: Pour the chilled mixture into your ice cream maker according to the manufacturer’s instructions. Typically, churning takes around 30 minutes, transforming the custard into a creamy, airy frozen dessert. Monitor the texture and stop when it reaches a soft-serve consistency.
- Freezing to Perfect Texture: If you prefer a firmer texture, transfer the churned ice cream to an airtight container and place it in the freezer for 2–4 hours. This allows it to set fully while maintaining its smooth, velvety texture. Before serving, let it sit at room temperature for 5–10 minutes to soften slightly for easy scooping.
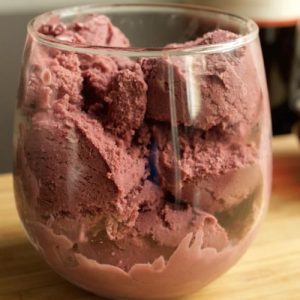
- Serving and Enjoying: Scoop your homemade Red Wine Ice Cream into dessert bowls or glasses. For an elegant touch, serve alongside a small glass of red wine. Each bite delivers a perfect balance of creamy custard, vanilla, and rich red wine flavor, making this dessert a luxurious treat for any occasion.
Notes
- Use a full-bodied red wine, such as Merlot or Cabernet Sauvignon, for the richest flavor. Lighter wines may result in a less pronounced taste.
- When reducing the wine, maintain a gentle simmer and stir occasionally to prevent scorching. Patience here is key—it enhances the flavor complexity.
- Always temper the eggs slowly to prevent curdling and ensure a smooth, creamy custard.
- Scraping the vanilla bean seeds directly into the cream creates a more intense, authentic vanilla flavor compared to extracts.
- For best results, chill the mixture thoroughly before churning; this produces a smoother, creamier texture and reduces ice crystal formation.
Chef’s Secrets: Elevating Flavor And Texture
One secret to truly luxurious Red Wine Ice Cream is the wine reduction itself.
By slowly simmering the wine down to a concentrated syrup, you intensify its aroma and depth, ensuring the final dessert bursts with flavor.
Another trick is using fresh vanilla beans; their tiny seeds distribute flavor evenly throughout the custard, giving every spoonful a natural, aromatic richness.
Additionally, consistent stirring while cooking the custard helps prevent lumps and creates a velvety-smooth texture, which is the hallmark of a high-quality ice cream.
For a subtle warmth, you can add a pinch of cinnamon or nutmeg during the cream heating step, complementing the wine without overpowering it.
Serving Suggestions: Creative Ways To Enjoy
Red Wine Ice Cream is versatile and pairs beautifully with both sweet and savory accompaniments.
Serve it in elegant bowls alongside a small glass of the same wine for a sophisticated dessert experience.
It also complements chocolate desserts, such as brownies or dark chocolate cake, enhancing the richness of both flavors.
For a fresh contrast, add seasonal berries or a drizzle of honey on top.
For casual serving, simply scoop into cones or waffle bowls for a luxurious twist on classic ice cream treats.
Garnishes like crushed pistachios or a sprig of mint add color, texture, and a hint of freshness.
Storage Tips: Keeping Ice Cream Perfect
To maintain the creamy texture of Red Wine Ice Cream, transfer it to an airtight container before freezing.
Press a piece of parchment paper directly onto the surface to prevent ice crystals from forming.
Store in the coldest part of the freezer, away from the door, to avoid temperature fluctuations.
Properly stored, the ice cream can last up to 2 weeks.
For softer serving, remove it from the freezer 5–10 minutes before scooping.
Avoid refreezing melted portions, as this can compromise the smooth texture and flavor.
Frequently Asked Questions
1. Can I use a different type of wine?
Yes, but choose full-bodied reds like Merlot, Cabernet Sauvignon, or Shiraz. Lighter wines may result in a milder flavor and thinner consistency.
2. Do I have to use a vanilla bean?
While vanilla extract can be used in a pinch, fresh vanilla beans provide richer aroma and speckled visual appeal. Scraping the seeds directly into the custard gives superior flavor.
3. Can I make this without an ice cream maker?
Yes! Pour the chilled mixture into a freezer-safe container and stir every 30–45 minutes for the first few hours to break up ice crystals, repeating until it reaches desired consistency.
4. How long can I store this ice cream?
Store in an airtight container for up to 2 weeks in the coldest part of the freezer. Beyond that, the texture may become icy and less creamy.
5. Can I add mix-ins like chocolate or nuts?
Absolutely! Fold in finely chopped chocolate, roasted nuts, or dried fruits after churning for added texture and flavor. Add these toward the end of churning to maintain even distribution.