Oven-roasted chickpeas offer a deliciously crunchy, flavorful snack that’s as nutritious as it is satisfying.
These plant-based powerhouses provide a hefty boost of protein and fiber, making them an excellent choice for maintaining energy and promoting digestive health.
Low in saturated fat and rich in good fats from olive oil, they cater perfectly to vegan and gluten-free diets.
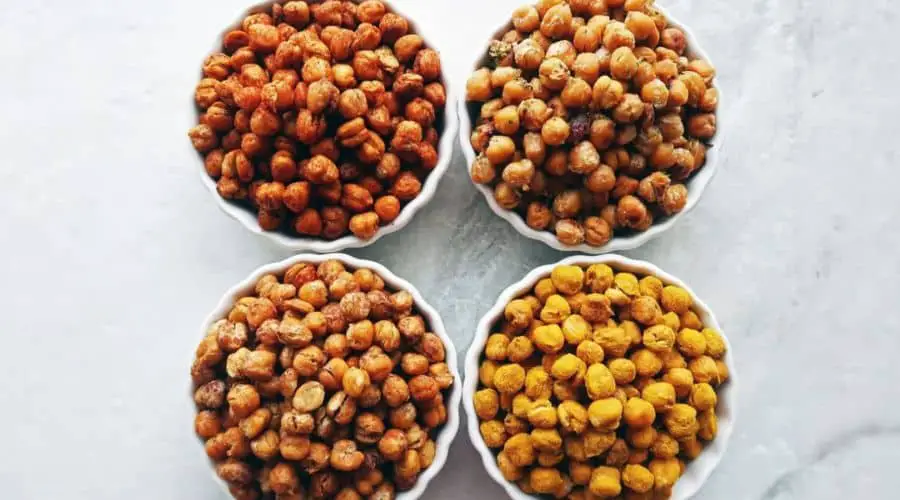
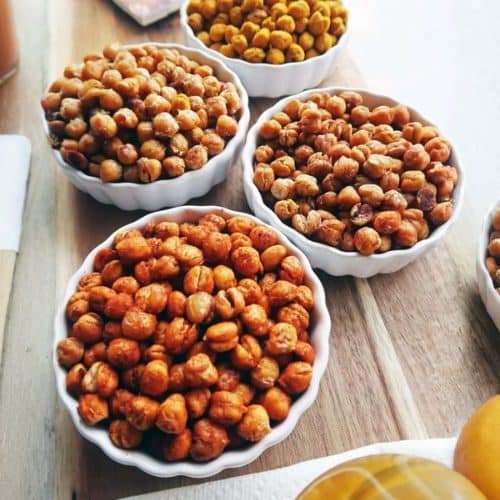
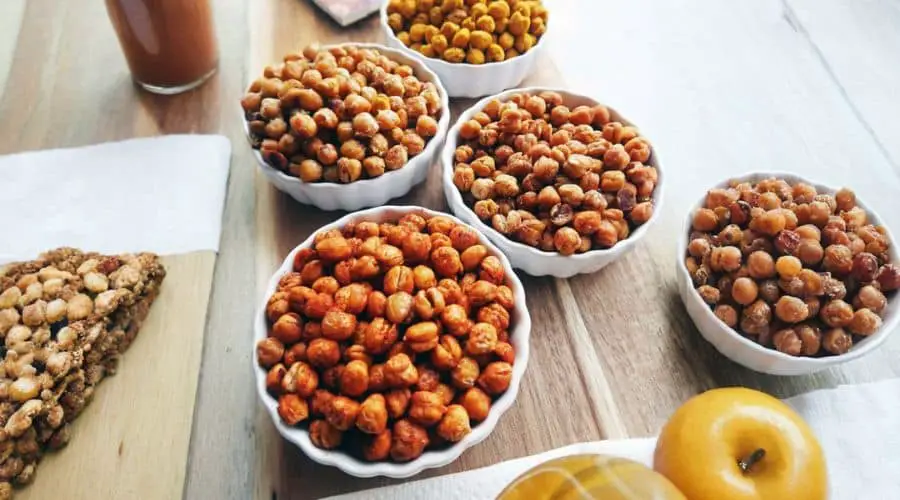
The beauty of this recipe lies in its versatility — with four distinct seasoning options, each batch feels fresh and exciting.
Plus, the simplicity and speed make it ideal for busy days, meal prepping, or healthy snacking on the go.

Whether you’re craving something savory, sweet, or tangy, these chickpeas offer a guilt-free crunch that’s both easy to prepare and endlessly adaptable.
Must-Have Tools for Perfect Results
Baking Sheet with Raised Edges
Perfect for evenly roasting chickpeas without them rolling off. Its rimmed design ensures easy tossing and turning, while its versatility makes it indispensable for roasting vegetables and baking cookies.
Parchment Paper
Essential for preventing sticking and simplifying cleanup. It helps maintain the chickpeas’ crispiness by avoiding excess oil contact and can be reused across many cooking tasks.
Fine Mesh Strainer
Ideal for thoroughly rinsing and draining canned chickpeas to remove excess sodium and liquid. It’s a versatile tool for washing grains, fruits, and vegetables in everyday cooking.
Citrus Zester and Juicer
For extracting fresh lime juice and zest to brighten the flavor in one of the seasoning options. This tool adds a vibrant, natural touch to countless dishes, from dressings to desserts.
Mixing Bowl
A sturdy bowl for tossing chickpeas with oil, salt, and spices ensures even coating. Beyond this recipe, it’s a kitchen workhorse for mixing doughs, salads, and marinades.

Crunchy Roasted Chickpeas with Spices
Equipment
- 1 rimmed baking sheet
- Parchment paper or aluminum foil (for lining)
- Fine mesh strainer
- Citrus zester and juicer
- Medium mixing bowl
Ingredients
- 2 cans 19 oz each cooked chickpeas, drained and dried
- 1 to 2 tbsp olive oil
- ½ tsp salt
Seasoning options (choose one):
- 2 tsp smoked paprika + 1 tsp cumin
- 3 tsp sugar + 1 tsp cinnamon
- 2 tsp turmeric + 1 tsp ginger
- Juice and zest of 1 lime + 2 tsp cracked black pepper
Instructions
- Prepare the Oven and Baking Surface: Preheat your oven to 400°F (205°C). Line a rimmed baking tray with parchment paper or aluminum foil to prevent sticking and make cleanup easier.
- Dry and Prep the Chickpeas:Thoroughly rinse the canned chickpeas under cold water using a fine mesh strainer to remove excess sodium and liquid. Spread them out on a clean kitchen towel or several layers of paper towels and gently pat dry. For extra crunch, remove any loose skins that naturally come off during drying.
- Coat Chickpeas with Oil and Salt: Transfer the dried chickpeas to a medium mixing bowl. Drizzle with olive oil and sprinkle with sea salt. Toss gently but thoroughly to ensure every chickpea is evenly coated with oil and seasoning, which helps achieve a crispy, flavorful exterior.
- Initial Roasting for Crispness: Spread the chickpeas out in a single layer on the prepared baking sheet. Place in the oven and roast for 30 minutes, shaking or stirring the chickpeas every 10 minutes to promote even cooking and prevent burning.
- Add Flavor and Final Crisping: Remove the tray from the oven and evenly sprinkle your chosen seasoning mixture over the roasted chickpeas. Return the tray to the oven for an additional 5 to 10 minutes, watching carefully to avoid burning. The chickpeas should be golden, fragrant, and crunchy when done.
- Cool and Serve: Let the chickpeas cool slightly on the baking sheet; this helps them crisp up further. Enjoy them warm for the best crunch, or store for later snacking
Notes
- Adjust seasoning amounts to suit your taste preferences; feel free to mix and match spice blends for your own unique flavor.
- Drying chickpeas thoroughly is key to crispiness — removing the skins where possible improves texture.
- Storage tip: Keep roasted chickpeas in an airtight container at room temperature but avoid sealing them completely airtight, as a bit of airflow helps maintain crunch. They may lose some crispness after a day but remain delicious and satisfying.
- Versatility: This snack is perfect on its own, tossed into salads, or used as a crunchy topping for soups and grain bowls.
- Nutritional info reflects one serving out of four and excludes added seasonings.
Chef’s Secrets: Tips For Crunchy Perfection
Achieving that perfect crunch with roasted chickpeas starts with thorough drying — the drier the chickpeas, the crispier they roast.
Using a kitchen towel to remove every bit of moisture and gently rubbing off loose skins makes a noticeable difference.
Tossing chickpeas evenly in oil ensures a uniform roast, preventing dry patches or burning.
Shaking the pan every 10 minutes helps cook them evenly and creates a consistent crunch.
For even bolder flavors, try toasting the spices briefly in a dry pan before adding them to the chickpeas, enhancing their aroma.
Also, don’t skip the second roasting stage after seasoning; this step locks in flavor and intensifies crispness.
Lastly, always cool them on the tray before storing — this prevents steam buildup and sogginess
Serving Suggestions: Creative Ways To Enjoy Snacks
Roasted chickpeas shine as a standalone snack—warm and crunchy right out of the oven.
For a fun twist, sprinkle them over leafy green salads to add texture and protein, or use them as a crunchy topping on creamy soups like butternut squash or tomato bisque.
Mix them into grain bowls or pasta dishes for an extra burst of flavor and nutrition.
They also work beautifully crushed over avocado toast or incorporated into wraps and sandwiches for a delightful crunch.
Pair these chickpeas with dips like hummus, tzatziki, or spicy salsas for a satisfying appetizer or party snack.
Storage Tips: Keep Crispness Longer
To keep your roasted chickpeas crunchy for as long as possible, store them at room temperature in a container that isn’t airtight—think a jar with a loose-fitting lid or a bowl covered with a cloth.
This slight airflow prevents moisture buildup, which can soften the chickpeas. Avoid refrigeration, as cold temperatures tend to draw out moisture and cause sogginess.
If you notice they have lost some crispness, reheat them in a 350°F (175°C) oven for 5–7 minutes to refresh their crunch before serving.
These snacks generally keep well for up to 3 days when stored properly.
Frequently Asked Questions: Common Recipe Inquiries
Q1: Can I use dried chickpeas instead of canned?
Yes! If using dried chickpeas, soak them overnight and cook until tender before drying thoroughly.
This method requires more time but offers control over texture and sodium content.
Q2: Why is it important to remove chickpea skins?
Removing loose skins is optional but recommended for extra crispiness, as the skins can retain moisture and create a chewy texture instead of a crunchy one.
Q3: Can I make these chickpeas gluten-free and vegan?
Absolutely! This recipe is naturally vegan and gluten-free, making it suitable for various dietary needs.
Q4: What if my chickpeas aren’t crispy after roasting?
Make sure they are dried completely before roasting and that you roast them long enough, shaking occasionally. Also, avoid overcrowding the pan to allow hot air circulation.
Q5: How do I store leftover roasted chickpeas?
Store at room temperature in a container with a loose lid or breathable cover to maintain crispness. Avoid airtight containers or refrigeration.


