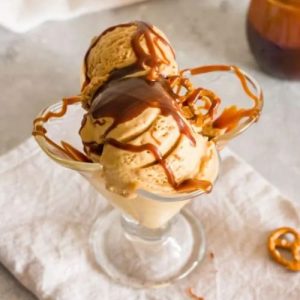
Indulge in the perfect blend of sweet and salty with this no-churn Salted Caramel Pretzel Ice Cream.
Creamy, rich, and satisfying, it combines the buttery goodness of homemade caramel with crunchy, salty pretzels for a decadent treat.
High in protein from the cream and condensed milk, and featuring good fats from butter, this recipe is easy, fuss-free, and perfect for quick desserts or weekend treats.
Salted Caramel Pretzel Ice Cream
Equipment
- 3-quart (3 L) heavy saucepan
- Balloon whisk or heat-proof silicone spatula
- 9×5-inch (23×13 cm) loaf pan or freezer-safe container
- hand mixer
Ingredients
Salted Caramel Sauce (Makes ~1½ cups):
- 1½ cups 300 g sugar
- 1½ cups 375 ml heavy cream
- 6 tbsp 90 g unsalted butter, cubed
- ¾ tsp salt
Ice Cream Base:
- 2 cups 500 ml heavy cream (≥35% fat)
- 1 can 396 g / 14 oz sweetened condensed milk
- 1 tsp vanilla extract
- 1 cup 250 ml salted caramel sauce
- 1¼ cups 50 g mini pretzels, coarsely chopped
Instructions
- Prepare the Caramel Sauce Base: Start by gathering all your ingredients for the caramel sauce sugar, heavy cream, unsalted butter, and salt. Place 1½ cups of sugar into a heavy, deep saucepan over medium heat. Avoid stirring immediately—let the sugar begin to melt naturally. You’ll notice the edges start liquefying while the center remains granulated. Gently swirl the pan to encourage even melting. This careful process prevents burning and creates a smooth caramel foundation.
- Melt the Sugar Gradually: As the sugar melts, it will begin to bubble and turn an amber color. Use a heat-proof silicone spatula or balloon whisk to gently fold the melting sugar into itself. Take your time and avoid rushing; the sugar should reach a uniform golden brown with fragrant, slightly nutty notes. Patience here ensures a rich, complex caramel flavor without bitterness.
- Add the First Portion of Cream: Once the sugar is fully melted and amber-colored, reduce the heat slightly. Slowly pour in ⅓ of the heavy cream, whisking constantly. The mixture will bubble vigorously and release steam—this is normal. Continuous whisking prevents the caramel from seizing and ensures a silky texture. After the first portion is fully incorporated, gradually add the remaining cream in small increments, whisking constantly until the sauce is smooth and glossy.
- Incorporate Butter for Richness: Remove the saucepan from the heat. Immediately add the cubed butter, one piece at a time, whisking thoroughly after each addition. The butter enriches the sauce, creating a creamy, luscious texture. Make sure all pieces melt completely and the sauce is homogeneous before proceeding.
- Season the Caramel: Stir in ¾ teaspoon of salt to balance the sweetness. Taste the caramel once it cools slightly, and adjust with more salt if desired. Transfer the finished caramel to a heat-proof bowl and let it cool to room temperature. This ensures it won’t melt the whipped cream when you layer it later.
- Whip the Cream for the Ice Cream Base: In a large mixing bowl, pour 2 cups of heavy cream along with 1 teaspoon of vanilla extract. Using a hand mixer, beat on medium-high speed until stiff peaks form. The cream should be thick and hold its shape without collapsing. Whipping the cream correctly is essential—it provides the airy structure that makes this ice cream creamy and scoopable without an ice cream maker.
- Fold in Sweetened Condensed Milk and Caramel: To the whipped cream, gently fold in one can of sweetened condensed milk and ¾ cup of the cooled salted caramel sauce. Use a large spatula and a folding motion to combine. Avoid overmixing to maintain the fluffy texture of the whipped cream. This mixture is the base for your ice cream, rich in flavor and creamy without needing churning.
- Layer the Ice Cream and Pretzels: Choose a 9×5-inch loaf pan or a similar freezer-safe container. Spoon about one-third of the ice cream base into the pan, spreading it evenly. Sprinkle one-third of the coarsely chopped pretzels on top. Drizzle some of the remaining caramel sauce over the pretzels. Repeat this layering process two more times ice cream base, pretzels, and caramel drizzle. For a visually appealing swirl, you can gently use a knife to create marbled patterns through the top layer.
- Cover and Freeze Properly: Cover the surface directly with plastic wrap to prevent ice crystals from forming. Then wrap the pan with aluminum foil for additional protection. Freeze the ice cream for at least 12 hours or overnight for best results. The caramel prevents the ice cream from freezing rock-hard, keeping it soft, creamy, and scoopable.
- Serve and Enjoy: Remove the ice cream from the freezer 5–10 minutes before serving to make scooping easier. Use an ice cream scoop dipped in warm water for clean, perfect scoops. Serve in bowls or cones, optionally garnishing with extra caramel drizzle or crushed pretzels. Enjoy this sweet-and-salty delight as a satisfying summer dessert or a quick indulgent treat.
Notes
- This no-churn ice cream is soft-serve style; it will not freeze rock-hard like traditional churned ice cream, thanks to the high cream and caramel content.
- For the best caramel flavor, avoid pre-made caramel sauces from squeeze bottles, as they are often too thin. Making your own ensures a rich, smooth texture.
- Use a digital kitchen scale for precise measurements. While volume measurements are included, weighing ingredients yields consistent results, especially for sugar and cream.
- When layering ice cream and pretzels, be gentle to preserve the whipped texture. Folding, rather than stirring, prevents the base from deflating.
- Leftover caramel can be stored in a glass jar in the fridge for up to one month. Rewarm gently before using in other desserts.
Chef’s Secrets: Tips For Perfect Ice Cream
The key to creating creamy, luscious no-churn ice cream lies in properly whipping the cream and layering it carefully.
Make sure your heavy cream is very cold before whipping, and beat it until stiff peaks form—this ensures a light, airy texture that holds up in the freezer.
When making caramel, add the cream slowly to prevent seizing, and always whisk constantly to achieve a smooth sauce.
For extra flavor and texture, toast the pretzels lightly before layering; this enhances their crunch and deepens the overall flavor profile.
Serving Suggestions: Sweet And Salty Pairings
Serve this ice cream as a standalone treat for a summer indulgence, or pair it with warm desserts like apple pie, brownies, or chocolate lava cake.
Garnishing with a few extra crushed pretzels or a drizzle of salted caramel sauce on top makes it visually appealing and adds an extra layer of texture.
You can also scoop it into waffle cones or use it as a decadent filling for an ice cream sandwich.
Its sweet-and-salty balance makes it universally appealing for family gatherings or casual dessert nights.
Storage Tips: Keep Ice Cream Perfectly Soft
To maintain the soft, creamy texture, cover the surface of the ice cream directly with plastic wrap before sealing the container with aluminum foil.
This prevents ice crystals from forming.
Store in the back of the freezer where the temperature is most consistent.
Properly stored, the ice cream will keep for 2–3 weeks.
When ready to serve, let it sit at room temperature for 5–10 minutes to make scooping easier.
Refrain from refreezing melted portions to maintain optimal texture.
Frequently Asked Questions
1. Can I make this recipe dairy-free?
Yes, substitute coconut cream for the heavy cream and use a plant-based sweetened condensed milk. The texture will be slightly different but still creamy and delicious.
2. Can I skip making homemade caramel?
While store-bought caramel can be used, homemade caramel provides a richer, deeper flavor and better consistency. If using store-bought, choose a thick caramel and avoid runny sauces in squeeze bottles.
3. How long does it take to freeze completely?
This ice cream needs a minimum of 12 hours to set properly, though overnight freezing ensures a firmer, well-swirled dessert. Soft-serve style will remain scoopable.
4. Can I add other mix-ins besides pretzels?
Absolutely! Chocolate chunks, toffee bits, or nuts can be layered in the same way. Just ensure they are chopped coarsely so they distribute evenly without sinking.
5. How do I prevent ice crystals from forming?
Covering the ice cream surface with plastic wrap directly and sealing with foil helps. Avoid frequent temperature changes, and do not leave the ice cream exposed at room temperature for long periods.