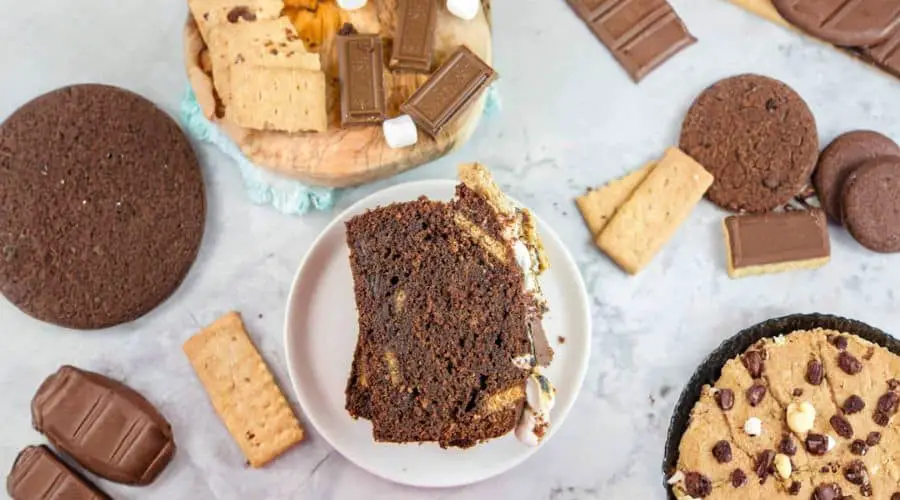
This S’mores Quick Bread is a delightful twist on the classic campfire treat, bringing the nostalgic flavors of toasted marshmallows, chocolate, and graham crackers right into your kitchen.
What makes this recipe truly special is its ease and versatility—it’s quick to mix up without the fuss of yeast, making it perfect for busy weeknights or casual gatherings.
The inclusion of yogurt adds a moist texture while contributing beneficial probiotics, and the use of oil instead of butter offers a good source of heart-healthy fats.
With the balance of sweet indulgence and wholesome ingredients like fiber-rich graham cracker crumbs and antioxidant-packed cocoa, this bread offers a satisfying treat that feels a bit more nourishing

It’s also incredibly forgiving and easy to customize, making it a fantastic option for meal prep or sharing with friends and family.
Must-Have Tools for Perfect Results:
8.5 x 4.5-Inch Loaf Pan
This classic loaf pan ensures even baking and the perfect shape for slicing. Its sturdy construction means it will last through countless recipes beyond quick breads, like meatloaf or pound cakes.
Medium Mixing Bowl
Ideal for combining dry ingredients thoroughly. A versatile kitchen staple, it can be used for everything from tossing salads to marinating meats.
Large Mixing Bowl
Perfect for whisking together wet ingredients, it offers ample space to mix without splashing, making your prep cleaner and easier.
Rubber Spatula
This tool is essential for folding delicate ingredients like chocolate chips and marshmallows into the batter without deflating it, ensuring a tender crumb. Its flexible design makes it a must-have for scraping bowls clean.
Kitchen Torch or Oven Broiler
Toasting marshmallows on top adds an irresistible caramelized finish. A kitchen torch provides precise control, while a broiler offers a convenient alternative for a bubbly, golden crust.

Delicious S’mores Loaf
Equipment
- 1 loaf pan (8.5 x 4.5 inches)
- 1 Medium mixing bowl
- 1 Large Mixing Bowl
- 1 Rubber spatula
- 1 Kitchen torch or oven broiler (for toasting)
Ingredients
- 1 cup all-purpose flour 120 grams
- ½ cup graham cracker crumbs 72 grams
- ½ cup unsweetened cocoa powder 42 grams
- ½ teaspoon salt
- 1 teaspoon baking powder
- ¼ teaspoon baking soda
- 1 cup neutral oil vegetable or grapeseed (198 grams)
- 1 cup brown sugar lightly packed (213 grams)
- 2 large eggs
- 1 teaspoon vanilla extract
- ⅔ cup plain yogurt 151 grams
- ¾ cup chocolate chips 128 grams
- 4 graham cracker sheets broken into quarters
- ¾ cup mini marshmallows
- ¾ cup miniature marshmallows for topping
- Additional graham crackers and chocolate squares for decoration
Instructions
- Prepare Your Baking Pan: Start by preheating your oven to 350°F (175°C) to ensure an even bake. Lightly grease an 8.5 x 4.5-inch loaf pan with butter or non-stick spray, making sure to cover every corner and edge thoroughly. This step prevents the bread from sticking and helps achieve a beautiful golden crust.
- Combine Dry Ingredients: In a medium-sized mixing bowl, whisk together the all-purpose flour, graham cracker crumbs, unsweetened cocoa powder, salt, baking powder, and baking soda. Mixing these dry ingredients thoroughly ensures an even distribution of leavening agents and flavors, which is essential for a consistent texture throughout the bread.
- Mix Wet Ingredients Separately: Take a large mixing bowl and whisk together the neutral oil, lightly packed brown sugar, eggs, vanilla extract, and plain yogurt. Whisk vigorously until the mixture is smooth, slightly thickened, and well combined. This step creates a moist base that will give your bread its tender crumb and rich flavor.
- Combine Wet and Dry Mixtures: Gradually add the dry ingredients to the wet mixture, stirring gently with a rubber spatula or wooden spoon until no dry streaks remain. Be careful not to overmix; stir just until everything is incorporated to keep your bread tender and avoid toughness.
- Fold in S’mores Ingredients: Using a rubber spatula, gently fold in the chocolate chips, quartered graham cracker pieces, and mini marshmallows. Take your time during this step to distribute these add-ins evenly throughout the batter without breaking them up or deflating the mixture, ensuring gooey pockets of deliciousness in every bite.
- Transfer Batter to Pan and Bake: Pour the fully mixed batter into the prepared loaf pan, smoothing the top lightly with your spatula to create an even surface. Place the pan in the preheated oven and bake for 50 to 60 minutes. Check for doneness by inserting a toothpick into the center — it should come out with moist crumbs but no wet batter.
- Cool Bread Before Topping: Remove the bread from the oven and let it cool in the pan for about 10 minutes, allowing it to firm up for easier handling. After this, carefully transfer the loaf onto a wire cooling rack to cool completely. Proper cooling prevents the marshmallow topping from melting prematurely and keeps the bread’s texture intact.
- Toast Marshmallow Topping: Once the bread is fully cooled, evenly sprinkle miniature marshmallows over the top. Using a kitchen torch, carefully toast the marshmallows until golden brown and gooey, or place the bread under a preheated broiler for 1 to 2 minutes — watch closely to prevent burning. Immediately press additional graham cracker pieces and chocolate squares into the warm marshmallows to decorate and add texture.
- Serve and Store Properly: Allow the toasted marshmallow topping to cool and set fully before slicing to prevent sticking. Serve your S’mores Quick Bread warm or at room temperature for maximum flavor and gooeyness. Store any leftovers in an airtight container at room temperature for up to five days, or wrap tightly and freeze for up to three months.
Notes
- Use room temperature eggs and yogurt for better batter consistency and smoother mixing.
- Avoid overmixing the batter once dry and wet ingredients are combined to maintain a tender crumb.
- For best results, toast the marshmallows right before serving to preserve their gooey texture.
- Substitute neutral oil with melted coconut oil for a subtle tropical flavor.
- If you don’t have a kitchen torch, use your oven broiler but watch carefully to avoid burning.
- Graham cracker crumbs can be homemade by crushing store-bought sheets in a ziplock bag with a rolling pin.
- Store leftovers in an airtight container to maintain freshness and prevent the marshmallows from becoming sticky.
Chef’s Secrets for Perfect Texture
To achieve that moist, tender crumb combined with bursts of gooey s’mores flavor, start with quality ingredients like fresh baking powder and cocoa powder.
Incorporating yogurt not only adds moisture but also tenderizes the bread with its mild acidity.
Folding in the chocolate chips, graham crackers, and marshmallows gently keeps them intact and prevents the batter from becoming too dense.
When toasting the marshmallows, a kitchen torch provides precise control, allowing you to get the perfect golden finish without overheating the bread beneath.
Don’t rush cooling before toasting—this ensures the bread holds its shape and texture during the final presentation.
Serving Suggestions That Impress Guests
This quick bread shines as a nostalgic snack or comforting breakfast paired with a steaming cup of coffee, hot cocoa, or tea.
For a decadent dessert, serve warm slices with a scoop of vanilla ice cream or drizzled with caramel sauce.
Adding fresh berries or sliced bananas on the side can balance the sweetness and add a fresh note.
This recipe also makes a fun addition to brunch buffets or kids’ parties where guests can customize toppings like extra chocolate chips or nut butters.
Storage Tips to Maintain Freshness
Store your S’mores Quick Bread in an airtight container at room temperature for up to five days to keep it moist and flavorful.
Avoid refrigeration as it can dry out the bread.
For longer storage, wrap individual slices tightly in plastic wrap and freeze in a sealed freezer-safe bag or container for up to three months.
Thaw overnight at room temperature or warm gently in the microwave before serving. Keep marshmallow toppings separate or add fresh mini marshmallows before serving to maintain their texture.
Frequently Asked Questions (FAQs)
1. Can I substitute yogurt with something else?
Yes, sour cream or buttermilk are great alternatives that will maintain moisture and add tang, but plain yogurt provides the best balance of texture and flavor.
2. Is it necessary to use both baking powder and baking soda?
Yes, baking powder and baking soda work together to help the bread rise properly while neutralizing acidity from the yogurt, ensuring a light and fluffy texture.
3. Can I use other types of chocolate?
Absolutely! Dark chocolate chunks, white chocolate chips, or even peanut butter chips can be swapped in based on your preference for a different flavor profile.
4. How do I prevent marshmallows from burning?
Toast marshmallows on low heat and watch carefully—using a kitchen torch gives more control than the broiler. Keep the torch moving to avoid hotspots.
5. Can I make this recipe gluten-free?
Yes, substitute the all-purpose flour and graham cracker crumbs with a gluten-free flour blend and gluten-free graham crackers to make it suitable for gluten sensitivities.
This recipe is inspired by bunsenburnerbakery and has been carefully refined to enhance clarity, streamline preparation steps, and ensure accurate results. We’ve also included health benefits, nutritional highlights, and Must-Have Tools to help you get the best results every time you cook.


