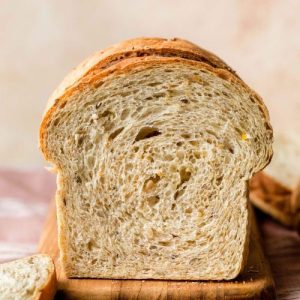
This soft multigrain bread is a wholesome, fiber-rich delight, offering a tender, fluffy texture with a subtly nutty flavor.
Packed with whole grains and seeds, it delivers plant-based protein, healthy fats, and slow-release energy.
Low in saturated fat and naturally nourishing, it’s perfect for everyday meals—whether for sandwiches, breakfast, or meal prep that keeps you satisfied all day.
Soft Multigrain Bread
Equipment
- 1 large mixing bowl
- Stand mixer with dough hook or paddle attachment (optional)
- Silicone spatula
- 9×5-inch loaf pan
- Rolling Pin
- Digital thermometer
- Measuring Cups and Spoons
Ingredients
- ½ cup 60g dry multigrain cereal mix or old-fashioned rolled oats
- 1¾ cups 410ml boiling water
- 2¼ tsp 7g instant or active dry yeast (1 packet)
- 3 Tbsp 37g packed light or dark brown sugar
- 3 Tbsp 43g unsalted butter, softened
- 1½ tsp salt
- 3⅓ cups 433g bread flour, plus more for kneading
Optional:
- ½ cup 60g sunflower seeds, chopped nuts, pepitas, raisins, or dried cranberries
Instructions
- Prepare the Grain Mixture: Begin by placing your dry multigrain cereal mix or old-fashioned rolled oats into a large heatproof bowl. Pour the boiling water evenly over the grains, ensuring they are fully submerged. Allow this mixture to rest and soften for about 20 minutes. This will hydrate the grains and release their natural flavor. Use a digital thermometer to check the temperature; the mixture should cool to about 110°F (43°C) before adding yeast. This is important — too hot, and the yeast will be destroyed; too cold, and the rising process will slow down.
- Activate the Yeast: Once the grain mixture has cooled to the right temperature, add the instant or active dry yeast and brown sugar. Stir gently to combine until dissolved. Let this mixture rest for 5–10 minutes, allowing the yeast to activate. You’ll know it’s ready when the surface develops bubbles and a light foam layer. This foamy surface is your signal that the yeast is active and ready to work its magic on the dough.
- Incorporate Initial Ingredients: Switch to a stand mixer fitted with a dough hook or paddle attachment, or use a large mixing bowl if mixing by hand. Add softened butter, salt, and one cup (about 130g) of bread flour to the foamy grain mixture. Mix on low speed for about 30 seconds to begin combining. Pause to scrape down the sides of the bowl with a silicone spatula to ensure all ingredients are evenly distributed.
- Build the Dough: Add another cup of bread flour and continue mixing on medium speed until the mixture is fairly incorporated, even if some butter lumps remain. Then add the remaining bread flour and any optional seeds or dried fruit. Continue mixing on medium speed until the dough comes together and pulls away from the sides of the bowl. If the dough feels too sticky, add additional flour one tablespoon at a time, but avoid over-flouring as this will dry out the bread. Your goal is a soft, slightly tacky dough that feels pliable to the touch.
- Knead to Develop Gluten: If using a stand mixer, knead on medium-low speed for about 3–5 minutes. If kneading by hand, transfer the dough to a lightly floured surface and knead for the same amount of time. The dough should become smooth, elastic, and slightly springy. Perform the windowpane test by tearing a small piece of dough and stretching it thin — if light passes through without tearing, kneading is complete. This step is crucial to build the gluten structure that gives the bread its texture.
- First Rise (Bulk Fermentation): Lightly oil a large bowl with olive oil or nonstick spray. Place the kneaded dough into the bowl, turning it gently to coat all surfaces with oil. Cover the bowl with a clean kitchen towel, plastic wrap, or aluminum foil. Allow the dough to rise in a warm draft-free environment for 1–2 hours, or until it has doubled in size. This process develops flavor and texture. For best results, let the dough rise for a full 2 hours at room temperature.
- Shape the Dough: After the first rise, punch the dough down gently to release trapped gases. Lightly flour your work surface and hands to prevent sticking. Roll the dough into a large rectangle approximately 8×15 inches. The shape doesn’t need to be perfect — rustic edges add character to your loaf. Roll the dough tightly into an 8-inch log, pinching the seams together to seal. Place the shaped loaf seam-side down into a greased 9×5-inch loaf pan.
- Second Rise (Proofing): Cover the loaf pan loosely with a clean kitchen towel, plastic wrap, or aluminum foil. Allow the dough to rise again for about 1 hour, or until the dough extends 1–2 inches above the edge of the loaf pan. This proofing step is essential for achieving a light, airy texture in the final bread.
- Preheat the Oven: While the dough is proofing, adjust your oven rack to the lower position and preheat the oven to 350°F (177°C). Baking on the lower rack ensures even heat distribution and prevents excessive browning on top.
- Bake the Bread: Place the risen loaf in the preheated oven and bake for 35–40 minutes. Check at 30 minutes — if the top is browning too quickly, tent it loosely with aluminum foil to prevent burning. To test for doneness, gently tap the top of the loaf; it should sound hollow. For precise results, use an instant-read thermometer — the center should register between 195°F and 200°F (90°C–93°C).
- Cooling and Serving: Once baked, remove the loaf from the oven and allow it to cool for at least 10–15 minutes before slicing. This resting period lets the crumb finish setting and enhances flavor. Serve warm or at room temperature with your favorite spreads, or use it for nutritious sandwiches.
- Storage for Freshness: Wrap leftover bread tightly in plastic wrap or place it in an airtight container. Store at room temperature for 2–3 days. For longer storage, refrigerating is an option but can cause bread to become dry more quickly. Freezing is ideal for preserving freshness — simply slice the cooled loaf before freezing, then store in a freezer bag for up to 3 months. Thaw slices at room temperature or toast directly from frozen for a quick, fresh-tasting serving.
Notes
- Use a reliable digital thermometer when preparing the grain mixture. Yeast activation depends on temperature, and overheating will kill the yeast, while underheating slows the rise.
- Fresh yeast produces the best results, but both instant and active dry yeast work well.
- If you prefer extra flavor and texture, experiment with seeds, nuts, or dried fruit, but keep the total add-ins around ½–⅔ cup.
- Avoid adding too much flour during kneading. Slight tackiness in the dough results in softer bread.
- For best texture and taste, allow the bread to cool completely before slicing — this prevents a gummy crumb.
Chef’s Secrets: Elevating Homemade Bread Baking
To achieve bakery-quality bread at home, attention to detail matters.
Always measure flour by spooning it into your measuring cup and leveling it off rather than scooping directly, which compresses flour and adds excess.
Hydration is key — the grain mixture should feel warm but not hot before yeast is added.
Kneading is equally important; under-kneading prevents proper gluten development, while over-kneading can produce a dense crumb.
For a richer crust and deeper flavor, try brushing the loaf with a light egg wash before baking or adding a teaspoon of honey to the dough.
Finally, patience is your best ingredient — allowing the dough to rise slowly at a slightly cooler temperature often produces a more flavorful bread.
Serving Suggestions: Delicious Ways To Enjoy Bread
This soft multigrain bread is a versatile kitchen staple.
Slice it thick for hearty toast with avocado, nut butter, or a drizzle of olive oil and herbs.
Use it as the base for gourmet sandwiches — smoked turkey with sprouts, hummus, or fresh vegetables works beautifully.
It also pairs well with soups and stews, offering a wholesome side with satisfying texture.
For a breakfast option, toast slices lightly and serve with fresh fruit, Greek yogurt, and a sprinkle of seeds.
You can even turn it into a simple bruschetta topped with tomatoes, basil, and a touch of olive oil for an elegant snack.
Storage Tips: Keeping Bread Fresh Longer
For the best flavor and texture, store your bread at room temperature, wrapped tightly in plastic wrap or in an airtight bread bag.
This keeps moisture locked in while preventing the loaf from drying out.
Bread stored this way should stay fresh for 2–3 days.
For longer storage, refrigerating is an option but can cause bread to become dry more quickly.
Freezing is ideal for preserving freshness — simply slice the cooled loaf before freezing, then store in a freezer bag for up to 3 months.
Thaw slices at room temperature or toast directly from frozen for a quick, fresh-tasting serving.
Frequently Asked Questions
1. Can I make this bread without a stand mixer?
Yes! This recipe works perfectly by hand. Kneading by hand takes slightly more effort — about 6–8 minutes — but gives great control over dough texture.
Use a sturdy bowl or countertop and keep adding flour sparingly to prevent stickiness.
2. What grains can I substitute in this recipe?
You can use oats, barley, rye flakes, or any unsweetened whole grain hot cereal. Avoid flavored mixes with sugar or spices as they alter the bread’s flavor and rising ability.
3. Can I use whole wheat flour entirely?
Using 100% whole wheat flour will make the bread denser and heavier. For a softer texture, replace only up to one cup of bread flour with whole wheat flour. This adds flavor and nutrition without sacrificing fluffiness.
4. How do I make the crust softer?
For a softer crust, brush the loaf lightly with melted butter or olive oil after baking. You can also wrap the bread in a clean towel while cooling to retain moisture.
5. Can I make this bread in advance?
Yes! This dough can be prepared the day before using overnight instructions, allowing it to slowly rise in the refrigerator.
This method develops deeper flavor. Simply shape and refrigerate for up to 12 hours, then let rise at room temperature before baking.