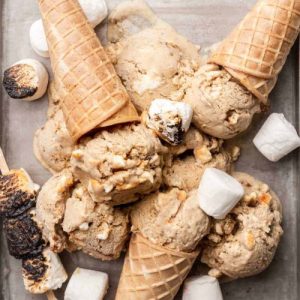
This Toasted Marshmallow Ice Cream is a creamy twist on a nostalgic favorite, blending a silky custard base with golden, charred marshmallows for a campfire-inspired treat.
It’s indulgent yet balanced, providing a source of protein from egg yolks and calcium from dairy.
With good fats from cream and relatively low sodium, it’s a satisfying dessert that’s both comforting and wholesome—perfect for everyday enjoyment, family gatherings, or weekend indulgence.
Toasted Marshmallow Ice Cream
Equipment
- 1 heavy-bottomed saucepan
- 1 Medium mixing bowl
- 1 paring knife (for vanilla bean)
- 1 whisk
- 1 fine-mesh sieve
- 1 baking tray (for toasting marshmallows)
- 1 ice cream maker
- 1 Freezer-safe container with lid
Ingredients
- 480 ml whole milk
- 300 ml double cream heavy cream
- 5 large egg yolks
- 100 g granulated sugar
- 1 whole vanilla bean pod
- 200 g mini marshmallows divided into two portions
Instructions
- Infuse the milk and cream: Pour the whole milk and double cream into a heavy-based saucepan. Split the vanilla bean lengthwise using the dull edge of a paring knife, scraping out the seeds, then add both the seeds and the pod to the saucepan. Place the pan over medium heat and warm slowly until you notice steam and small bubbles forming around the edges. Do not allow the mixture to boil, as this can change the texture. Once gently heated, remove from the stove and set aside.
- Whisk the egg yolks and sugar: In a medium mixing bowl, combine the egg yolks with the granulated sugar. Whisk vigorously until the mixture becomes thick, pale, and slightly frothy. This step not only dissolves the sugar but also incorporates air, giving the custard base a lighter structure.
- Temper the egg mixture: To prevent the eggs from scrambling, carefully temper them with the hot milk mixture. While whisking the yolk mixture constantly, slowly pour in about one cup of the warm milk in a thin stream. Once blended, continue to whisk while adding the remaining milk mixture gradually until everything is fully combined. Placing the bowl on a damp towel will keep it stable as you whisk.
- Cook the custard base: Return the combined mixture to the saucepan and place it over low heat. Stir constantly with a whisk or wooden spoon, allowing the custard to slowly thicken without ever boiling. The process may take several minutes, but patience is key. To test readiness, dip the back of a spoon into the custard, then run your finger across it. If the line remains clean without running together, the custard has reached the proper thickness.
- Strain for a smooth texture: Remove the vanilla pod from the custard, then pour the mixture through a fine-mesh sieve into a clean bowl. This step ensures any lumps or cooked egg bits are removed, leaving a silky, lump-free base.
- Toast the first batch of marshmallows: Spread half of the mini marshmallows evenly across a baking tray. Position the tray under a hot grill (broiler) close to the heat source. Watch carefully, as the marshmallows will puff and brown within minutes and can burn easily. Remove them once golden and slightly charred to your preference.
- Dissolve marshmallows into custard: While the custard is still warm, spoon in the toasted marshmallows and stir until they dissolve completely into the base. Cover the bowl with plastic wrap pressed directly against the custard’s surface to prevent a skin from forming. Allow it to cool to room temperature, then refrigerate for at least 2 hours, though overnight chilling gives the best flavor and texture.
- Churn the ice cream: Once thoroughly chilled, pour the custard into your ice cream maker. Follow the manufacturer’s directions to churn until the mixture thickens into a soft-serve consistency. This process incorporates air, which is what makes the ice cream creamy rather than dense.
- Toast the remaining marshmallows: While the machine churns, toast the second half of the marshmallows using the same method as before. Keep an eye on them to avoid burning. Allow them to cool slightly before mixing.
- Fold in marshmallows and freeze: When churning is finished, fold the freshly toasted marshmallows gently into the soft ice cream. Transfer the mixture into a freezer-safe container, smooth the surface, and cover tightly. Freeze for at least 6 hours, or until the ice cream is firm enough to scoop.
- Serve and enjoy: When ready to serve, let the ice cream rest at room temperature for 5 minutes to soften slightly for easier scooping. Dish into cones, bowls, or sundaes, and enjoy the creamy, toasted marshmallow flavor in every bite.
Notes
- Use high-fat cream and whole milk for a rich, creamy texture.
- Toast marshmallows carefully—sugar burns quickly.
- Chill the custard overnight for best results.
- Add marshmallows in two stages: some dissolved for flavor, others folded in for texture.
- Always strain the custard for smoothness.
- Let ice cream sit for 5 minutes before scooping.
- Digital scales ensure accurate ingredient measurement.
- A kitchen torch works well if no grill is available.
- Soft-serve texture after churning will firm up in the freezer.
- Store in an airtight container to avoid freezer burn.
Chef’s Secrets for Perfect Results
The key to this recipe’s success lies in patience and precision.
First, always heat the custard gently; low and slow cooking prevents curdled eggs and ensures a silky finish.
Straining the custard is another non-negotiable step—it guarantees a perfectly smooth base without lumps.
When toasting marshmallows, stay close by, as sugar burns in seconds.
A light golden char gives a subtle sweetness, while a darker char adds campfire smokiness.
Finally, don’t rush the chilling process; allowing the custard to cool fully, preferably overnight, gives the ice cream machine the best chance to create a light, airy texture.
Serving Suggestions for Every Occasion
This ice cream is delightful on its own, but you can easily dress it up.
Serve scoops in waffle cones for a fun summer treat, or pair with chocolate brownies to create a decadent dessert reminiscent of s’mores.
For a party presentation, layer scoops in a sundae glass with crushed graham crackers, chocolate sauce, and extra toasted marshmallows.
It also makes a wonderful topping for warm fruit pies, such as apple or peach, where the contrast of hot and cold elevates the experience.
Storage Tips for Lasting Freshness
To keep your ice cream in peak condition, always transfer it to a freezer-safe container with a tight-fitting lid.
Press a sheet of parchment or plastic wrap against the surface before sealing to minimize ice crystal formation.
Stored properly, the ice cream will last up to 6 weeks.
For the best scooping texture, allow the container to rest at room temperature for 3–5 minutes before serving.
Avoid repeatedly thawing and refreezing, as it compromises both texture and flavor.
Frequently Asked Questions
1. Can I make this recipe without an ice cream machine?
Yes! A no-churn version can be made by folding whipped cream into sweetened condensed milk mixed with toasted marshmallows. It’s slightly denser than churned ice cream but still creamy and flavorful.
2. How do I prevent my custard from curdling?
Always cook custard over low heat, stirring continuously. Temper the egg yolks by slowly adding hot milk before combining everything. If it does curdle slightly, straining through a fine sieve usually fixes the texture.
3. Can I use regular-sized marshmallows instead of mini ones?
Absolutely. Regular marshmallows work just as well—simply cut them into smaller pieces before toasting for easier blending into the custard and folding into the churned ice cream.
4. How long does it take to churn?
This depends on your machine, but most ice cream makers require 20–30 minutes. The custard should thicken to soft-serve consistency before being transferred to the freezer for firming.
5. Can I add extra flavors or mix-ins?
Definitely! Crushed graham crackers, chocolate chips, or a swirl of caramel can enhance the flavor and create a s’mores-style ice cream. Just be sure to fold these extras in after churning so they stay well-distributed.