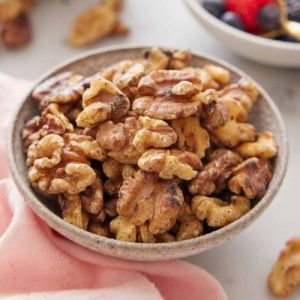
Add a delightful crunch and rich, nutty flavor to your meals with these perfectly toasted walnuts.
Packed with plant-based protein, heart-healthy fats, and fiber, they’re a nutritious addition to breakfast bowls, salads, and baked goods.
Quick, simple, and versatile, this easy-to-follow recipe is perfect for everyday cooking, meal prep, or a wholesome snack on the go.
Delicious Toasted Walnuts
Equipment
- 1 baking sheet or skillet
- Parchment paper (for oven method)
- Large skillet (for stovetop method)
Ingredients
- 1 cup walnuts 120 g
Instructions
- Preheat the Oven (Oven Method): Begin by setting your oven to 350°F (175°C) to ensure it reaches the ideal temperature for toasting. This step is crucial because an evenly preheated oven allows the walnuts to toast uniformly, developing a rich, nutty aroma without burning. While the oven warms, line a baking sheet with parchment paper to prevent sticking and make cleanup effortless.
- Arrange Walnuts Evenly (Oven Method): Take 1 cup (120 g) of walnuts and spread them in a single layer on the prepared baking sheet. Ensuring each walnut piece has space around it helps them toast evenly, allowing heat to circulate and enhancing the flavor and texture. Avoid piling or overlapping the walnuts, as this can result in uneven toasting.
- Toasting the Walnuts (Oven Method): Place the baking sheet in the preheated oven. Toast the walnuts for 10 to 15 minutes, keeping a close eye on them. Every few minutes, gently stir or shake the walnuts using a spatula to promote even browning. You’ll notice the color darkening slightly and the aroma becoming deeply nutty—these are your cues that the walnuts are nearly done.
- Cool the Walnuts (Oven Method): Once toasted, remove the walnuts from the oven immediately to prevent overcooking. Transfer them to a plate or tray and allow them to cool completely. Cooling is essential because the residual heat can continue to cook the nuts if left on the hot pan, which may result in a slightly bitter taste.
- Heat the Skillet (Stovetop Method): For the stovetop option, select a large, dry skillet and place it over medium heat. Preheating the skillet ensures the walnuts toast quickly and evenly. Avoid using oil or butter; the natural oils in the walnuts are sufficient to bring out their flavor.
- Add Walnuts to Skillet (Stovetop Method): Pour the 1 cup (120 g) of walnuts into the preheated skillet in a single layer. Make sure they are spread evenly to maximize contact with the skillet’s surface. This helps each walnut develop a uniform golden-brown color and prevents some pieces from burning while others remain raw.
- Toasting with Attention (Stovetop Method): Cook the walnuts over medium heat, stirring frequently with a wooden spoon or spatula. This constant motion is key to preventing burning and allows the nuts to release their natural oils, enhancing both aroma and flavor. Toast for 8 to 12 minutes, keeping an eye on their color and smelling for a rich, nutty fragrance, which signals they are perfectly toasted.
- Cool Completely (Stovetop Method): After reaching the desired color and fragrance, remove the skillet from the heat. Immediately transfer the toasted walnuts to a plate or tray to cool completely. Letting them cool prevents residual heat from overcooking and ensures they maintain their crisp texture.
- Store or Use as Desired: Once the walnuts are fully cooled, you can use them immediately to add crunch and flavor to salads, oatmeal, baked goods, or snack mixes. If not using right away, store them in an airtight container at room temperature for up to 1 week, or refrigerate/freezer for 2–3 months to maintain maximum freshness and prevent rancidity.
Notes
- Choose uniform walnut pieces: Using halves, pieces, or chopped walnuts is fine, but pick all of the same type for even toasting. Smaller pieces will toast faster, so monitor them carefully to avoid burning.
- Trust your senses: Color changes and aroma are the best indicators of doneness. Look for a light golden-brown hue and inhale the rich, nutty scent as the oils release.
- Cool completely: Always allow walnuts to cool fully before storing to prevent condensation, which can make them stale quickly.
- Optional seasoning: For a twist, lightly sprinkle with cinnamon, smoked paprika, or a pinch of salt before toasting. This adds flavor while keeping the nuts wholesome.
Chef’s Secrets: Expert Toasting Techniques
Mastering toasted walnuts is all about patience and attention to detail.
Whether using the oven or stovetop, evenly spacing the nuts ensures consistent browning.
Stirring frequently prevents scorching and encourages even oil release, which deepens flavor.
Always monitor the color and aroma rather than relying solely on time—walnuts can go from perfectly toasted to burnt in seconds.
Choosing fresh, high-quality walnuts enhances both taste and nutritional value, making your dishes truly shine.
Serving Suggestions: Creative Meal Ideas
Toasted walnuts add a satisfying crunch and subtle nutty sweetness to numerous dishes.
Sprinkle them over breakfast bowls, yogurt, or oatmeal for a protein-rich start to your day.
Toss them into green salads or grain bowls for texture and flavor contrast.
Incorporate them into baked goods like muffins, breads, or cookies to elevate both taste and nutrition.
They also make a simple, wholesome snack on their own or paired with dried fruits and cheese.
Storage Tips: Keep Walnuts Fresh Longer
Proper storage is key to maintaining crunch and flavor.
After cooling completely, place walnuts in an airtight container and store in a cool, dark cupboard for up to one week.
For longer storage, refrigerate or freeze in airtight containers, where they can last 2–3 months without losing texture or taste.
Avoid storing warm walnuts, as condensation can lead to sogginess and staleness.
Always label containers with the date to track freshness.
Frequently Asked Questions
1. Can I toast walnuts ahead of time?
Absolutely! Toasted walnuts can be prepared in advance and stored in an airtight container at room temperature for up to one week or in the refrigerator/freezer for up to three months.
Just make sure they’re fully cooled before storing.
2. Should I use halves or chopped walnuts?
Either works well, but consistency is key. Smaller pieces toast faster, while halves take slightly longer. Using all one type ensures even cooking and prevents some pieces from burning while others remain raw.
3. Can I add flavor while toasting?
Yes! Lightly sprinkle walnuts with salt, cinnamon, smoked paprika, or a touch of sugar before toasting. Be cautious with sweet toppings, as they can burn quickly, so stir frequently and monitor closely.
4. How do I know when walnuts are perfectly toasted?
Look for a golden-brown color and a fragrant, nutty aroma. The smell is usually the first indicator that the oils have released and the nuts are ready. Avoid relying solely on time, as ovens and stovetops vary.
5. Can I use other nuts instead of walnuts?
Definitely! Almonds, pecans, hazelnuts, or cashews can be toasted using the same methods.
Adjust the cooking time slightly depending on size and type—smaller nuts generally toast faster, so watch closely to prevent burning.