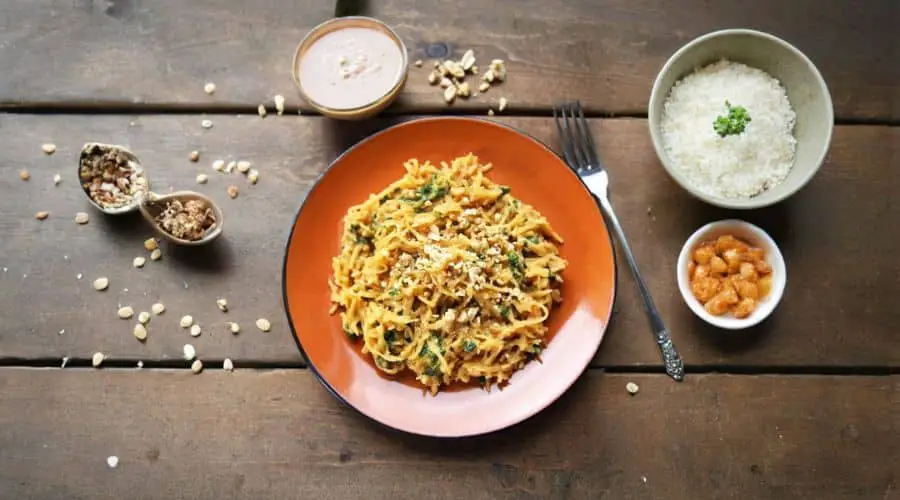
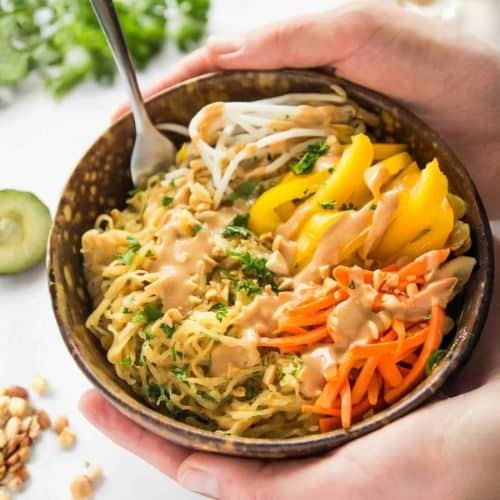
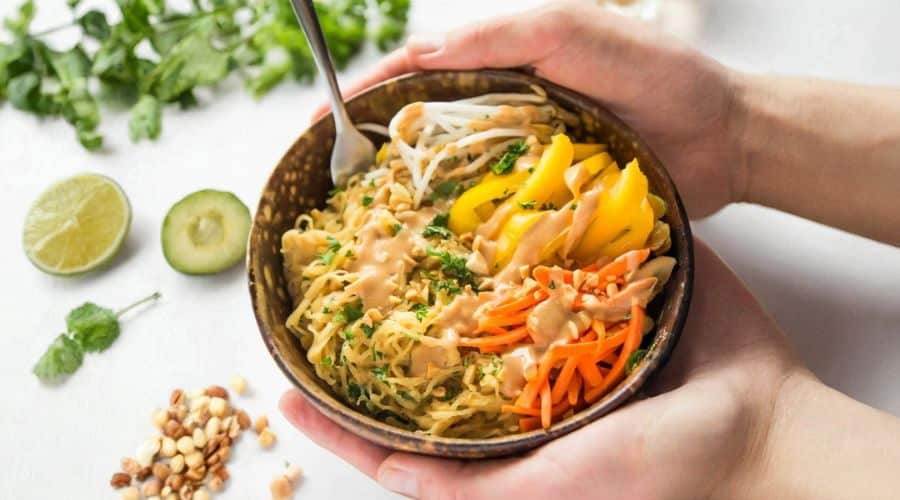
This Thai Spaghetti Squash with Peanut Sauce is a vibrant and nourishing dish that perfectly combines wholesome ingredients with bold, authentic flavors.
It offers a delicious grain-free alternative to traditional pasta, featuring spaghetti squash which is naturally low in carbs and rich in fiber.

The creamy peanut sauce adds a wonderful dose of plant-based protein and heart-healthy fats from natural peanut butter and coconut milk, making it both satisfying and nourishing.
This recipe is gluten-free, vegan, and free from refined sugars, catering to clean eating lifestyles.
Its quick cooking time—especially when using the Instant Pot method—makes it ideal for busy weeknights or meal prepping.
With simple pantry staples and a rich, spicy sauce, this dish delivers complex Thai-inspired tastes without the fuss, balancing health and flavor in every bite.
Must-Have Tools for Perfect Results
Instant Pot DUO 7-in-1 Pressure Cooker:
The Instant Pot dramatically cuts down cooking time, steaming the spaghetti squash perfectly in just 10 minutes. Its versatility extends far beyond this recipe, making it a must-have for quick meals, soups, and more.
Sharp Chef’s Knife:
A sharp knife is essential for safely slicing the tough spaghetti squash. Precision and ease in cutting reduce prep stress and speed up your cooking process.
Medium Saucepan:
This is key for gently heating and thickening the peanut sauce, allowing flavors to meld while maintaining a smooth, creamy consistency. A quality saucepan also serves for countless other cooking tasks.
Mixing Bowl:
Combining the squash noodles with sauce and garnishes is simplest in a large mixing bowl, ensuring even coating. This versatile tool is indispensable for salads, marinating, and tossing ingredients.
Fork:
Used to scrape out the squash strands once cooked, a sturdy fork helps create the signature noodle texture. It’s a simple tool that plays a big role in transforming squash into pasta-like strands.

Vegan Thai-Inspired Spaghetti Squash
Equipment
- Instant Pot (6-quart or larger)
- 1 Sharp Chef’s Knife
- 1 Medium saucepan
- 1 Large Mixing Bowl
- 1 Fork
Ingredients
Ingredients List
- 1 medium spaghetti squash
- Olive oil for drizzling
- Sea salt to taste
- 1 garlic clove minced
- ¼ cup chopped fresh parsley or cilantro leaves
- 2 tablespoons crushed peanuts
Peanut Sauce:
- 1 14 oz can coconut milk
- ⅔ cup natural peanut butter
- ¼ cup coconut sugar or 2 tablespoons maple syrup
- ¼ cup water
- 2 tablespoons soy sauce or tamari for gluten-free or fish sauce (non-vegan option)
- 2 tablespoons white or apple cider vinegar
- 2 teaspoons toasted sesame oil
- 2 teaspoons red curry paste
Instructions
- Prepare the Spaghetti Squash: Begin by carefully washing the outside of the spaghetti squash to remove any dirt. Using a sharp chef’s knife, place the squash on a sturdy cutting board. Slice the squash in half widthwise (across the shorter side), which will create halves with longer noodle strands once cooked. If the squash feels tough to cut, work slowly and cautiously to avoid accidents. After halving, use a spoon to scoop out the seeds and stringy pulp from each half, creating a hollow cavity. Set the squash halves aside while you prepare the cooking method of your choice.
- Oven Roasting Method: Preheat your oven to 350°F (175°C). Drizzle the cut sides of the squash halves lightly with olive oil, then sprinkle a pinch of sea salt evenly over the flesh. Place the squash halves cut-side down on a rimmed baking sheet lined with parchment paper or aluminum foil for easier cleanup. Roast the squash in the preheated oven for approximately 25 minutes, or until the flesh is tender and easily pierced with a fork. Remove from the oven and allow to cool for about 10 minutes so it is safe to handle.
- Instant Pot Pressure Cooking Method: Pour 1 cup of water into the Instant Pot insert. Place the metal trivet inside the pot and set the squash halves on top of it, cut side up. Seal the Instant Pot lid and ensure the pressure release valve is set to “Sealing.” Select the “Manual” or “Pressure Cook” function and set the timer for 10 minutes. Once the cooking cycle completes, carefully perform a quick pressure release by turning the valve to “Venting.” Open the lid, drain any excess liquid from the squash cavities, and test the flesh with a fork to ensure it is tender. If it requires softer texture, reseal and cook for a few more minutes as needed.
- Extract Spaghetti Squash Noodles: Once the squash halves have cooled enough to handle safely, use a fork to gently scrape the flesh lengthwise, coaxing out the spaghetti-like strands. Hold the squash half steady and use the fork to pull the flesh away from the skin, working all around the cavity until only the skin remains. If the strands seem moist or watery, transfer them to a colander or fine-mesh sieve and gently pat dry with paper towels to remove excess moisture. Place the prepared squash noodles into a large mixing bowl.
- Prepare the Creamy Thai Peanut Sauce: Gather all the peanut sauce ingredients: coconut milk, natural peanut butter, coconut sugar (or maple syrup), water, soy sauce or fish sauce, vinegar, toasted sesame oil, and red curry paste. Pour these into a medium saucepan. Place the pan over medium-high heat and whisk the ingredients together to combine them smoothly. Bring the mixture to a gentle boil, stirring constantly to prevent scorching. Once boiling, reduce the heat to low and let the sauce simmer, stirring frequently for about 5 minutes, until it thickens into a rich, velvety consistency that will coat the squash noodles beautifully. Remove from heat once the desired thickness is achieved.
- Combine Sauce and Spaghetti Squash Noodles: Heat a large skillet over medium heat and add a small splash of olive oil if desired. Add the minced garlic and sauté for 30 seconds until fragrant but not browned. Then stir in the chopped parsley or cilantro and approximately ¼ cup of the peanut sauce. Mix these together briefly to infuse the fresh herbs with the sauce’s flavors. Add the spaghetti squash noodles and crushed peanuts to the skillet. Toss everything gently but thoroughly to ensure the noodles are evenly coated with the creamy sauce. Cook for 1-2 minutes just until heated through, stirring frequently to prevent sticking.
- Plate and Garnish for Serving: Transfer the sauced spaghetti squash noodles to serving plates or bowls. For an extra touch of texture and flavor, sprinkle additional crushed peanuts over the top. Garnish with fresh chopped parsley or cilantro for brightness and a pop of color. Optionally, add a squeeze of fresh lime juice or thinly sliced green onions to enhance the dish’s freshness. For added nutrition and crunch, serve alongside or topped with raw or lightly sautéed vegetables like bean sprouts, shredded carrots, or sliced bell peppers.
- Enjoy and Store Leftovers Properly: Serve your Thai Spaghetti Squash with Peanut Sauce immediately while warm. Leftover squash and sauce can be stored separately in airtight containers in the refrigerator for up to 3 days. When reheating, gently warm the sauce on the stovetop and toss with the squash noodles to maintain the best texture. This dish also freezes well—freeze the sauce alone in portions and combine with freshly cooked squash when ready to eat for optimal flavor and textur
Notes
Chef’s Secrets to Flavorful Success
Achieving the perfect balance of creamy, spicy, and savory in the peanut sauce is key to this dish.
Using red curry paste rather than individual spices streamlines the process while providing authentic Thai flavor.
When simmering the sauce, constant stirring ensures it thickens smoothly without scorching.
Don’t underestimate the fresh herbs — parsley or cilantro add brightness that lifts the rich peanut sauce. For added depth, lightly toast your peanuts before crushing them to bring out their nutty aroma.
Lastly, cutting the squash widthwise rather than lengthwise yields longer noodle strands, enhancing the dish’s noodle-like texture.
Serving Suggestions to Impress Everyone
This Thai Spaghetti Squash shines as a main dish for a light lunch or dinner, especially when paired with crunchy fresh veggies such as bean sprouts, julienned carrots, and sliced bell peppers.
It also works beautifully as a side dish alongside grilled tofu, chicken, or fish.
For a more filling meal, toss in some steamed edamame or roasted broccoli florets.
Garnish with a squeeze of fresh lime juice and chopped green onions to add zing and freshness.
The leftover peanut sauce can double as a flavorful dip for spring rolls or drizzled over grain bowls for an extra punch of flavor.
Storage Tips for Freshness and Flavor
Store cooked spaghetti squash and peanut sauce separately in airtight containers to maintain optimal texture and taste.
Refrigerated leftovers will stay fresh for up to 3 days.
When reheating, warm the sauce gently on the stovetop and toss with freshly heated squash noodles to avoid drying out or clumping.
The peanut sauce freezes well in portions—use freezer-safe containers or zip-top bags for convenience.
Thaw in the refrigerator overnight and whisk before reheating. Avoid freezing cooked squash as it may become mushy upon thawing.
Frequently Asked Questions Answered Clearly
1. Can I make this recipe vegan and gluten-free?
Yes! Use tamari or gluten-free soy sauce instead of fish sauce to keep it vegan and gluten-free. Make sure your curry paste is vegan-friendly as well.
2. What if I don’t have an Instant Pot?
No worries! Roasting the spaghetti squash in the oven at 350°F for about 25 minutes works perfectly to cook the squash evenly and develop subtle sweetness.
3. How do I know when the spaghetti squash is done?
The squash is ready when the flesh is tender and easily pierced with a fork. When scraping the strands, they should come out easily and resemble thin noodles.
4. Can I use other nut butters instead of peanut butter?
You can experiment with almond or cashew butter, but expect a slightly different flavor profile. Peanut butter provides the classic Thai peanut sauce taste.
5. Is the peanut sauce suitable as a dip?
Absolutely! The rich, creamy peanut sauce is fantastic as a dip for fresh veggies, spring rolls, or grilled meats, making it a versatile addition to many meals.
This recipe is inspired by leelalicious and has been carefully refined to enhance clarity, streamline preparation steps, and ensure accurate results. We’ve also included health benefits, nutritional highlights, and Must-Have Tools to help you get the best results every time you cook.


