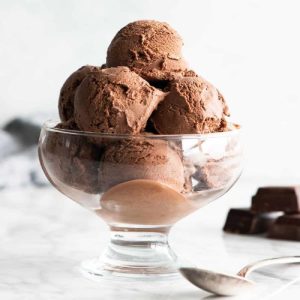
This homemade chocolate ice cream is rich, creamy, and deeply satisfying, crafted with real chocolate and a silky custard base.
Packed with calcium, protein, and antioxidants from cocoa, it’s a dessert that feels indulgent yet wholesome in moderation.
With balanced fats for creaminess and less processed ingredients than store-bought options, it’s a freezer staple that’s surprisingly easy to make and perfect for both everyday treats and special gatherings.
Chocolate Ice Cream
Equipment
- 1 ice cream maker
- 1 Ice cream storage container
- 1 Large glass mixing bowl
- 1 medium saucepan
- 1 fine-mesh strainer
- 1 whisk
- 1-Heatproof spatula
- Measuring Cups and Spoons
Ingredients
- 2 cups heavy cream divided
- ¼ cup unsweetened cocoa powder
- 6 oz semisweet chocolate chopped (or chocolate chips)
- 1 ½ cups whole milk
- ¾ cup granulated sugar
- ⅛ tsp sea salt
- 3 large egg yolks beaten
- ½ tsp pure vanilla extract
Instructions
- Combine Cream and Cocoa: In a medium saucepan, pour in 1 cup of the heavy cream and add the unsweetened cocoa powder. Whisk until the mixture is completely smooth and no dry cocoa remains. Place the pan over medium heat and bring it just to a gentle boil. Once bubbling, let it simmer for about 30 seconds, whisking continuously to prevent scorching. This process helps “bloom” the cocoa, intensifying the chocolate flavor right from the start.
- Melt the Chocolate Into the Cream: Remove the saucepan from the heat and immediately add the chopped semisweet chocolate (or chocolate chips). Whisk steadily until the chocolate melts completely and the mixture is silky and glossy. Stir in the remaining 1 cup of heavy cream, mixing until the base is fully combined. Transfer this chocolate mixture to a large heatproof bowl. Place a fine mesh strainer on top of the bowl to prepare for the custard step, then set it aside.
- Prepare the Egg Yolks: In a separate medium bowl, lightly whisk the egg yolks until they are smooth and slightly thickened. This will make it easier to temper them later without scrambling. Keep this bowl within reach, as you will be adding warm milk to it soon.
- Heat the Milk and Sugar: Using the same saucepan (wipe it clean if needed), add the whole milk, granulated sugar, and sea salt. Place it over medium heat and whisk until the sugar dissolves completely. The mixture should feel warm to the touch but not boiling. At this point, it’s ready to be combined with the egg yolks.
- Temper the Egg Yolks: Slowly ladle about ½ cup of the warm milk mixture into the bowl with the whisked egg yolks while whisking constantly. This process, called tempering, prevents the eggs from cooking too quickly. Once the yolks have been warmed, carefully pour the yolk mixture back into the saucepan with the rest of the milk. Keep whisking during this step to ensure a smooth custard base.
- Cook the Custard: Continue cooking the mixture over medium heat, stirring constantly with a heatproof spatula. Be sure to scrape the bottom and sides of the pan so nothing sticks or burns. The custard is ready when it thickens enough to coat the spatula and holds a light film (about 170°F / 77°C if using a thermometer). Do not let it boil, as this could cause curdling.
- Strain and Blend With Chocolate: Once the custard reaches the right consistency, immediately pour it through the prepared fine mesh strainer into the bowl containing the chocolate mixture. Strain out any cooked egg bits for a silky texture. Stir gently until both mixtures are completely combined into a smooth, chocolatey base.
- Add Vanilla and Chill: Stir in the vanilla extract for depth of flavor. Cover the bowl with a lid or plastic wrap and refrigerate until fully chilled—at least 6 hours, but preferably overnight for the best results. If you’d like to speed up the cooling process, set the bowl in an ice bath and stir every 10 minutes until cold.
- Churn the Ice Cream: Once chilled, pour the mixture into your ice cream maker and churn according to the manufacturer’s instructions. Typically, this will take 30–40 minutes, during which the mixture will thicken and take on a soft-serve consistency.
- Freeze Until Firm: Transfer the churned ice cream into an airtight freezer-safe container, smoothing the top with a spatula. Cover tightly and freeze for at least 6 additional hours, or until firm enough to scoop.
- Serve and Enjoy: Scoop into bowls, cones, or layer into dessert creations. Garnish with shaved chocolate, sprinkles, or a drizzle of hot fudge if desired. Enjoy your rich, creamy, homemade chocolate ice cream!
Notes
- Cream choice matters: Use heavy cream for a luxuriously creamy texture—lighter creams won’t achieve the same richness.
- Two chocolates = deeper flavor: Bloomed cocoa powder plus melted chocolate give a layered, full-bodied chocolate taste.
- Don’t rush chilling: Proper refrigeration allows the custard to thicken, ensuring a smooth churn later.
- Temperature check: Keep custard at about 170°F to thicken without scrambling eggs.
- Texture tip: Straining the custard removes any tiny cooked egg bits for a perfectly silky base.
- Customize sweetness: Adjust chocolate type (milk vs. dark) depending on your flavor preference.
- Hand churn option: Without a machine, stir and re-freeze repeatedly for a smooth, scoopable result.
Chef’s Secrets for Perfect Ice Cream
The secret to this recipe lies in the balance of technique and patience.
Blooming the cocoa in cream unlocks its deep chocolate notes, while the addition of chopped chocolate creates richness and body that a cocoa-only recipe would lack.
Tempering the eggs may feel intimidating, but slow, steady whisking ensures a velvety custard without curdling.
Another key is proper chilling—rushing this step can lead to icy crystals, while an overnight rest develops a smoother texture and fuller flavor.
Lastly, straining the custard is non-negotiable; it guarantees a professional-level finish you’d expect from a high-end ice cream shop.
Serving Suggestions Beyond the Basics
This chocolate ice cream is indulgent enough to shine on its own, but pairing options elevate it even further.
Serve in crisp waffle cones, layered in sundae glasses with whipped cream and berries, or alongside warm brownies and molten cakes for contrast.
It also pairs beautifully with coffee-based desserts like affogato or as a filling for homemade ice cream sandwiches.
For an elegant twist, add a sprinkle of flaky sea salt, toasted nuts, or a drizzle of caramel sauce.
If hosting, consider setting up a “sundae bar” with toppings so guests can customize their scoops.
Storage Tips for Lasting Freshness
For best results, store your ice cream in a shallow, airtight container to limit air exposure and reduce ice crystal formation.
Press a piece of parchment paper or plastic wrap directly onto the surface before sealing the lid—this keeps the texture creamy for weeks.
Homemade ice cream is at its prime within 2–3 weeks, though it can last up to 3 months if stored properly.
Allow the container to sit at room temperature for 5 minutes before scooping; this softens it slightly and makes serving easier without compromising texture.
Always return it quickly to the freezer to maintain quality.
Frequently Asked Questions
1. Can I make this without an ice cream maker?
Yes! While a machine gives the smoothest result, you can freeze the custard base in a container and whisk it every 30 minutes for 3–6 hours. This breaks up ice crystals and creates a scoopable texture.
2. What type of chocolate works best?
Semisweet or dark chocolate (around 60%) strikes a good balance between richness and sweetness.
Milk chocolate will make the ice cream sweeter, while darker varieties (70–75%) give a more intense, less sweet flavor.
3. Why do I need egg yolks?
Egg yolks create a custard base, adding creaminess and body that prevents the ice cream from tasting icy. They also help emulsify the mixture, so every bite feels smooth and indulgent.
4. How can I make it less sweet?
You can reduce the sugar slightly, but keep in mind sugar also helps with texture. A better option is to use darker chocolate or Dutch-process cocoa powder, which naturally balance sweetness with a bolder flavor.
5. Can I add mix-ins like nuts or chips?
Absolutely! Stir in chopped nuts, crushed cookies, or chocolate chunks during the last few minutes of churning. Just avoid adding too much, as large amounts of mix-ins can make the texture crumbly.