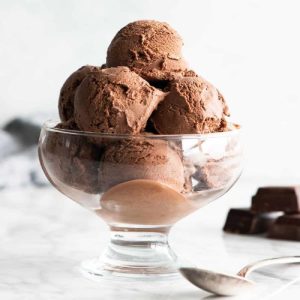
Chocolate Ice Cream
This creamy homemade chocolate ice cream combines two forms of chocolate for a deep, rich flavor and a luscious texture. With simple ingredients and no unnecessary additives, it’s an easy yet indulgent treat that rivals your favorite ice cream shop.
Equipment
- 1 ice cream maker
- 1 Ice cream storage container
- 1 Large glass mixing bowl
- 1 medium saucepan
- 1 fine-mesh strainer
- 1 whisk
- 1-Heatproof spatula
- Measuring Cups and Spoons
Ingredients
- 2 cups heavy cream divided
- ¼ cup unsweetened cocoa powder
- 6 oz semisweet chocolate chopped (or chocolate chips)
- 1 ½ cups whole milk
- ¾ cup granulated sugar
- ⅛ tsp sea salt
- 3 large egg yolks beaten
- ½ tsp pure vanilla extract
Instructions
- Combine Cream and Cocoa: In a medium saucepan, pour in 1 cup of the heavy cream and add the unsweetened cocoa powder. Whisk until the mixture is completely smooth and no dry cocoa remains. Place the pan over medium heat and bring it just to a gentle boil. Once bubbling, let it simmer for about 30 seconds, whisking continuously to prevent scorching. This process helps “bloom” the cocoa, intensifying the chocolate flavor right from the start.
- Melt the Chocolate Into the Cream: Remove the saucepan from the heat and immediately add the chopped semisweet chocolate (or chocolate chips). Whisk steadily until the chocolate melts completely and the mixture is silky and glossy. Stir in the remaining 1 cup of heavy cream, mixing until the base is fully combined. Transfer this chocolate mixture to a large heatproof bowl. Place a fine mesh strainer on top of the bowl to prepare for the custard step, then set it aside.
- Prepare the Egg Yolks: In a separate medium bowl, lightly whisk the egg yolks until they are smooth and slightly thickened. This will make it easier to temper them later without scrambling. Keep this bowl within reach, as you will be adding warm milk to it soon.
- Heat the Milk and Sugar: Using the same saucepan (wipe it clean if needed), add the whole milk, granulated sugar, and sea salt. Place it over medium heat and whisk until the sugar dissolves completely. The mixture should feel warm to the touch but not boiling. At this point, it’s ready to be combined with the egg yolks.
- Temper the Egg Yolks: Slowly ladle about ½ cup of the warm milk mixture into the bowl with the whisked egg yolks while whisking constantly. This process, called tempering, prevents the eggs from cooking too quickly. Once the yolks have been warmed, carefully pour the yolk mixture back into the saucepan with the rest of the milk. Keep whisking during this step to ensure a smooth custard base.
- Cook the Custard: Continue cooking the mixture over medium heat, stirring constantly with a heatproof spatula. Be sure to scrape the bottom and sides of the pan so nothing sticks or burns. The custard is ready when it thickens enough to coat the spatula and holds a light film (about 170°F / 77°C if using a thermometer). Do not let it boil, as this could cause curdling.
- Strain and Blend With Chocolate: Once the custard reaches the right consistency, immediately pour it through the prepared fine mesh strainer into the bowl containing the chocolate mixture. Strain out any cooked egg bits for a silky texture. Stir gently until both mixtures are completely combined into a smooth, chocolatey base.
- Add Vanilla and Chill: Stir in the vanilla extract for depth of flavor. Cover the bowl with a lid or plastic wrap and refrigerate until fully chilled—at least 6 hours, but preferably overnight for the best results. If you’d like to speed up the cooling process, set the bowl in an ice bath and stir every 10 minutes until cold.
- Churn the Ice Cream: Once chilled, pour the mixture into your ice cream maker and churn according to the manufacturer’s instructions. Typically, this will take 30–40 minutes, during which the mixture will thicken and take on a soft-serve consistency.
- Freeze Until Firm: Transfer the churned ice cream into an airtight freezer-safe container, smoothing the top with a spatula. Cover tightly and freeze for at least 6 additional hours, or until firm enough to scoop.
- Serve and Enjoy: Scoop into bowls, cones, or layer into dessert creations. Garnish with shaved chocolate, sprinkles, or a drizzle of hot fudge if desired. Enjoy your rich, creamy, homemade chocolate ice cream!
Notes
- Cream choice matters: Use heavy cream for a luxuriously creamy texture—lighter creams won’t achieve the same richness.
- Two chocolates = deeper flavor: Bloomed cocoa powder plus melted chocolate give a layered, full-bodied chocolate taste.
- Don’t rush chilling: Proper refrigeration allows the custard to thicken, ensuring a smooth churn later.
- Temperature check: Keep custard at about 170°F to thicken without scrambling eggs.
- Texture tip: Straining the custard removes any tiny cooked egg bits for a perfectly silky base.
- Customize sweetness: Adjust chocolate type (milk vs. dark) depending on your flavor preference.
- Hand churn option: Without a machine, stir and re-freeze repeatedly for a smooth, scoopable result.
