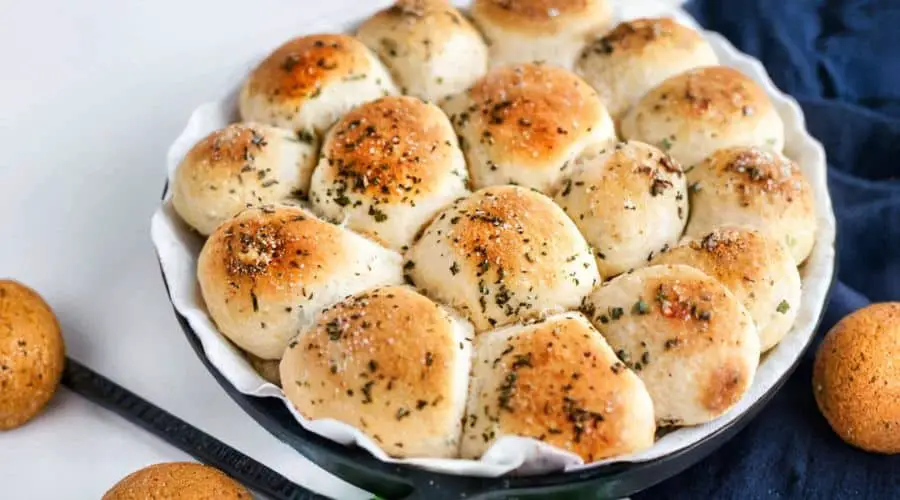
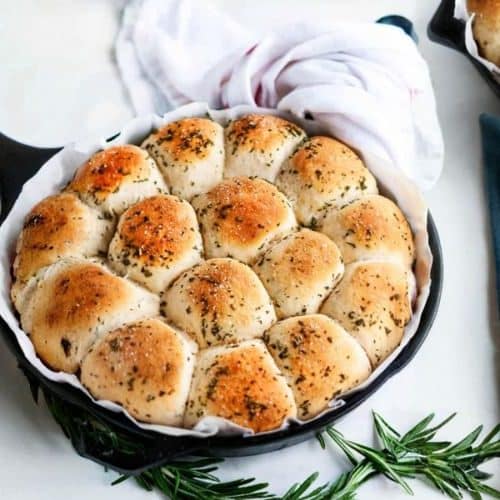
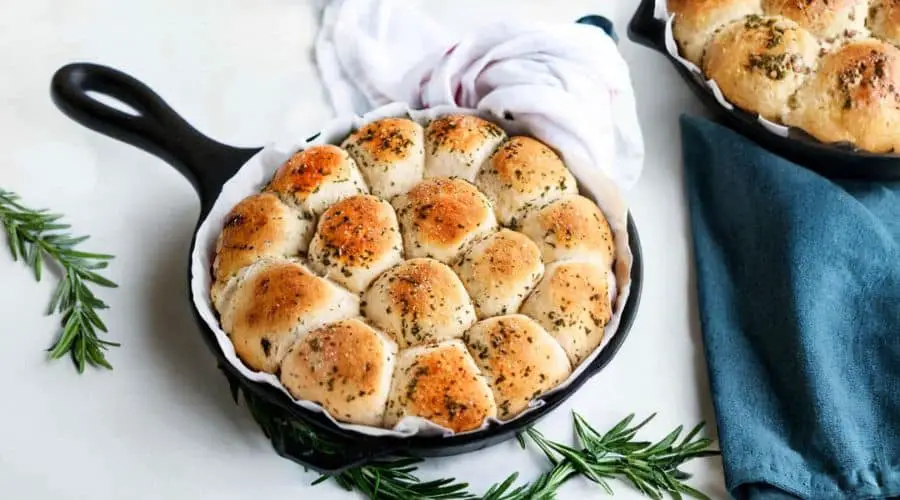
These rosemary garlic dinner rolls bring a perfect blend of aromatic herbs and rich, buttery softness that transforms any meal into a comforting experience.
Made from simple pantry staples, the dough is enriched with fresh rosemary and garlic, offering a savory depth without overpowering the palate.
While not specifically designed as a health-focused recipe, these rolls incorporate wholesome ingredients like unbleached all-purpose flour and fresh herbs, providing dietary fiber and antioxidants.
The moderate use of butter contributes good fats that enrich the texture and flavor.

Their soft, fluffy crumb and quick 1-hour preparation make them a fantastic everyday side dish—ideal for family dinners, holiday feasts, or meal prepping ahead.
These rolls pair beautifully with soups, stews, and saucy mains, delivering warmth and satisfaction with each bite.
Must-Have Tools for Perfect Results
Stand Mixer with Dough Hook Attachment
This essential appliance effortlessly kneads the dough to the perfect consistency, saving time and physical effort. Beyond this recipe, it’s indispensable for baking bread, cakes, and mixing batters with consistent results.
Microwave-Safe Bowl
Perfect for gently warming liquids to the ideal yeast-activating temperature, this versatile bowl is also great for melting butter or reheating food, making it a staple in any busy kitchen.
9×13 Inch Baking Dish
Ideal for baking these rolls evenly with enough space for rising, this pan is also great for casseroles, roasting vegetables, and baking desserts, providing versatility and durability.
Pastry Brush
Used to generously coat the rolls with herbed butter before baking, it ensures a golden, flavorful crust. This small tool is invaluable for glazing pastries, basting meats, and adding finishing touches.
Pizza Cutter or Sharp Knife
Essential for dividing the dough into even portions quickly and cleanly, it also doubles as a handy kitchen tool for slicing pizza, quesadillas, and dough-based recipes.

Rosemary Garlic Dinner Rolls
Equipment
- 1 Stand mixer with dough hook attachment
- 1 Microwave-safe bowl
- 1 9×13 inch baking dish
- 1 Pastry brush
- 1 Pizza cutter or sharp knife
Ingredients
- ¾ cup water
- 1 tablespoon rapid-rise instant yeast
- 3 tablespoons sugar
- ½ cup milk 2% recommended
- 4 tablespoons unsalted butter plus extra for greasing
- 1 large egg beaten
- 1 ½ teaspoons salt
- 3 ½ to 4 cups all-purpose unbleached flour
- 2 tablespoons fresh rosemary minced
- 3 garlic cloves minced
Instructions
- Prepare Your Workspace and Equipment: Before beginning, ensure all your ingredients are measured and ready. Grease a 9×13-inch baking dish with butter or line it with parchment paper to prevent sticking and ease cleanup. Preheat your oven to 400°F (205°C) so it will be ready when your rolls need baking. Having your workspace organized will make the process smoother and more enjoyable.
- Warm the Liquid Ingredients to Activate Yeast: In a microwave-safe bowl, combine ¾ cup of water, 3 tablespoons of sugar, 3 tablespoons of butter, and ½ cup of milk. Heat this mixture for about 1 minute, then check the temperature with your finger—it should be warm but not hot, ideally between 110°F and 115°F (43°C to 46°C). If it’s cooler, continue heating in 10-15 second intervals, whisking after each, until the right warmth is reached. This precise temperature range is critical for activating the yeast without killing it.
- Activate the Yeast: Pour the warmed liquid mixture into the bowl of your stand mixer fitted with the dough hook attachment. Sprinkle 1 tablespoon of rapid-rise instant yeast evenly over the surface of the liquid. Let it sit undisturbed for 5 to 7 minutes. During this time, the yeast will begin to foam and bubble, signaling that it’s active and ready to leaven your dough. This step ensures your rolls will rise beautifully.
- Combine Dry and Wet Ingredients into Dough: Add 3½ cups of unbleached all-purpose flour to the yeast mixture, followed by 1½ teaspoons of salt, 1 tablespoon of minced fresh rosemary, 3 minced garlic cloves, and the beaten egg. Set your mixer to the lowest speed (“stir” or “slow” setting) and mix for 1 to 2 minutes until the ingredients start to come together and form a shaggy dough. The dough will cling to the sides of the bowl initially but should begin pulling away. If it’s still too sticky, gradually add flour ¼ cup at a time, mixing after each addition, but do not exceed 4 cups total. This gradual flour addition helps you achieve the perfect dough texture.
- Knead the Dough to Develop Gluten: Once the dough has started to pull away from the bowl and is only slightly sticky, increase the mixer speed to medium-low and knead the dough for 5 full minutes. This kneading process develops the gluten network, which gives the rolls their tender but structured crumb. Proper kneading will result in a smooth, elastic dough that springs back when gently pressed with a finger.
- First Rise – Proofing the Dough: Lightly butter a large mixing bowl. Remove the dough from the mixer and transfer it to the greased bowl, turning it over once so the entire surface is coated with butter to prevent drying. Cover the bowl tightly with plastic wrap or a damp kitchen towel to trap moisture and warmth. Set the bowl in a draft-free, warm place and allow the dough to rise for 20 minutes. During this time, the yeast ferments, causing the dough to expand and become airy.
- Shape the Rolls: After the dough has risen, gently turn it out onto a generously floured surface. Using your fists, softly punch the dough down to release trapped air without deflating it completely. With a sharp pizza cutter or knife, slice the dough into 15 equal pieces for consistent roll sizes. Take each piece and fold the edges under, rolling it gently between your palms to form smooth, tight balls. This folding creates surface tension, helping the rolls hold their shape and rise upward rather than spread out.
- Second Rise – Preparing for Baking: Place each shaped dough ball seam side down onto your prepared baking dish, leaving a little space between each so they can expand. Cover the baking dish loosely with plastic wrap or a damp towel to keep the dough moist. Let the rolls rise again for 20 minutes. This second rise, called proofing, allows the rolls to puff up and develop a light, fluffy texture when baked.
- Prepare Rosemary Garlic Butter Glaze: While the rolls complete their second rise, melt the remaining 1 tablespoon of butter in a small bowl or microwave-safe container. Stir in the remaining 1 tablespoon of minced fresh rosemary until evenly combined. This aromatic butter glaze will be brushed on top of the rolls just before baking, giving them a beautiful golden color and an extra burst of herbaceous flavor.
- Brush Rolls and Bake: Once the rolls have puffed up nicely, carefully remove the plastic wrap or towel. Using a pastry brush, generously coat the tops of each roll with the rosemary garlic butter mixture. This step ensures a flavorful, golden crust that is both visually appealing and delicious. Immediately place the baking dish in your preheated oven and bake for 13 to 15 minutes. Keep an eye on the rolls; they should be cooked through with a lightly browned top when done.
- Cooling and Serving: When the rolls are baked to perfection, remove them from the oven and let them cool in the pan for a few minutes. This brief resting period helps the rolls firm up slightly for easier handling while maintaining softness inside. Serve the rolls warm, ideally fresh from the oven, alongside your favorite soups, stews, or any hearty meal. They’re perfect for soaking up sauces or enjoying plain.
Notes
Chef’s Secrets for Bakery-Quality Rolls
Achieving bakery-quality dinner rolls at home comes down to a few key techniques. Kneading the dough sufficiently develops the gluten structure needed for a tender yet sturdy crumb.
Use a stand mixer with a dough hook to knead evenly and save time.
Allow the dough to rise in a warm, draft-free place to encourage optimal fermentation and flavor development.
Incorporating fresh rosemary and garlic in the dough and butter glaze layers the herbaceous aroma throughout the rolls.
Finally, applying the rosemary butter glaze just before baking ensures a glossy, flavorful finish that makes these rolls irresistibly inviting.
Serving Suggestions for Every Occasion
These rosemary garlic rolls are incredibly versatile and pair wonderfully with a variety of dishes.
Serve them warm alongside creamy soups like tomato bisque, chicken noodle, or butternut squash for a comforting meal.
They also complement rich stews, pot roasts, and roasted vegetables perfectly, soaking up savory sauces beautifully.
For a casual snack or appetizer, serve the rolls with flavored olive oil or herb butter.
Their soft texture and aromatic flavor make them an elegant addition to holiday feasts or weekend family dinners alike.
Storage Tips to Preserve Freshness
To keep your rolls fresh, allow them to cool completely before storing.
Place them in an airtight container or resealable plastic bag at room temperature for up to 2 days.
For longer storage, freeze the cooled rolls individually wrapped in plastic wrap and then placed in a freezer bag for up to 3 months.
To reheat, thaw at room temperature and warm briefly in a preheated oven at 350°F for 5-7 minutes, or microwave for 15-20 seconds wrapped in a damp paper towel to restore softness. A
void refrigerating as this can dry out the rolls quickly.
Frequently Asked Questions About Rolls
1. Can I use dried rosemary instead of fresh?
Yes, you can substitute dried rosemary, but use about one-third the amount as it is more concentrated. Fresh rosemary provides a brighter, more aromatic flavor.
2. What if I don’t have a stand mixer?
You can knead the dough by hand on a floured surface for about 10 minutes until smooth and elastic. It takes more effort but works just as well.
3. Can I make these rolls gluten-free?
This recipe relies on gluten development, so gluten-free flour would require specialized blends and adjustments. For best results, follow a gluten-free bread recipe.
4. How can I make the rolls more garlicky?
Add extra minced garlic to both the dough and the butter glaze, or brush additional garlic butter on the rolls after baking.
5. Can I prepare the dough in advance?
Yes! You can prepare the dough, let it rise once, then refrigerate it overnight. Bring it to room temperature before shaping, rising again, and baking.
This recipe is inspired by aberdeenskitchen and has been carefully refined to enhance clarity, streamline preparation steps, and ensure accurate results. We’ve also included health benefits, nutritional highlights, and Must-Have Tools to help you get the best results every time you cook.


