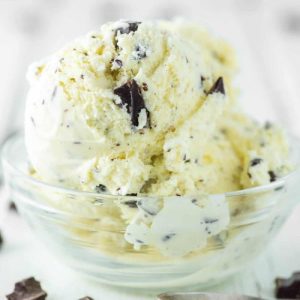
Chocolate Chip Ice Cream
A smooth and creamy homemade chocolate chip ice cream made with a rich vanilla custard base and bits of dark chocolate. Perfectly balanced in sweetness, this treat offers a luxurious texture and flavor in every spoonful.
Equipment
- 1 medium saucepan
- 2 Mixing bowls (heatproof)
- 1 whisk
- 1 fine-mesh strainer
- 1 Ice bath setup (large bowl + ice water)
- 1 ice cream maker
- 1 rubber spatula
- 1 Airtight container with lid
Ingredients
- 2 cups heavy cream
- 1 cup whole milk
- 4 large egg yolks
- ⅔ cup granulated sugar
- 2 teaspoons pure vanilla extract
- ⅛ teaspoon fine sea salt
- 1 cup dark chocolate finely chopped
Instructions
- Warm the Cream and Milk Mixture: In a medium-sized heavy-bottomed saucepan, pour in the heavy cream and whole milk. Place the pan over medium-low heat, allowing the mixture to warm gradually. Stir occasionally with a rubber spatula to keep the dairy from sticking or scorching at the bottom. As the liquid heats, you’ll notice faint steam and tiny bubbles forming along the edges — this indicates it’s approaching the right temperature. Continue heating until the mixture reaches 165°F (74°C). At this point, it should feel quite warm to the touch but not boiling. Warming the cream and milk first helps infuse them together for a smooth, custard-like base later.
- Whisk the Egg Yolks and Sugar: While the dairy mixture warms, separate the egg yolks into a heatproof mixing bowl. Whisk the yolks thoroughly until they become smooth and slightly thickened. Gradually sprinkle in the granulated sugar, whisking constantly as you go. Keep whisking until the mixture turns pale yellow and creamy in texture — this step is crucial because it dissolves the sugar and incorporates air into the yolks, helping create a silky custard. The consistency should feel slightly heavier than before, forming smooth ribbons when the whisk is lifted.
- Temper the Egg Mixture: Once the milk and cream mixture is hot, begin tempering the yolks. Slowly drizzle about 1/2 cup of the hot milk mixture into the egg yolk mixture while whisking continuously. This gradual process prevents the yolks from curdling due to sudden heat exposure. After the first addition, slowly add the remaining warm milk in a steady stream, whisking non-stop until everything is fully blended. The mixture should now be warm, silky, and uniform in texture, signaling it’s ready to return to the heat.
- Cook the Custard to Perfection: Pour the tempered mixture back into the saucepan and return it to the stovetop over low heat. Using a rubber spatula or wooden spoon, stir constantly in a figure-eight motion, scraping the bottom and sides to prevent sticking or curdling. Continue heating the custard gently until it thickens slightly and reaches 165°F (74°C) again. To check for doneness, dip the spoon into the mixture — it should coat the back evenly. When you drag your finger through the coating, it should leave a clean line that doesn’t run back together. Avoid boiling, as this can cause the eggs to scramble and the texture to become grainy.
- Strain and Cool the Custard Base: Immediately remove the saucepan from the heat and pour the hot custard through a fine-mesh strainer into a clean bowl set over an ice bath (a larger bowl filled with ice and a bit of water). This step removes any tiny bits of cooked egg and ensures a smooth, creamy texture. Stir the custard gently over the ice bath for several minutes to release heat evenly and speed up the cooling process. Once it feels cool to the touch, cover the bowl tightly with plastic wrap, pressing it directly onto the surface of the custard to prevent a skin from forming. Transfer the bowl to the refrigerator and chill for at least 4 hours or, for best results, overnight. The longer it chills, the creamier and more flavorful your ice cream will be.
- Flavor and Prepare for Churning: When the custard is completely chilled, remove it from the refrigerator and give it a gentle stir to loosen it. Add the vanilla extract and salt, mixing until evenly incorporated. These ingredients enhance the overall flavor and balance the sweetness of the custard. Your base should now be thick, velvety, and beautifully aromatic — ready to transform into ice cream.
- Churn the Ice Cream Base: Set up your ice cream maker according to the manufacturer’s instructions. Pour the chilled custard mixture into the bowl of the machine while it’s running. Allow the machine to churn for about 20 minutes, or until the texture thickens to a soft-serve consistency. The churning process incorporates air into the custard, giving the finished ice cream its smooth and fluffy texture. Keep an eye on the mixture — it should look creamy and light but not overly firm.
- Add the Chocolate Pieces: Once the ice cream reaches the perfect soft-serve texture, slowly add the chopped dark chocolate into the churning bowl. Continue to churn for an additional 30 seconds to 1 minute, just until the chocolate is evenly distributed throughout the ice cream. Adding the chocolate at the end prevents it from sinking or clumping and keeps the texture perfectly balanced with delightful chocolate bits in every spoonful.
- Freeze for Firmness: Using a rubber spatula, transfer the freshly churned ice cream into an airtight, freezer-safe container. Smooth the top evenly and press a layer of plastic wrap directly against the surface to prevent ice crystals from forming. Seal the container with its lid and place it in the freezer for at least 2 hours, or until it firms up to your preferred scooping consistency. For a softer texture, you can enjoy it after about an hour; for a firmer, more traditional ice cream, let it freeze longer.
- Serve and Savor: When ready to serve, remove the container from the freezer and let it sit at room temperature for 5 minutes to soften slightly for easier scooping. Use a warmed ice cream scoop to serve smooth, rounded scoops into bowls or cones. Each bite should deliver a creamy vanilla base with crisp chocolate bits — a classic combination that’s both nostalgic and indulgent. Enjoy it plain, or top it with chocolate syrup, caramel drizzle, or fresh fruit for an elevated dessert experience.
Notes
- Chill thoroughly for best texture: Allowing the custard base to chill for at least 4 hours (or ideally overnight) ensures a smoother, creamier ice cream with a well-developed flavor.
- Use high-quality dark chocolate: Premium dark chocolate melts slightly during churning and re-solidifies into delicate, crisp flakes that enhance both texture and taste.
- Avoid overcooking the custard: Heating beyond 170°F can cause curdling, so keep a close watch and stir constantly for a silky finish.
- Don’t overchurn: Once the mixture reaches soft-serve consistency, stop the machine. Overchurning can introduce unwanted ice crystals and make the texture dense.
- Prevent ice crystals in storage: Press a piece of plastic wrap or parchment paper directly against the ice cream surface before sealing it in a container.
- Add optional stabilizers: A pinch of xanthan gum or a tablespoon of vodka can help keep the texture scoopable straight from the freezer.
- Flavor variations: Swap vanilla for almond or coffee extract, or stir in nuts, toffee bits, or caramel swirls for a creative twist.
