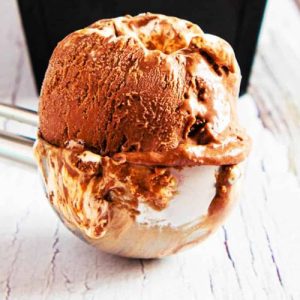
Chocolate Marshmallow Ice Cream
This no-churn chocolate marshmallow ice cream is creamy, chocolatey, and swirled with caramel and marshmallow fluff. Ready in minutes and freezing-friendly, it’s a perfect make-ahead dessert for family gatherings, hot summer days, or anytime you crave a sweet, indulgent treat.
Equipment
- 1 large mixing bowl
- Stand mixer or hand whisk
- spatula
- Freezer-safe container
- Spoon
- Skewer
Ingredients
- 20 g cocoa powder
- 50 g dark chocolate melted
- 300 g double cream heavy cream
- 150 g sweetened condensed milk
- 50 g dark chocolate chips
- 50 g dulce de leche or caramel sauce
- 50 g marshmallow fluff
- 1 tbsp chocolate sauce
Instructions
- Prepare Chocolate Base: Start by placing the cocoa powder and melted dark chocolate into a large mixing bowl or the bowl of your stand mixer. Using a spatula, gently mix the cocoa and chocolate together until fully combined and smooth. Make sure there are no lumps, as this will form the rich chocolate foundation of your ice cream.
- Whip the Cream: Pour the double cream (heavy cream) into the chocolate mixture. Using a stand mixer fitted with the whisk attachment, or a hand whisk, beat the cream on medium speed until soft peaks form. Soft peaks should hold shape but still bend at the tip. Avoid over-whipping, as this can cause the cream to turn grainy or separate. If your whipped cream becomes too stiff, add 1 tablespoon of milk and gently fold in to loosen it.
- Fold in Condensed Milk: Measure out the sweetened condensed milk and slowly add it to the whipped chocolate cream. Using a spatula, carefully fold it in with gentle, sweeping motions. Take care to maintain the airiness of the whipped cream; folding instead of stirring preserves the light texture. The mixture should now be thick, creamy, and well combined.
- Incorporate Chocolate Chips: Add the dark chocolate chips to the chocolate cream mixture. Gently fold them in, ensuring they are evenly distributed. These chocolate bits will add delightful texture to your ice cream, giving a slightly crunchy bite in each scoop.
- Layer Base Mixture: Take a freezer-proof container and spoon in half of the chocolate cream mixture. Use a spatula to smooth the surface evenly, creating a stable base for the swirls of caramel and marshmallow to follow.
- Swirl in Dulce de Leche: Spoon half of the dulce de leche or caramel sauce over the chocolate layer. Using the tip of a skewer or a knife, gently swirl the caramel into the chocolate mixture. Create light, even patterns, but avoid fully mixing, so you get distinct caramel ribbons in the ice cream.
- Add Marshmallow Fluff Swirl: Next, dollop half of the marshmallow fluff over the caramel layer. Again, use a skewer or the back of a spoon to gently swirl the fluff into the mixture. The goal is to create soft, airy ribbons of marshmallow that will melt slightly when scooped, giving that classic marshmallow texture.
- Add Remaining Chocolate Mixture: Spoon the remaining chocolate cream mixture on top of the swirled layer, smoothing it with a spatula to create an even surface. Be careful not to press too hard, as you want to maintain the swirled patterns beneath.
- Top with Remaining Dulce de Leche and Marshmallow: Spoon over the remaining dulce de leche and marshmallow fluff, and use a skewer or spoon to lightly swirl them across the top layer. This will create a visually appealing marbled effect and ensure every scoop has some caramel and marshmallow.
- Drizzle Chocolate Sauce: Finish the ice cream by drizzling 1 tablespoon of chocolate sauce evenly over the top layer. This adds an extra hint of chocolate richness and creates a polished, dessert-worthy appearance.
- Cover and Freeze: Cover the container tightly with cling film to prevent ice crystals from forming and to help the ice cream set to a smooth, creamy consistency. Place the container in the freezer for at least 6 hours, or overnight for the best results. Avoid opening the freezer during this time to maintain the texture.
- Serve and Enjoy: When ready to serve, remove the ice cream from the freezer 5–10 minutes before scooping to soften slightly for easier serving. Use a warm ice cream scoop to create perfect, creamy scoops, and enjoy a rich, chocolatey, marshmallow-filled treat with every bite.
Notes
- Experiment with mix-ins: Swap chocolate chips for cookie pieces, honeycomb chunks, chocolate buttons, or mini marshmallows to create your own flavor combinations.
- Whipping cream consistency matters: Soft peaks are key for a light, airy texture. If over-whipped, add a little milk to loosen the cream.
- Swirl carefully: When adding caramel or marshmallow, swirl lightly to create beautiful ribbons rather than blending everything together.
- Freezer coverage: Covering the ice cream tightly with cling film helps prevent ice crystals and keeps the texture creamy.
- Timing counts: Although this ice cream can be eaten after 6 hours, overnight freezing yields the best scoopable consistency.
