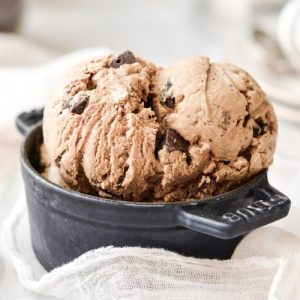
Coffee Chocolate Chip Ice Cream
A creamy, no-churn ice cream infused with espresso flavor and studded with dark chocolate chunks. Quick to prepare, protein-rich, and satisfying, this homemade treat is perfect for a simple dessert or a special coffee-flavored indulgence.
Equipment
- 1 Electric Mixer (Stand or Hand-Held)
- 1 large mixing bowl
- 1 Medium mixing bowl
- 1 spatula
- 1 Lidded Freezer-Safe Container
Ingredients
- 2 cups cold heavy whipping cream
- ¼ cup instant espresso powder or instant coffee powder
- 1 can sweetened condensed milk
- 2 tsp vanilla extract
- 1 tbsp bourbon optional, good-quality
- 3 oz dark chocolate roughly chopped
Instructions
- Prepare the Coffee Base: Start by dissolving the instant espresso powder to ensure a smooth, bold coffee flavor. Measure ¼ cup of the cold heavy whipping cream into a small mixing bowl. Sprinkle in the ¼ cup of instant espresso powder (or instant coffee powder) and whisk vigorously until the powder is completely dissolved. The mixture should be smooth with no lumps. This step is essential for a rich, even coffee flavor throughout your ice cream.
- Whip the Cream: Pour the remaining 1 ¾ cups of cold heavy whipping cream into a large mixing bowl. Using an electric mixer (hand-held or stand), whip the cream on medium-high speed until soft peaks form. To check, lift the whisk attachment—soft peaks should hold their shape but gently bend at the tip. Whipping the cream properly ensures your ice cream will be airy, creamy, and scoopable once frozen.
- Combine Sweetened Condensed Milk and Flavorings: In a separate medium-sized bowl, pour in the entire can of sweetened condensed milk. Add 2 teaspoons of vanilla extract and, if desired, 1 tablespoon of good-quality bourbon. Whisk thoroughly until fully combined. This mixture adds sweetness and depth, balancing the coffee’s natural bitterness while giving the ice cream a luscious, creamy texture.
- Fold in the Coffee Whipped Cream: Now it’s time to gently bring the mixtures together. Pour about one-third of the whipped coffee cream into the condensed milk mixture. Using a spatula, fold the cream in carefully with slow, sweeping motions from the bottom to the top of the bowl. Repeat this process in two more additions, folding each third carefully to preserve the airy texture. The folding technique is crucial to prevent deflating the whipped cream, ensuring a light, fluffy ice cream.
- Add Chocolate Chunks: Roughly chop 3 ounces of good-quality dark chocolate. Fold the chocolate into the combined coffee cream and condensed milk mixture evenly. The chocolate pieces will provide satisfying crunchy bites in every scoop. Be gentle while folding to keep the mixture light and fluffy.
- Transfer to Freezer Container: Prepare a lidded, freezer-safe container for the ice cream. Carefully pour the ice cream mixture into the container, spreading it evenly with a spatula. Smooth the top for a professional, clean finish. Cover the container tightly with its lid to prevent ice crystals from forming and preserve the creamy texture.
- Freeze Until Firm: Place the container in the coldest part of your freezer. Allow the ice cream to set for at least 8 hours or overnight for best results. The extended freeze time helps the flavors meld together and the texture to firm up perfectly, making it scoopable and creamy.
- Serve and Enjoy: When ready to serve, remove the ice cream from the freezer about 5–10 minutes beforehand to soften slightly, making scooping easier. Use an ice cream scoop to serve into bowls or cones. For added flair, sprinkle a few extra chocolate chunks or a light dusting of espresso powder on top. Enjoy a homemade, creamy coffee chocolate chip ice cream that tastes like it came from a gourmet dessert shop!
Notes
- Use high-quality ingredients: Choosing good-quality dark chocolate and fresh espresso powder dramatically improves the flavor and texture of this ice cream.
- Chill your cream: Ensure the heavy cream is cold before whipping for stable, fluffy peaks.
- Fold gently: Over-mixing the whipped cream into the condensed milk mixture can deflate it, resulting in a denser ice cream.
- Optional bourbon: Adds depth and enhances coffee flavors, but can be omitted for a non-alcoholic version.
- Adjust sweetness: If you prefer a less sweet ice cream, reduce the sweetened condensed milk slightly; keep in mind it may affect texture slightly.
- Prep ahead: The recipe is excellent for meal prep or entertaining, as it can be made in advance and stored for several weeks.
