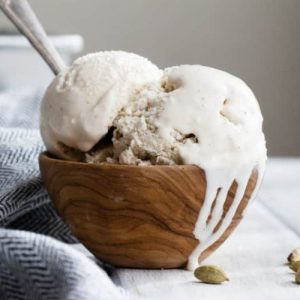
Creamy Cardamom Ice Cream
A silky, dairy-free ice cream infused with the warm, exotic spice of cardamom and the richness of coconut milk. This vegan treat churns into a smooth, creamy dessert that’s both refreshing and indulgent, making it perfect for everyday enjoyment or special occasions.
Equipment
- Medium saucepan (1)
- Fine mesh sieve (1)
- Coffee grinder or mortar & pestle (1, for cardamom seeds)
- Mixing spoon (1)
- Large mixing bowl (1)
- Ice bath setup (large bowl + ice + water)
- 1-gallon resealable plastic bag (1)
- Ice cream maker (1, pre-frozen bowl type recommended)
- Airtight storage container or loaf pan (1)
- Parchment paper (1 sheet)
Ingredients
- 12 –15 cardamom pods or ¾ teaspoon ground cardamom
- 1 14-ounce can coconut cream (or equivalent 13.66–16 oz)
- 1 13.66-ounce can full-fat coconut milk
- ¾ cup raw turbinado sugar
- 2 tablespoons molasses or light corn syrup
- 1 tablespoon coconut oil
- 1 whole vanilla bean split and scraped (or ½ teaspoon pure vanilla extract)
- ¼ teaspoon kosher salt
Instructions
- Prepare the Cardamom: Start by splitting open 12–15 cardamom pods to release the tiny aromatic seeds inside. Reserve the empty pods, as they will be used during steeping. Grind the seeds finely using a coffee grinder for a strong, fresh flavor. If you prefer, you can also crush them by hand using a mortar and pestle. Freshly ground cardamom ensures the ice cream will have the most vibrant, warm, and slightly citrusy flavor.
- Warm the Coconut Base: In a medium saucepan, combine 1 can of coconut cream, 1 can of full-fat coconut milk, ¾ cup raw turbinado sugar, 2 tablespoons molasses (or light corn syrup), 1 tablespoon coconut oil, the ground cardamom seeds, reserved pods, and the scraped seeds plus pod of 1 whole vanilla bean. Add ¼ teaspoon kosher salt to balance the flavors. Place the saucepan over medium heat, stirring occasionally to dissolve the sugar completely and incorporate all ingredients. Heat the mixture just until it begins to simmer—avoid boiling, as high heat can affect the creamy texture.
- Infuse the Flavors: Once the mixture reaches a gentle simmer, remove the saucepan from heat. Cover it with a lid to allow the flavors to meld and intensify. Let it steep for 20–30 minutes. During this time, the cardamom seeds and pods release their fragrant oils, while the vanilla infuses the coconut base with a sweet, floral aroma. This step is key to creating a rich, well-rounded flavor that will shine through the finished ice cream.
- Strain the Cream: After steeping, place a fine mesh sieve over a clean bowl. Pour the infused coconut mixture through the sieve, gently pressing on the solids with a spatula or spoon to extract every drop of flavor. This process removes the cardamom pods and vanilla bean pod, leaving a silky-smooth cream. The resulting liquid should be thick, fragrant, and free of any gritty bits, ready for chilling.
- Cool the Base: To bring the cream to the proper temperature for churning, prepare an ice bath by filling a large bowl with ice and cold water. Pour the strained mixture into a large 1-gallon Ziploc bag, sealing it tightly to prevent leaks. Submerge the bag in the ice bath for about 30 minutes until the mixture is completely chilled. If you prefer, you can refrigerate the cream for 4 hours or overnight to achieve the same result. Chilling is crucial for smooth, creamy ice cream, as it prevents ice crystals from forming during churning.
- Churn the Ice Cream: Transfer the cold coconut base into the bowl of your pre-frozen ice cream maker. Turn the machine on and allow it to churn the mixture according to the manufacturer’s instructions. The ice cream will gradually thicken and reach a soft-serve consistency after approximately 15–18 minutes. During churning, the machine incorporates air, giving the ice cream its light, creamy texture without the need for eggs or dairy.
- Pack for Freezing: Once churned, transfer the ice cream into an airtight container or a metal loaf pan. Smooth the surface with a spatula and press a sheet of parchment paper directly against the top to prevent ice crystals from forming. Seal the container tightly to preserve freshness and texture. This step ensures that the ice cream remains creamy and scoopable after freezing.
- Freeze Until Firm: Place the packed ice cream in the freezer and allow it to firm up for at least 4 hours, though overnight freezing is recommended for the best texture. The ice cream will solidify into a scoopable consistency while retaining the rich coconut and warm cardamom flavors.
- Serve Creatively: Scoop the ice cream into bowls or cones and serve immediately. For an extra-special touch, top with half a poached pear, a drizzle of mulled pomegranate syrup, and a handful of candied pecans. These garnishes complement the spice and creaminess, creating a sophisticated, balanced dessert perfect for any occasion.
- Storage Tips: Keep any leftover ice cream stored in an airtight container in the freezer for up to 2 weeks. To soften before serving, let it sit at room temperature for 5–10 minutes or briefly microwave in 10-second intervals. Proper storage ensures the ice cream remains smooth and flavorful without becoming icy.
Notes
- Use freshly ground cardamom seeds for the most vibrant flavor; pre-ground spices can be less aromatic.
- Choose full-fat coconut milk and coconut cream for a rich, creamy texture; lower-fat options may produce icier results.
- Steeping the coconut base allows flavors to fully develop—don’t rush this step.
- If you don’t have an ice cream maker, you can freeze the base in a shallow pan and whisk every 30 minutes until smooth.
- For a slightly lighter sweetness, reduce the sugar by 1–2 tablespoons or adjust according to taste.
