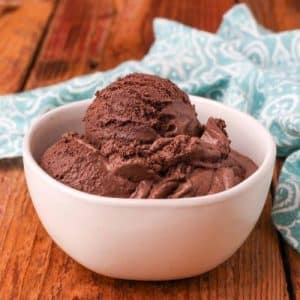
Easy Dark Chocolate Ice Cream
A creamy and indulgent dark chocolate ice cream that’s quick to make, perfectly balanced with bittersweet chocolate flavor, and ideal for satisfying your chocolate cravings anytime. Ready in just a few hours and packed with protein and healthy fats, this homemade dessert is both rich and wholesome.
Equipment
- 1 large saucepan
- 1 whisk
- 1 measuring cup
- 1 spoon
- Ice cream maker or freezer-safe container
Ingredients
- ⅓ cup dark cocoa powder
- ¾ cup granulated sugar
- ⅛ teaspoon kosher salt
- 1½ cups heavy cream
- ½ cup dark or bittersweet chocolate chips at least 60% cacao
- 1½ cups whole milk
- 1 teaspoon pure vanilla extract
Instructions
- Prepare the Cocoa Base: Start by gathering a large, heavy-bottomed saucepan to ensure even heat distribution. Add the dark cocoa powder, granulated sugar, and a pinch of kosher salt into the pan. Using a whisk, blend these dry ingredients thoroughly until the mixture is uniform and free of clumps. This step ensures that your chocolate flavor will be smooth and consistent throughout the ice cream.
- Add the Cream and Whisk: Next, pour in the heavy cream gradually while continuously whisking. Whisking at this stage is crucial—it prevents the cocoa from settling or forming lumps and helps the mixture become silky. Continue whisking until the ingredients are fully incorporated and the mixture has a slightly glossy appearance.
- Heat to Simmer: Place the saucepan over medium heat. Stir constantly to prevent scorching, especially along the bottom and edges of the pan. Heat the mixture until it starts to steam gently and small bubbles form around the edges, signaling that it is nearing a simmer. Avoid walking away at this stage, as cocoa-based mixtures can scorch quickly.
- Melt the Chocolate: Once the mixture is steaming, remove the saucepan from heat. Immediately add the dark or bittersweet chocolate chips. Use a whisk to stir continuously until the chocolate is fully melted and completely incorporated into the cream-cocoa mixture. The mixture should be smooth, glossy, and rich in color, with no chocolate chunks remaining.
- Incorporate Milk and Vanilla: After the chocolate is melted, slowly pour in the milk while whisking gently but thoroughly. This helps to cool the mixture slightly and balances the richness. Finally, stir in the vanilla extract. The vanilla adds depth to the chocolate flavor and enhances the overall aroma of the ice cream.
- Cool the Mixture: Allow the mixture to cool at room temperature for about 15–20 minutes. Then, transfer it to the refrigerator and chill for at least 4 hours or overnight. This step is essential, as a thoroughly cold mixture churns more evenly and yields a creamier texture in the final ice cream.
- Churn in Ice Cream Maker: Once chilled, pour the mixture into your ice cream maker according to the manufacturer’s instructions. Typically, this involves turning on the machine and allowing it to churn for 20–30 minutes, or until the ice cream reaches a soft-serve consistency. Churning introduces air and creates a light, smooth texture.
- Freeze for Firm Texture: For firmer ice cream, transfer the churned ice cream into a freezer-safe container. Smooth the top with a spatula, cover tightly, and freeze for at least 2–4 hours. This step ensures that your ice cream is scoopable and holds its shape.
- Serve and Enjoy: When ready to serve, remove the ice cream from the freezer and let it sit for 5 minutes to soften slightly for easier scooping. Scoop into bowls or cones, and optionally garnish with chocolate shavings, fresh berries, or a drizzle of melted dark chocolate for an extra touch of elegance.
- Storage Tips: Store leftover ice cream in an airtight container in the freezer for up to 2 weeks. To prevent ice crystals from forming, press a piece of parchment paper directly onto the surface before sealing the lid. Always use a clean scoop to serve, maintaining the creamy texture and fresh flavor.
Notes
- Always use high-quality dark chocolate with at least 60% cacao for a rich, intense flavor.
- Measure cocoa powder carefully and sift if needed to avoid lumps.
- Whisk constantly while heating to prevent scorching, which can cause a bitter taste.
- Chilling the mixture thoroughly before churning is crucial for a creamy, smooth texture.
- Adjust sweetness slightly depending on personal taste or the bitterness of your chocolate.
