Family-Friendly Maple Walnut Muffins
These Maple Walnut Muffins are soft, moist, and naturally sweet with maple syrup. Toasted walnuts add a satisfying crunch, while an optional maple glaze elevates their flavor. Ideal for breakfast, snacks, or brunch, this easy-to-make recipe yields 18 large muffins or 36 mini muffins in under 40 minutes.
Equipment
- 1 muffin tin (standard or mini)
- 1 Baking sheet
- 1 Medium mixing bowl
- 1 large mixing bowl
- Hand mixer or stand mixer
- Measuring Cups and Spoons
- spatula
- Cooling rack
Ingredients
For Muffins:
- 3 ½ cups all-purpose flour
- 2 teaspoons baking powder
- ½ teaspoon baking soda
- 1 teaspoon salt
- 8 tablespoons unsalted butter
- 1 cup sugar
- 3 large eggs
- 2 teaspoons maple flavoring
- ½ cup sour cream
- ½ cup buttermilk
- 1 ½ cups walnuts chopped
For Optional Maple Glaze:
- 1 cup powdered sugar
- ½ teaspoon maple flavoring
- 1 tablespoon maple syrup
- 1 tablespoon milk
Instructions
- Preheat and Prepare the Oven: Begin by preheating your oven to 400°F (200°C). This ensures your muffins bake evenly and develop a perfect golden top. While the oven warms, prepare your muffin tin by lightly greasing each cavity with vegetable spray or lining them with paper muffin liners. If using liners, spray them lightly to prevent sticking. This recipe works for standard muffin tins (yields 18 muffins) or mini muffin tins (yields 36–40 muffins).
- Toast the Walnuts: Spread your walnuts evenly on a baking sheet. Place them in the preheated oven for about 5–7 minutes, keeping a close eye to prevent burning. Toasting enhances their natural flavor and gives a delicate crunch. Once they turn fragrant and lightly browned, remove them from the oven and allow them to cool completely. Chop the toasted walnuts coarsely once cooled, setting them aside for the muffin batter.
- Combine Dry Ingredients: In a medium mixing bowl, whisk together 3 ½ cups of all-purpose flour, 2 teaspoons of baking powder, ½ teaspoon baking soda, and 1 teaspoon of salt. Whisking ensures these ingredients are evenly distributed and prevents lumps, which contributes to a light, fluffy muffin texture. Set this dry mixture aside.
- Cream Butter and Sugar: In a large mixing bowl, place 8 tablespoons of softened unsalted butter and 1 cup of sugar. Using a hand mixer or stand mixer, beat the butter and sugar together for approximately 2 minutes, or until the mixture becomes pale, smooth, and creamy. This step incorporates air, which helps give the muffins a tender crumb.
- Add Eggs: Add the eggs one at a time to the butter-sugar mixture. Beat well after each addition until fully incorporated. This prevents the batter from curdling and ensures a uniform texture throughout the muffins.
- Incorporate Wet Flavors: Add 2 teaspoons of maple flavoring, ½ cup of sour cream, and ½ cup of buttermilk to the batter. Mix until smooth, scraping down the sides of the bowl as needed. The combination of sour cream and buttermilk adds moisture, tenderness, and a subtle tang that balances the sweetness of the maple and sugar.
- Mix in Dry Ingredients: Gradually add the dry ingredient mixture to the wet ingredients. Mix on low speed just until the flour is incorporated. Avoid overmixing, as it can develop gluten and make the muffins dense. The batter should be thick but scoopable.
- Fold in Toasted Walnuts: Gently fold in the chopped toasted walnuts using a spatula. Ensure even distribution throughout the batter so every bite has a perfect balance of crunch and flavor.
- Fill Muffin Tin: Using a large cookie scoop or spoon, evenly portion the batter into the prepared muffin cups. Fill each cavity about ¾ full to allow room for the muffins to rise without spilling over. Smooth the tops lightly with a spatula if needed.
- Bake the Muffins: Place the muffin tin in the preheated oven. Bake large muffins for 18–22 minutes or until a toothpick inserted into the center comes out clean. Mini muffins take approximately 12–15 minutes. The tops should be lightly golden brown and spring back when gently pressed. Avoid overbaking to maintain moisture.
- Cool the Muffins: Once baked, remove the muffins from the oven and allow them to cool in the tin for 5–10 minutes. Then transfer them to a cooling rack to cool completely. This prevents condensation from forming and keeps the muffins from becoming soggy.
- Prepare Maple Glaze (Optional): In a small bowl, whisk together 1 cup of powdered sugar, ½ teaspoon maple flavoring, 1 tablespoon of maple syrup, and 1 tablespoon of milk until smooth and lump-free. Adjust the consistency by adding a little more milk if the glaze is too thick or more powdered sugar if too thin.
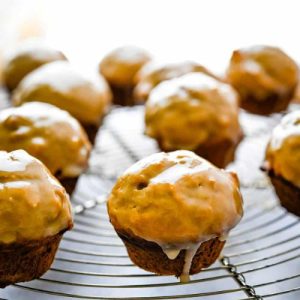
- Glaze the Muffins: Once the muffins have completely cooled, drizzle the glaze over the tops using a spoon or a small piping bag. For mini muffins, gently turn them upside down and dip the tops into the glaze for full coverage. Allow the glaze to set for several minutes before serving.
- Serve and Enjoy: Serve your Maple Walnut Muffins fresh with a cup of coffee or tea for breakfast, as a snack, or even a sweet addition to brunch. Store any leftovers in an airtight container at room temperature for up to 3 days, or freeze for longer storage. The muffins retain their moist texture and rich maple flavor beautifully.
Notes
- Use room-temperature butter and eggs to ensure smooth mixing and even baking.
- Toasting the walnuts enhances their natural flavor and adds a pleasant crunch.
- The batter should be mixed gently once dry ingredients are added—overmixing can make muffins dense.
- Muffins can be baked as large or mini; adjust baking times accordingly.
- Optional maple glaze adds sweetness and visual appeal but can be skipped for a lighter treat.
- Muffins freeze well; wrap individually for easy grab-and-go snacks.
