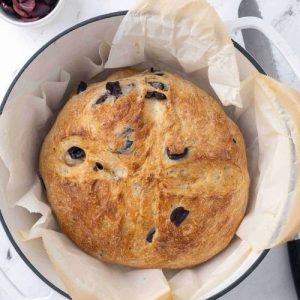
Homemade Olive Bread
A deliciously rustic olive bread infused with kalamata olives and a hint of honey, offering a perfect balance of savory and sweet. This easy-to-make loaf is rich in fiber and healthy fats, making it a nutritious choice for breakfast, sandwiches, or as a side with meals.
Equipment
- 1 large mixing bowl
- 1 non-stick Dutch oven pot (6–8 qt)
- 1 rubber spatula or wooden spoon
- Measuring Cups and Spoons
- Glass measuring cup
- Sharp Knife
- Parchment Paper
- Cooling rack
Ingredients
- 3 ½ cups bread flour
- 2 ¼ tsp instant yeast 1 packet
- 1 tsp salt
- 1 ½ cups warm water 110°F / 43°C
- 1 tbsp olive oil plus extra for coating bowl
- 2 tsp honey
- 1 cup kalamata olives chopped, drained, and dried
Instructions
- Prepare Dry Ingredients: Measure 3 ½ cups of bread flour and place it in a large mixing bowl. Add 2 ¼ teaspoons (one packet) of instant yeast and 1 teaspoon of fine salt. Stir the ingredients gently with a whisk or wooden spoon until they are evenly combined. This step ensures the yeast and salt are evenly distributed, which is essential for consistent dough rising and flavor development.
- Combine Wet Ingredients: In a glass measuring cup, pour 1 ½ cups of warm water (110°F / 43°C). Add 2 teaspoons of honey and 1 tablespoon of olive oil. Stir gently until the honey dissolves completely and the olive oil blends into the water. Warm water activates the yeast, and the honey adds a subtle sweetness while feeding the yeast for a tender crumb.
- Mix Wet and Dry Ingredients: Slowly pour the warm liquid mixture into the bowl containing dry ingredients. Using a rubber spatula or wooden spoon, stir until a slightly shaggy dough forms. The mixture will be tacky and uneven, which is expected. Ensure all dry flour is incorporated while keeping the dough slightly sticky, as this will create a moist, airy crumb.
- Add Olives: Sprinkle 1 cup of chopped kalamata olives, drained and patted dry, over the dough. Lightly flour your hands to prevent sticking, then fold the dough gently over itself until the olives are evenly dispersed throughout. Avoid over-kneading at this stage, as it can break down the dough structure and cause olives to clump unevenly.
- First Rise — Bulk Fermentation: Wipe your mixing bowl clean and lightly coat it with olive oil. Return the dough to the bowl, turning it gently to coat with oil. Cover the bowl with a clean kitchen towel or plastic wrap. Place it in a warm, draft-free area and let it rise until doubled in size, about 35–40 minutes. This process allows the dough to develop flavor and texture.
- Prepare Dough for Shaping: Line your work surface with parchment paper large enough to lift the bread in and out of the Dutch oven later. Dust your hands lightly with flour. Gently press the dough to release excess air and then turn it onto the parchment. Fold the edges under the dough ball to create a smooth surface tension, which helps produce a consistent shape and crust.
- Second Rise — Proofing: Cover the shaped dough with a lightly damp towel or plastic wrap and allow it to rest for about 15 minutes. This resting period relaxes the dough, making it easier to bake evenly. While the dough rests, preheat the oven to 450°F (232°C) and place your Dutch oven with its lid inside to heat on a lower rack. A preheated Dutch oven is critical for creating steam and achieving the perfect crust.
- Score the Dough: Once proofed, use a sharp knife or bread lame to make a ½-inch deep crosshatch cut on top of the dough. Scoring not only creates an artisan appearance but also controls how the bread expands during baking.
- Bake Covered: Carefully transfer the dough with parchment paper into the preheated Dutch oven. Place the lid on to trap steam, which creates a moist environment for baking. Bake covered for 30 minutes. This stage ensures the loaf develops a tender crumb and a glossy crust.
- Bake Uncovered: Remove the lid from the Dutch oven after 30 minutes and continue baking uncovered for 15–20 minutes. This step deepens crust color and produces a crisp exterior. Check for a golden brown color and a firm crust before removing.
- Cool Before Slicing: Lift the bread out of the Dutch oven using the parchment paper and transfer it to a cooling rack. Allow it to cool for at least 45 minutes before slicing. Cooling preserves the crumb structure and prevents the bread from becoming gummy when cut.
Notes
- Use high-quality bread flour for a better texture and chew.
- Ensure water is warm (around 110°F / 43°C) to activate yeast effectively — too hot will kill it, too cold will slow rising.
- Drain and dry olives well to prevent excess moisture, which can make the bread dense.
- Folding olives into the dough rather than kneading extensively preserves texture and prevents overworking.
- Letting the bread cool fully before slicing gives the crumb structure time to set, preventing squashed slices.
