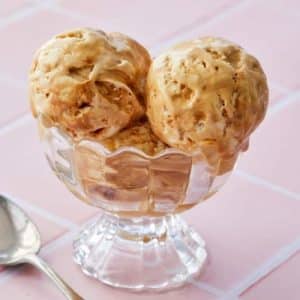
No-Churn Honeycomb Ice Cream
A creamy, crunchy, and irresistibly sweet no-churn ice cream made with honeycomb candy and a simple 2-ingredient base. Perfect for summer or anytime you crave a refreshing dessert, this recipe is beginner-friendly, requires no ice cream maker, and can be prepared in under 30 minutes before freezing.
Equipment
- 1 Stand mixer or hand mixer
- 1 Mixing bowl (medium size)
- 1 spatula
- 1 Freezer-safe container with lid
- 1 Measuring cups and spoons
Ingredients
- 14 ounces 1 can / 400 ml sweetened condensed milk, cold
- 2 cups 16 oz / 450 ml whipping cream, cold
- 2 cups crushed honeycomb candy
Instructions
- Chill the Base Ingredients: Start by placing the can of sweetened condensed milk in the refrigerator for at least 1–2 hours before you begin. This helps it blend smoothly with the whipped cream without melting it down. Make sure your whipping cream is also very cold, as chilled cream whips faster and holds its peaks much better. If possible, place your mixing bowl and whisk attachment in the fridge or freezer for 10 minutes to keep everything extra cold.
- Whip the Cream to Perfection: Pour the chilled whipping cream into your mixing bowl. Using a stand mixer fitted with the whisk attachment, or a hand mixer on medium speed, begin whipping the cream. After a few minutes, you’ll notice it thickening—keep going until you reach stiff peaks, meaning the cream holds its shape when you lift the whisk. Be careful not to over-whip, as this can turn the cream grainy or butter-like.
- Blend in the Condensed Milk: Once the cream is whipped, reduce the mixer speed slightly. Slowly pour in the chilled sweetened condensed milk while continuing to whip. This gradual mixing helps the two blend seamlessly without losing the fluffy texture of the cream. At this stage, you can also stir in a teaspoon of vanilla extract if you want an extra layer of flavor. After the condensed milk is fully added, increase the speed back to medium-high and whip until the mixture is thick and holds firm peaks again.
- Fold in the Honeycomb Pieces: Take your crushed honeycomb candy and gently fold it into the creamy mixture using a spatula. Fold carefully rather than stirring vigorously—this preserves the airy texture of the base while evenly distributing the crunchy honeycomb bits throughout. You can reserve a small handful of honeycomb to sprinkle on top later for garnish if you’d like a decorative finish.
- Transfer to Freezer-Safe Container: Spoon the ice cream mixture into a clean, airtight, freezer-safe container. Smooth out the top with a spatula to create an even layer. If you saved extra honeycomb pieces, scatter them over the surface for a crunchy topping. Press a layer of parchment paper or plastic wrap directly onto the surface before sealing with the lid—this prevents ice crystals from forming on top.
- Freeze Until Firm: Place the container in the freezer and allow the ice cream to set for at least 6 hours, or preferably overnight, for best results. The longer it chills, the firmer and creamier the final texture will be. Avoid opening the container during this time, as fluctuating temperatures can create unwanted ice crystals.
- Scoop and Enjoy: When ready to serve, remove the container from the freezer and let it sit at room temperature for 5 minutes to soften slightly. Use a warmed ice cream scoop to make serving easier. Scoop into bowls or cones and enjoy the creamy, crunchy, caramel-like flavor of honeycomb swirled into velvety ice cream. For an extra treat, drizzle with chocolate sauce, sprinkle more crushed honeycomb, or serve with fresh fruit.
Notes
- For the best texture, always ensure both the sweetened condensed milk and whipping cream are well-chilled before you start. Cold ingredients whip better and produce a creamier, fluffier ice cream.
- Gently fold in the honeycomb pieces to preserve the airy texture of the ice cream base. Stirring too vigorously can deflate your mixture.
- You can adjust the amount of honeycomb candy depending on how crunchy or sweet you prefer the ice cream. Adding a small handful on top before freezing gives a visually appealing finish.
- This recipe is naturally customizable—try adding chocolate chips, caramel swirls, or a sprinkle of sea salt to elevate flavors.
- Use an airtight, freezer-safe container and cover the surface directly with parchment or plastic wrap to prevent ice crystals.
