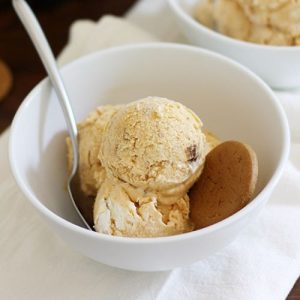
Pumpkin Cheesecake Ice Cream
A rich, spiced pumpkin ice cream churned to perfection and swirled with soft cream cheese and gingersnap crumbles. Creamy, festive, and irresistible—perfect for fall and beyond.
Equipment
- 1 large mixing bowl
- 1 medium saucepan
- 1 whisk
- 1 spatula
- 1 stand mixer with ice cream maker attachment (frozen at least 15 hours)
- 1 freezer-safe airtight container
Ingredients
- 6 large egg yolks
- ¾ cup granulated sugar
- ½ teaspoon vanilla extract
- 2 ¼ cups heavy cream divided
- ¾ cup 2% milk
- ¾ teaspoon pumpkin pie spice
- 1 ½ cups canned pumpkin puree
- 4 ounces cream cheese softened and cubed
- ½ cup gingersnap cookies crushed
Instructions
- Gather and Prep Ingredients: Measure every ingredient before you start 6 egg yolks, ¾ cup granulated sugar, ½ tsp vanilla, 2¼ cups heavy cream (divided: ¾ cup + 1½ cups), ¾ cup 2% milk, ¾ tsp pumpkin pie spice, 1½ cups canned pumpkin puree, 4 oz cream cheese (softened and cut into small ½-cm cubes), and ½ cup crushed gingersnaps. Place the cream cheese on the counter 30–60 minutes ahead so it softens naturally; if short on time, microwave it in 5–8 second bursts until just pliable. Line up your tools a medium heavy-bottomed saucepan, one large mixing bowl, a whisk, a heatproof spatula, a fine-mesh sieve (optional but recommended), a freezer-safe bowl, plastic wrap, and your ice-cream maker or stand mixer attachment. If using a freezer-bowl attachment (like a KitchenAid), confirm it has been in the freezer at least 15 hours and that your freezer is very cold.
- Whisk Egg Yolks and Sugar: In the large bowl, place the 6 egg yolks, ¾ cup sugar, and ½ teaspoon vanilla. Whisk briskly until the mixture becomes paler and slightly thickened — you should notice the color lighten and the sugar beginning to dissolve. Whisk for about 1–2 minutes; the mixture needn’t be ribbon-thick but should look smoother and more cohesive. This step helps the sugar dissolve and prepares the yolks to accept hot liquid without scrambling.
- Warm the Milk-and-Cream Mixture: Combine ¾ cup heavy cream and ¾ cup milk in the saucepan. Heat over medium, whisking or stirring often to prevent a film from forming, until the mixture is steaming and tiny bubbles form around the edge—just before it reaches a full boil (the surface may show small, gentle bubbles). This is called “scalding” and helps dissolve sugar and temper the eggs later. Remove from heat promptly so it doesn’t boil over.
- Temper the Eggs (Slowly Bring Up Temperature): With the whisk running in the yolk-sugar bowl, pour about a quarter to a third of the hot milk/cream into the yolks in a thin, steady stream. Do this slowly and whisk constantly — this equalizes temperature so the eggs don’t scramble. When that first addition is incorporated, add the rest of the hot mixture in a slow steady stream while continuing to whisk. The yolk mixture should feel warm and smooth. If you want to be precise, after tempering the mixture should be around 100–120°F (38–49°C); this protects the eggs while allowing you to finish thickening safely.
- Cook the Custard to Thicken: Return the tempered mixture to the saucepan and place over low–medium heat. Cook gently, stirring constantly and scraping the bottom with a spatula, until the custard noticeably thickens and coats the back of the spatula or wooden spoon. Test by dragging your finger across the back of the spoon—if the line holds, it’s ready. If you prefer a thermometer target, aim for roughly 170–175°F (77–80°C). Important do not let the mixture boil — boiling can cause curdling. This step takes patience; keep the heat low and the motion steady.
- Finish the Base with Pumpkin and Remaining Cream: Remove the saucepan from heat. Immediately stir in the remaining 1½ cups heavy cream, the 1½ cups pumpkin puree, and the ¾ teaspoon pumpkin pie spice until everything is completely smooth and evenly colored. If you see any small lumps of cooked egg, or if you want an ultra-silky texture, pour the mixture through a fine-mesh sieve into a clean bowl, pressing gently with a spatula to pass the custard through. Straining is optional but yields the creamiest result.
- Chill the Custard Rapidly: To preserve texture and prevent bacterial growth, the custard must be chilled quickly. Cover the bowl with plastic wrap pressed directly onto the surface (this prevents a skin). For the fastest safe chill, place the bowl in an ice-water bath (a larger bowl filled with ice and cold water) and stir the custard occasionally until it reaches fridge-cold (about 20–30 minutes). Alternatively, place the covered bowl in the refrigerator and chill until thoroughly cold, about 1–2 hours, or follow the original timing of 30–40 minutes in the freezer but check every 10 minutes — the goal is cold but not frozen. If using the freezer to speed things up, don’t forget it so it won’t freeze solid.
- Prepare Your Ice-Cream Maker: If you haven’t already, install and set up your ice cream attachment according to the manufacturer’s instructions. For a KitchenAid freezer bowl, confirm it has been frozen for at least 15 hours and is very cold to the touch. For compressor-style machines, ensure it is powered and pre-chilled per the manual. Have your cream cheese (softened and cubed) and crushed gingersnaps ready so you can add them quickly once the ice cream reaches soft-serve stage.
- Churn to Soft-Serve Consistency: Turn your machine to the designated stirring/churning setting (for the stand mixer set to “Stir” if you’re using a KitchenAid attachment) and slowly pour the well-chilled custard into the bowl. Churn according to your machine’s directions — for this recipe plan on roughly 12–20 minutes; most experiences show about 15 minutes until you reach a creamy soft-serve texture. You’ll know it’s done when the mixture thickens, increases in volume, and clings to the paddle; it should be thick enough to form soft peaks but still pourable. Avoid over-churning, which can make ice cream icy by incorporating too much air.
- Fold in Cream Cheese and Gingersnaps: Turn off the machine and transfer the churned ice cream to a large mixing bowl or do this directly in the ice-cream bowl if recommended by the maker. Add the small cubes of softened cream cheese and the ½ cup crushed gingersnaps. Using a sturdy spatula, fold gently and quickly — the goal is to distribute pockets of cream-cheese ribbons and cookie crumbles without fully blending them into the base. For a marbled look, fold only a few strokes so some cream-cheese pieces remain semi-intact; for more even distribution, fold until pieces are small and well scattered. If you prefer larger cookie chunks, fold them in at the very end to avoid breaking them down.
- Serve Immediately or Firm Up: At this point you can serve directly as a luxuriously soft frozen treat (soft-serve style). If you want scoopable, firm ice cream, transfer it to a freezer-safe, airtight container. Press a piece of parchment or plastic wrap directly onto the surface to minimize air contact and prevent ice crystals. Seal the container and freeze for at least 2–4 hours to harden fully. For best texture, allow frozen scoops to rest at room temperature for 5–10 minutes before serving so they’re easy to scoop.
- Troubleshooting and Finish Tips: If your custard curdles or you see tiny cooked-egg bits during cooking, immediately remove from heat and strain through a fine sieve—this removes unwanted bits and smooths the base. If the base seems too thin after chilling, spin it slightly longer in the churn; if it’s too stiff to pour into the machine, let it sit at room temperature just until pourable. For a prettier presentation, top scoops with extra crushed gingersnaps, a drizzle of caramel, or a small dollop of whipped cream.
Notes
- Chill the ice cream base thoroughly before churning for the smoothest texture.
- Always temper the eggs slowly to prevent curdling.
- Use softened cream cheese so it blends easily without clumping.
- Add the gingersnaps at the very end to keep their crunch.
- For best scooping, let the frozen ice cream sit at room temperature for 5 minutes before serving.
- Strain the custard if you prefer a silkier finish.
- Use high-quality pumpkin puree for richer flavor.
- Make sure your ice cream maker bowl is fully frozen before starting.
