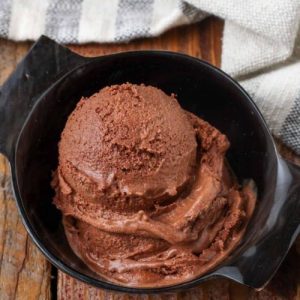
Spicy Chocolate Ice Cream
Cool and creamy with a touch of heat, this Spicy Chocolate Ice Cream combines the deep richness of dark cocoa with the bold warmth of chili and cinnamon. Each spoonful offers a balance of silky sweetness and gentle spice for a flavor that’s both comforting and exciting—perfect for adventurous dessert lovers.
Equipment
- 1 medium saucepan
- 1 whisk
- 1-Heatproof spatula
- 1 mixing bowl
- 1 Measuring cup set
- 1 Measuring Spoon Set
- 1 ice cream machine (for churning)
- 1 Airtight freezer container
Ingredients
- 1 ½ cups heavy cream
- ⅓ cup Dutch-process or dark cocoa powder
- ⅔ cup granulated sugar
- ½ cup bittersweet or semi-sweet chocolate chips
- 1 ½ cups whole milk
- 1 teaspoon pure vanilla extract
- ⅛ teaspoon kosher salt
- 1 ¼ teaspoons ground cinnamon
- 2 –3 teaspoons chili powder to taste
Instructions
- Combine Cream, Cocoa, and Sugar: Begin by adding heavy cream, cocoa powder, and sugar to a medium-sized saucepan. Whisk these ingredients together until no dry cocoa remains and the mixture looks smooth and glossy. This initial blending helps dissolve the sugar and ensures the cocoa is fully incorporated, preventing any lumps later. Use a sturdy whisk to mix continuously, as this step creates the flavor foundation for your ice cream.
- Heat and Whisk Until Boiling: Place the saucepan over medium-high heat and continue whisking constantly as the mixture warms up. You’ll notice it starting to foam and thicken slightly. Keep whisking until it reaches a full rolling boil—this means large bubbles will rise consistently to the surface. Allow it to boil for just a few seconds to fully dissolve the cocoa and sugar, which intensifies the chocolate flavor and gives the ice cream its rich texture.
- Melt in the Chocolate: Once the mixture is off the heat, immediately add the chocolate chips to the hot cream mixture. Let them sit for 20–30 seconds to soften, then whisk or stir gently until all the chocolate has completely melted and the mixture is smooth, dark, and glossy. This step infuses the ice cream with deep chocolate richness and a velvety texture. If a few chocolate bits remain, keep stirring until they dissolve entirely.
- Blend in Milk and Flavorings: Slowly pour in the milk, followed by vanilla extract, salt, ground cinnamon, and chili powder. Stir thoroughly to combine. The cinnamon adds warmth, while the chili gives a subtle heat that builds gradually. The salt enhances the chocolate’s depth and balances the sweetness. Taste the mixture at this stage—if you prefer a milder spice, start with 2 teaspoons of chili powder; for a bolder kick, go for 3 teaspoons.
- Chill the Mixture Completely: Transfer the warm ice cream base into a large mixing bowl and cover it tightly with plastic wrap or a reusable lid. Refrigerate it for at least 2 hours, or until it’s thoroughly chilled. For best results, leave it overnight. Cooling the mixture properly ensures that it churns smoothly in the ice cream maker and forms a creamy, scoopable texture instead of icy crystals.
- Churn to Creamy Perfection: Once the mixture is completely cold, pour it into your ice cream machine. Follow your machine’s manufacturer instructions for churning—this usually takes around 20–25 minutes, depending on the model. The ice cream will thicken and resemble soft-serve consistency when ready. During this stage, the air is incorporated into the base, making it light, smooth, and luscious.
- Freeze for Firm Texture: Transfer the churned ice cream into an airtight freezer container, smoothing the top with a spatula. Cover tightly with a lid or plastic wrap to prevent ice crystals from forming. Freeze for at least 4 hours, or until firm enough to scoop. This resting period helps the flavors meld and deepens the chocolate-chili harmony.
- Serve and Savor: When ready to serve, remove the container from the freezer and let it sit at room temperature for 5–10 minutes to soften slightly. Scoop into bowls or cones and enjoy the smooth, creamy chocolate ice cream with a gentle spicy finish. Garnish with a sprinkle of cinnamon, shaved dark chocolate, or a dusting of chili powder for a professional presentation. Each bite delivers a perfect balance of rich sweetness and subtle heat—cool, comforting, and irresistibly unique.
Notes
- Always taste the ice cream base before chilling—it’s your best chance to adjust the level of chili and cinnamon to your liking.
- The chili flavor becomes slightly stronger after freezing, so start with a lighter amount if you prefer mild heat.
- Dutch-process cocoa provides a deep, smooth chocolate flavor, but regular unsweetened cocoa also works for a lighter taste.
- For an extra silky texture, chill the mixture overnight before churning.
- Use high-quality chocolate chips or chopped chocolate for best flavor and consistency.
- To avoid icy texture, ensure your ice cream base is completely cold before churning.
- For a dairy-free version, replace heavy cream and milk with full-fat coconut milk and a touch of almond milk.
- A pinch of espresso powder can enhance the chocolate flavor even more without adding coffee taste.
- Always freeze the churned ice cream in a shallow container for faster, even freezing.
- Serve slightly softened for the creamiest texture and easiest scooping.
