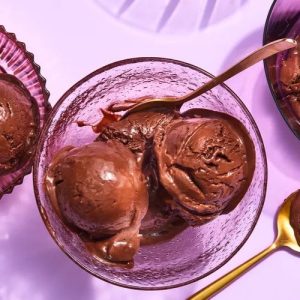
Vegan Chocolate Chipotle Ice Cream
A creamy, plant-based chocolate ice cream with a hint of smoky chipotle heat. Naturally dairy-free, rich in fiber, and low in saturated fat, it’s a perfect everyday dessert or freezer-friendly treat. Quick to prepare and surprisingly indulgent, this vegan frozen delight balances bold flavors with creamy texture for a satisfying, guilt-free sweet experience.
Equipment
- 1 heavy skillet (for toasting chiles)
- 1 small heatproof bowl (for soaking chiles)
- 1 mini food processor or blender
- 1 medium saucepan
- 1 whisk
- 1 Ice Cream Maker with Freezer Bowl
- 1 airtight container (for storing ice cream)
Ingredients
- 6 medium dried chipotle chiles ≈1 1/4 oz
- 1 cup hot water
- 14 oz vegan dark chocolate 70% cacao, chopped (≈2 1/2 cups)
- 1 ½ cups unsweetened oat milk or rice milk
- ¾ cup organic granulated sugar
- ½ cup + 2 tbsp unsweetened cocoa powder ≈2 oz
- ¾ tsp kosher salt
- ½ cup plain coconut yogurt
Instructions
- Toasting the Chipotle Chiles: Start by placing the dried chipotle chiles in a dry, heavy skillet over medium heat. Toast them gently, turning occasionally, until they release their smoky aroma and become slightly darker, about 1–2 minutes. Keep a close eye—they can burn quickly. Once fragrant, remove the chiles from heat and set aside. Carefully trim off the stems, seeds, and inner ribs, as these can make the mixture overly spicy.
- Soaking the Chiles: Place the cleaned chiles into a small heatproof bowl and pour in 1 cup of hot water. Let them soak for approximately 30 minutes, or until they become soft and pliable. This step helps release the smoky, rich flavor while making the chiles easier to blend into a smooth paste. Reserve the soaking liquid for later use to help adjust the paste consistency if needed.
- Making the Chipotle Paste: Transfer the softened chiles to a mini food processor or blender. Blend until a smooth, thick paste forms, stopping occasionally to scrape down the sides for even texture. If the paste is too thick, add 2–3 tablespoons of the reserved soaking liquid gradually to achieve a smooth consistency. This paste will infuse your ice cream with a subtle smoky heat. Set aside two tablespoons for the ice cream base and reserve any remaining paste in the freezer for future recipes—it freezes well up to one month.
- Preparing the Chocolate Base: In a medium saucepan, combine the chopped dark chocolate, oat or rice milk, sugar, unsweetened cocoa powder, and kosher salt. Place over medium heat and whisk continuously for about 3 minutes, or until the chocolate has fully melted and the mixture is smooth, silky, and well combined. Constant whisking ensures that the chocolate does not stick to the pan or form lumps, giving your ice cream a creamy, even texture.
- Cooling the Chocolate Mixture: Remove the saucepan from the heat and allow the chocolate mixture to cool to room temperature. This usually takes around 1 hour. Cooling is important because adding yogurt to a hot mixture can cause separation or curdling, which would affect the final creaminess of the ice cream.
- Incorporating Yogurt and Chipotle Paste: Once the chocolate mixture has cooled, whisk in the plain coconut yogurt until fully incorporated. Then, add 2 tablespoons of the prepared chipotle paste (or adjust to taste). Stir thoroughly to distribute the smoky, spicy flavor evenly throughout the chocolate base. Taste and adjust the spice level if desired, keeping in mind that freezing will slightly mute the flavors.
- Chilling the Ice Cream Base: Cover the chocolate-chipotle mixture with plastic wrap or a lid and refrigerate for at least 3 hours, or up to 12 hours. Chilling ensures the mixture is cold enough for the ice cream maker and improves the final texture, making the ice cream creamy and smooth instead of icy.
- Churning the Ice Cream: Prepare your ice cream maker according to the manufacturer’s instructions, ensuring the freezer bowl is fully frozen if required. Spoon the chilled chocolate mixture into the machine and churn until it reaches a soft-serve consistency, which usually takes 20–30 minutes depending on your machine. This process aerates the ice cream, giving it lightness while incorporating the chipotle flavor uniformly.
- Freezing Until Firm: Transfer the churned ice cream into an airtight container and cover tightly. Place it in the freezer for about 3 hours, or until firm enough to scoop. Freezing allows the flavors to meld and the texture to set perfectly, creating a rich, indulgent ice cream that’s still creamy and easy to serve.
- Serving and Enjoying: When ready to serve, allow the ice cream to sit at room temperature for 5 minutes to soften slightly for easier scooping. Scoop into bowls or cones and enjoy the unique combination of dark chocolate and smoky chipotle heat. Store any leftovers in an airtight container in the freezer for up to 1 week to maintain freshness and flavor.
Notes
- Lightly toast chipotle chiles to release their smoky aroma, but avoid burning for bitter flavor.
- Soak chiles in hot water for 30 minutes to soften and make blending easier.
- Use high-quality dark chocolate for the best flavor and creamy texture.
- Full-fat coconut yogurt ensures smooth, rich consistency without dairy.
- Chill the chocolate mixture thoroughly before adding yogurt to prevent curdling.
- Adjust chipotle quantity to taste; start with less and add more gradually.
- Reserve extra chipotle paste in the freezer for future recipes.
- Whisk continuously while melting chocolate to avoid lumps or sticking.
- Allow ice cream to soften slightly at room temperature before scooping for easier serving.
- Store ice cream in an airtight container to prevent ice crystals and preserve flavor.
