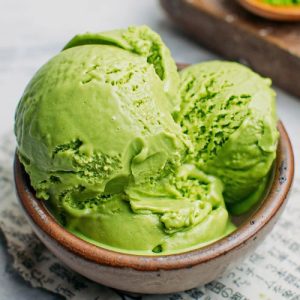
Vegan Matcha Ice Cream
This vegan matcha ice cream is silky, creamy, and packed with green tea flavor. Made with plant-based milk and healthy oils, it’s dairy-free, nut-free, gluten-free, and naturally low in saturated fat. Perfect for a refreshing dessert, it’s easy to prepare and ideal for everyday enjoyment.
Equipment
- 1 KitchenAid Ice Cream Maker Attachment
- 1 Cuisinart Ice Cream Maker
- Ice Cream Containers (for storage)
- 1 blender
- 1 Saucepan
- 1 Candy Thermometer
- 1 whisk
- 1 fine-mesh sieve
Ingredients
- 670 ml unsweetened soy milk or other plant-based milk
- 2½ tbsp matcha powder
- 88 g deodorized cacao butter or deodorized coconut oil
- 45 g sunflower oil or canola or grapeseed oil
- ½ tsp vanilla extract
- 122 g granulated sugar
- 55 g dextrose
- 2.5 g lecithin powder about 1 tsp
- 1 g locust bean gum about ½ tsp
- 0.5 g guar gum about ¼ tsp
- ⅛ tsp salt
Instructions
- Prepare the Matcha Paste: Begin by making a smooth matcha paste to ensure the green tea flavor is evenly distributed. Measure 2½ tablespoons of high-quality matcha powder into a small blender. Pour in 170 ml of your chosen plant-based milk. Blend on medium speed until the mixture is completely smooth, with no lumps or streaks of powder remaining. Set this vibrant green paste aside—it will be incorporated into the main ice cream base later.
- Melt the Healthy Fats: In a medium saucepan, combine the remaining 500 ml of plant-based milk with 88 g of deodorized cacao butter (or coconut oil) and 45 g of your preferred neutral oil, such as sunflower, canola, or grapeseed oil. Add ½ teaspoon of vanilla extract for a subtle sweetness. Heat the mixture gently over low-to-medium heat, stirring occasionally, until the cacao butter is fully melted and the mixture is warm but not boiling. This step ensures your fats are evenly distributed for a creamy ice cream texture.
- Combine the Dry Ingredients: In a separate small bowl, mix together all dry ingredients 122 g granulated sugar, 55 g dextrose, 2.5 g lecithin powder, 1 g locust bean gum, 0.5 g guar gum, and ⅛ teaspoon salt. Whisk them together thoroughly to ensure even distribution. Gradually sprinkle this dry mixture into the warm milk and fat mixture while whisking constantly. Take your time to fully incorporate the powders—this prevents clumping and helps create a smooth, stable ice cream base.
- Activate the Gums: To ensure the ice cream has a creamy, velvety texture, the gums need activation. Heat the mixture gently, constantly whisking, until it reaches approximately 170°F (75°C). Using a candy thermometer is recommended for accuracy. Once the target temperature is reached, immediately remove the saucepan from heat to avoid overheating. This step ensures the locust bean gum and guar gum thicken the base properly without breaking down.
- Incorporate the Matcha Paste: Slowly pour the prepared matcha paste into the warm milk mixture. Use a whisk to combine thoroughly, ensuring a uniform green color. For extra smoothness, strain the mixture through a fine-mesh sieve to catch any tiny clumps of matcha or undissolved powder. This creates a perfectly silky ice cream with a consistent matcha flavor in every bite.
- Emulsify with a Blender: Transfer the ice cream mixture to a blender and blend for 30–60 seconds on medium speed. This step emulsifies the fats, sugars, and matcha, producing a creamier mouthfeel and smoother texture. Pay attention to the consistency—the mixture should appear slightly thickened, silky, and glossy.
- Chill the Ice Cream Base: Pour the blended ice cream base into a large bowl. Cover it tightly with plastic wrap, pressing the wrap directly onto the surface of the liquid to prevent a skin from forming. Place the bowl in the refrigerator and chill for at least 8–12 hours, or overnight. Fully chilling the base is crucial for proper churning, ensuring the final ice cream has a smooth and creamy texture.
- Churn the Ice Cream: Set up your ice cream maker according to the manufacturer’s instructions. Slowly pour the chilled ice cream base into the machine. Churn on low speed (for KitchenAid attachments, use speed 1) for 20–25 minutes, or until the mixture reaches a soft-serve consistency. Avoid rushing this step—the slow churning incorporates air and creates the luxurious, velvety texture that defines this ice cream.
- Freeze to Firm: Transfer the churned ice cream to a freezer-safe container with a tight-fitting lid. Smooth the surface with a spatula and cover. Freeze for at least 6 hours, or until the ice cream is firm enough to scoop. Using proper freezer-safe containers prevents ice crystals from forming and keeps the ice cream fresh for longer storage.
- Serve and Enjoy: When ready to serve, allow the ice cream to sit at room temperature for 5–10 minutes to soften slightly for easier scooping. Serve in bowls or cones and enjoy a creamy, vibrant, plant-based dessert. This ice cream is perfect for an everyday indulgence or as a sophisticated treat for guests. Optional: garnish with extra matcha powder, chocolate shavings, or fresh berries for added flair.
Notes
- Use high-quality matcha powder. The flavor and color of your ice cream depend entirely on it—ceremonial or premium culinary grade works best.
- Deodorized cacao butter or coconut oil is essential. Strongly flavored fats can overpower the delicate matcha aroma.
- Do not skip chilling the base. Fully chilled ice cream ensures smooth churning and prevents icy textures.
- Measure gums carefully. Too much locust bean or guar gum can create a gummy texture, while too little affects creaminess.
- Blend the base thoroughly. Emulsifying ensures a uniform texture and prevents separation during freezing.
- Use freezer-safe containers with lids to avoid freezer burn and preserve freshness.
